Today you are going to look at an attempted revolution in Russia! Lucky for Nicholas II, he was able to hold onto power for a few more years, as the 1905 Revolution did not succeed…
1.
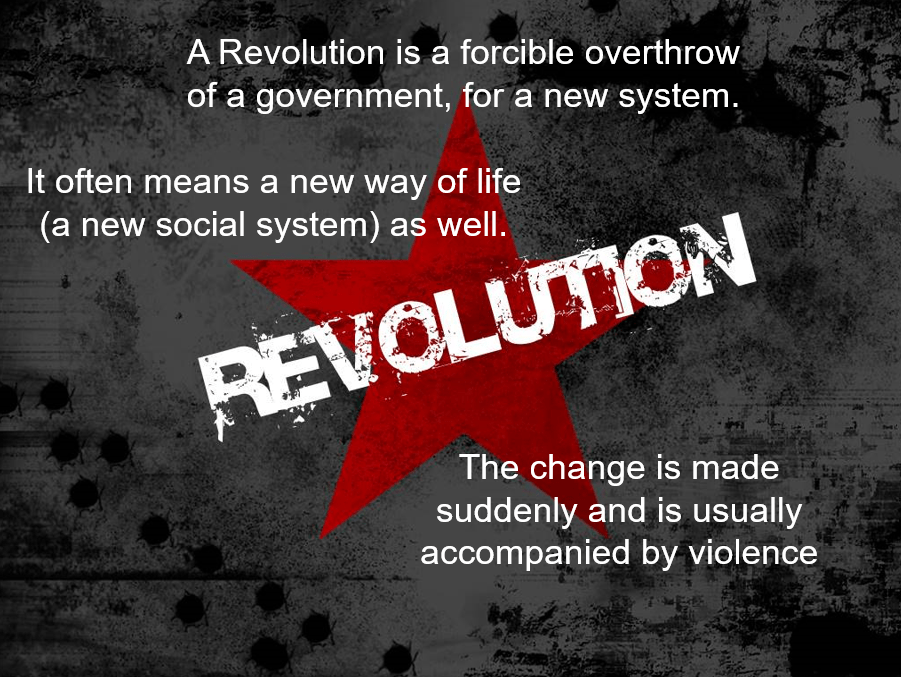
Here is a reminder of what a revolution is… a bit of revision!
2.
Watch the following video, as an introduction to today’s lesson.
Crisis & Revolution in Russia (1905). (5:55 minutes long)
3.
Now, let’s look at the causes of the “1905-Revolution”.
Causes of the 1905 Revolution. (2:05 minutes long)
4.
It is good to try and visualize the events. Here is Bloody Sunday, as portrayed in a movie…
History Bloody Sunday. (2:31 minutes long)
5.
The information about “The War with Japan” & the information about “Bloody Sunday”, p.5.
6.
Let’s now look at the whole year of 1905, to see how close Nicholas II came to losing the throne to the Russian empire!
1905 Revolution – Calendar. (2:08 minutes long)
7.
The calendar that shows the vents of The 1905 Revolution, p.5.
8.
Finally, use the Calendar (provided) to show the events of 1905:
Stick the 1905-Calendar into your book.
On each month, stick the relevant evens that occurred in Russia in 1905.
Today you are going to look at the opposition to the rule of Nicholas II in Russia!
1.
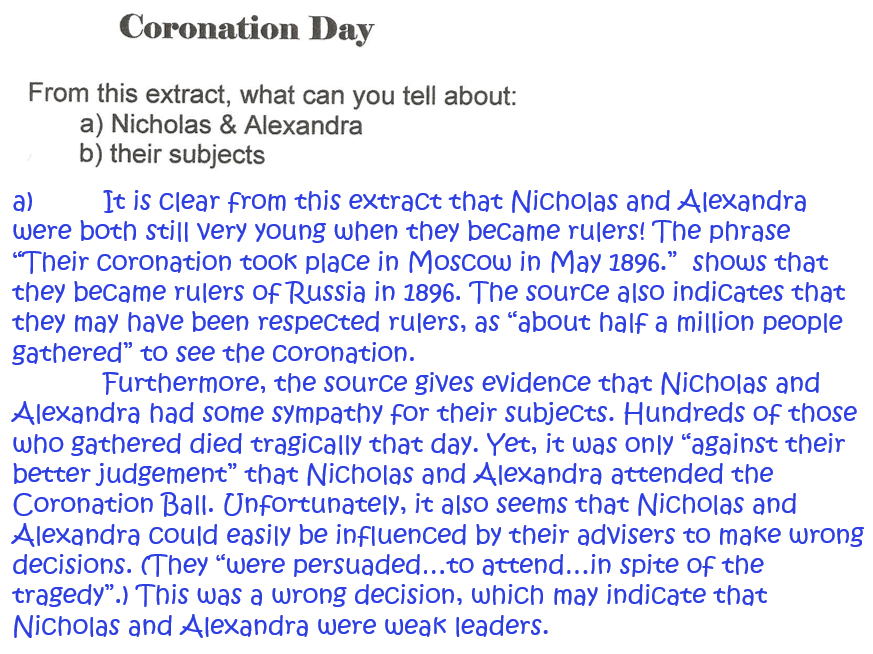
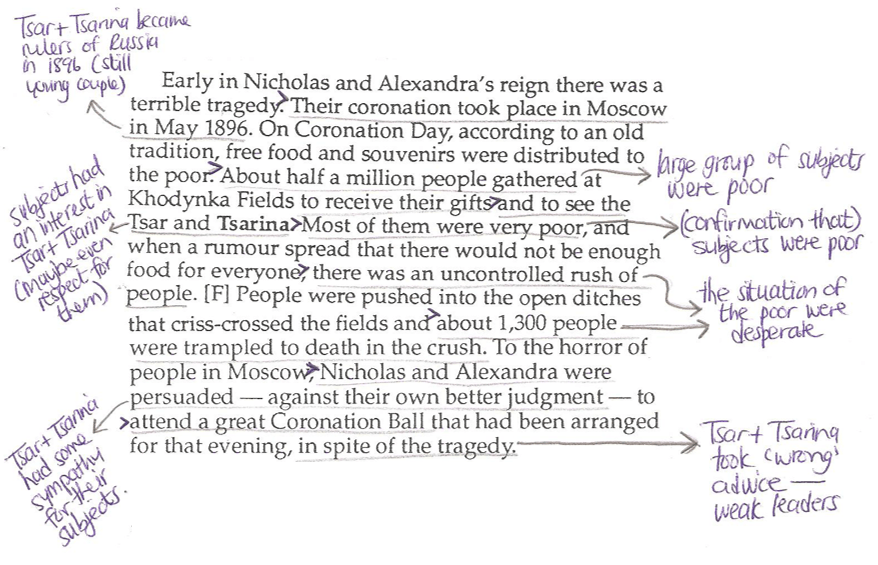
First look at this answer to the source question on the Coronation of Nicholas II. It is an example of how one should answer the question in paragraph form:
2.
Now, let’s look at Opposition to tsarists rule in Russia.
Opposition to Tsarist Regime. (2:38 minutes long)
3.
The “Theory of Communism”, p.1
Alternatively, watch the video (below) that explains the Theory of Communism:
Theory of Communism explained. (2:03 minutes long)
4.
In case you are still unsure, here it is again…
The Theory of Communism – (text only). (1:50 minutes long)
5.
Here is a little more about Karl Marx…
Was Karl Marx right? | The Economist. (3:22 minutes long)
6.
The information about the Opposition to Tsarist Rule, p.4
7.
Make study notes (in your homework book) on Opposition to Tsarist Rule (p.4).
Do you know how to do this?
Here are examples of brief study notes:
(Take note: the leader of the Mensheviks was Martov, and NOT Martel, as mentioned in the notes above.)
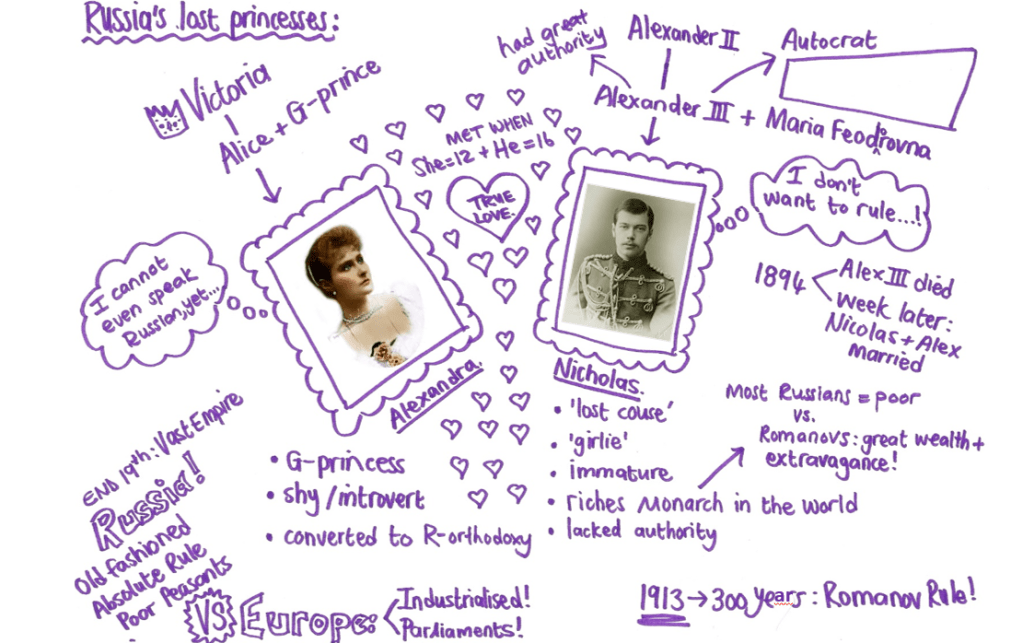
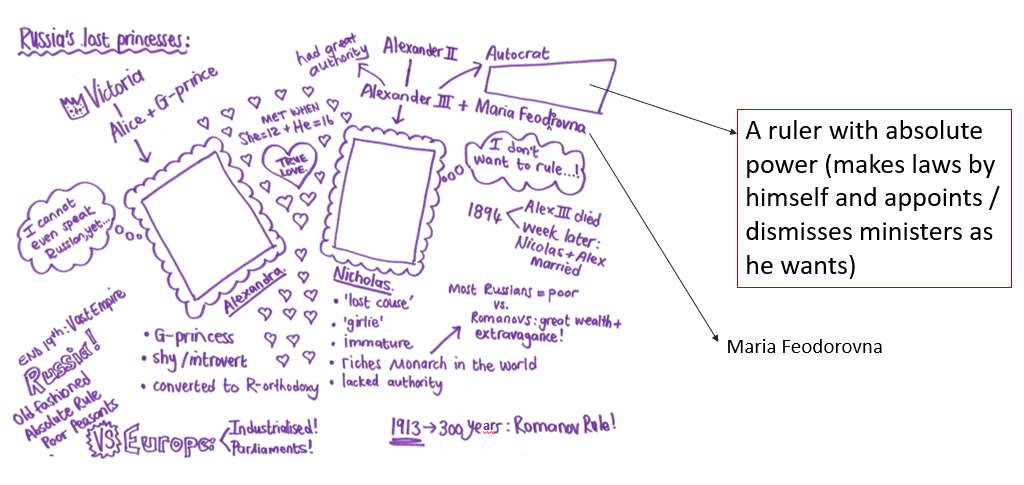
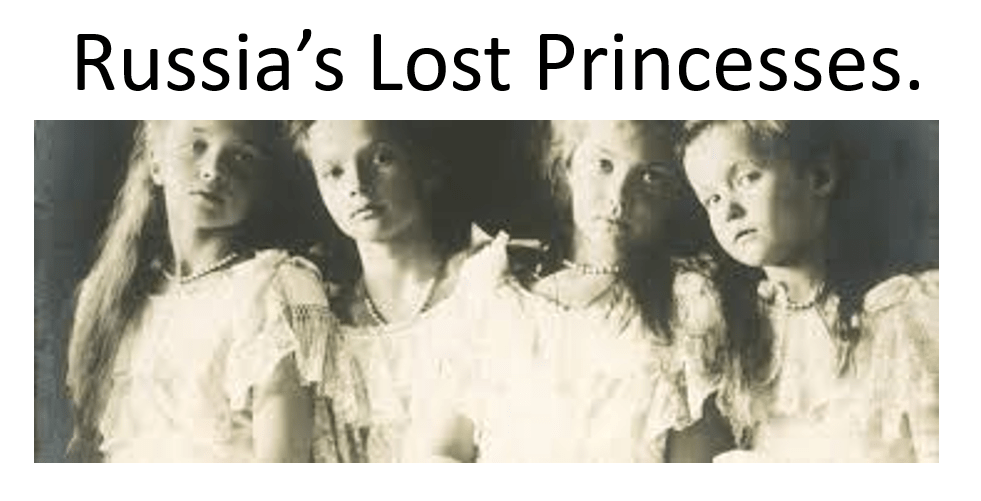
Today we will finish the documentary on Russia’s Lost Princesses and highlight important events that were shown in the documentary.
1.
First, let’s consider how Nicholas II ruled Russia….
The Tsarist Regime. (2:32 minutes long)
2.
The information about “The tsarist regime“, p.4.
3.
In the last “episode” we saw how the Romanov’s were overthrown in the February Revolution of 1917. Let’s watch the last 20 minutes of the documentary…
Tsarist Russia – Part VI. (18:42 minutes long.)
4.
Now, write a short film review (of 70-100 words), in your Exercise Book. Say how much you liked the documentary, how much you have learnt, what you think of the production, and if you would recommend it to future Year 10 students. (Use this heading: Film review for ‘Russia’s Lost Princesses’.)
5.
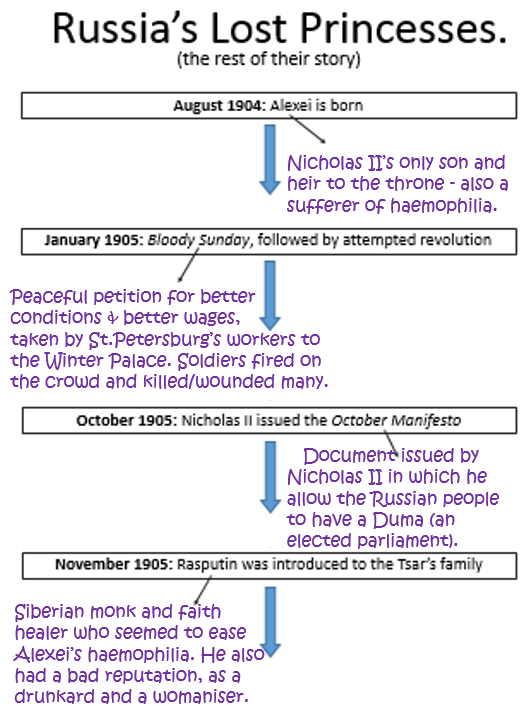
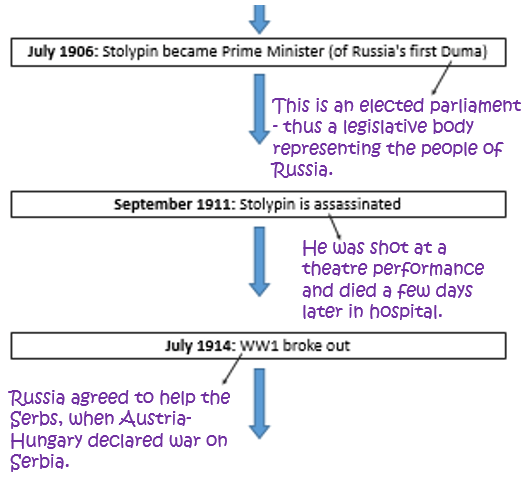
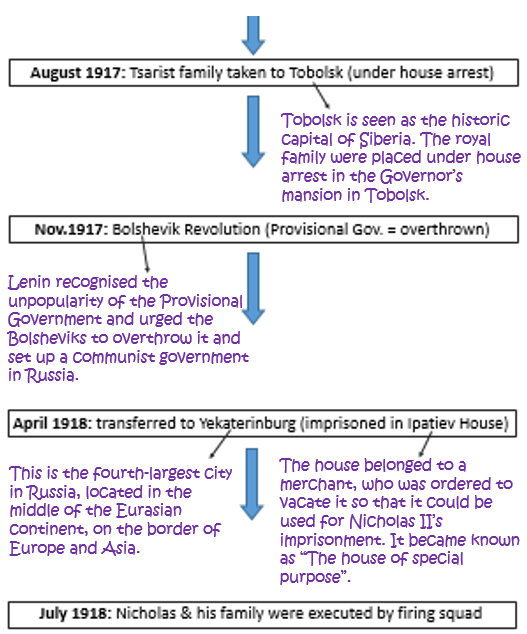
Let’s look at a “Timeline of Events” that is important to your study, as these events were shared in the documentary. (Or simply scroll down to 6, to see the timeline.)
Russia’s Lost Princesses flowchart. (5:16 minutes long)
6.
Now, copy the annotations onto your flowchart too!
7.
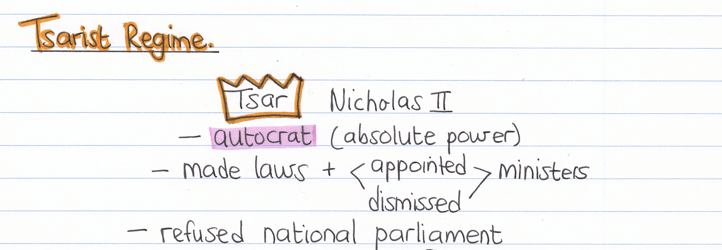
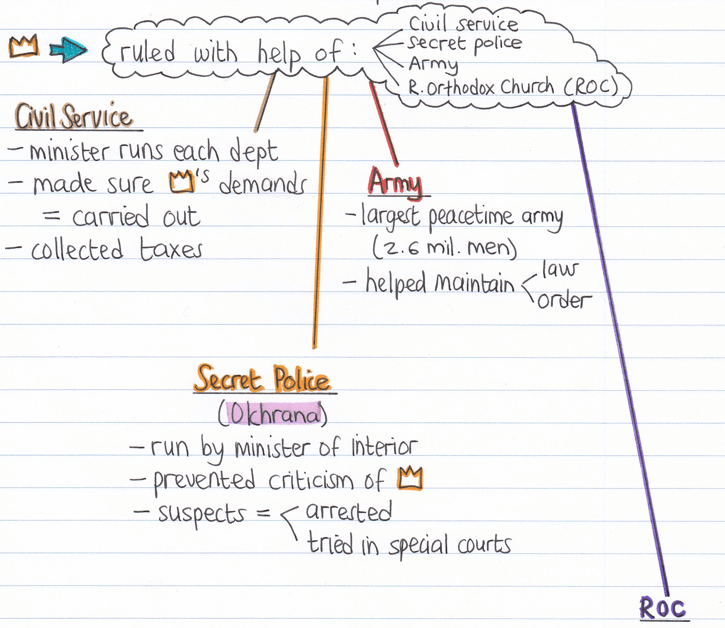
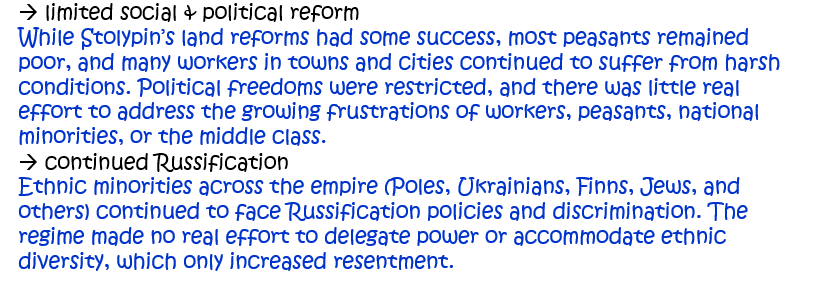
Finally, make study notes (in your Homework Book) on The Tsarist Regime (p.4).
Do you know how to do this?
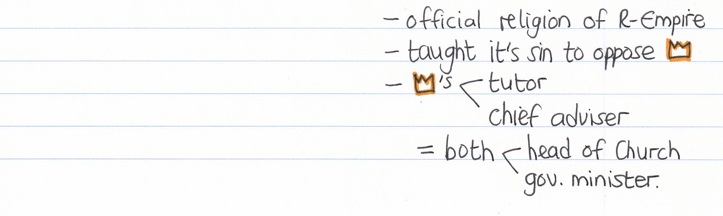
Here are examples of brief study notes:
(Copy the notes below so that you have another good example of how to make study notes.)
Today we are going to continue with the documentary, plus we will look at Russia in the early 1900’s and also at Russian Society in the early 1900’s.
1.
Today you will receive a booklet with notes on the Year 10 Russian History topic. From this booklet, we will begin by looking at what the Russian Empire was like at the beginning of the 1900’s.
Russia in Early 1900. (2:15 minutes long)
2.
Let’s also look at Russian Society in the early 1900’s.
Early 1900 – Russian Society. (2:25 minutes long)
3.
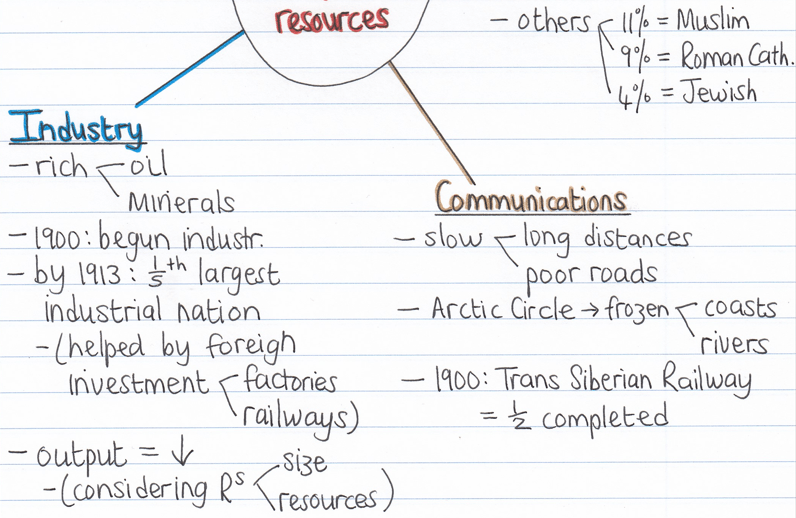
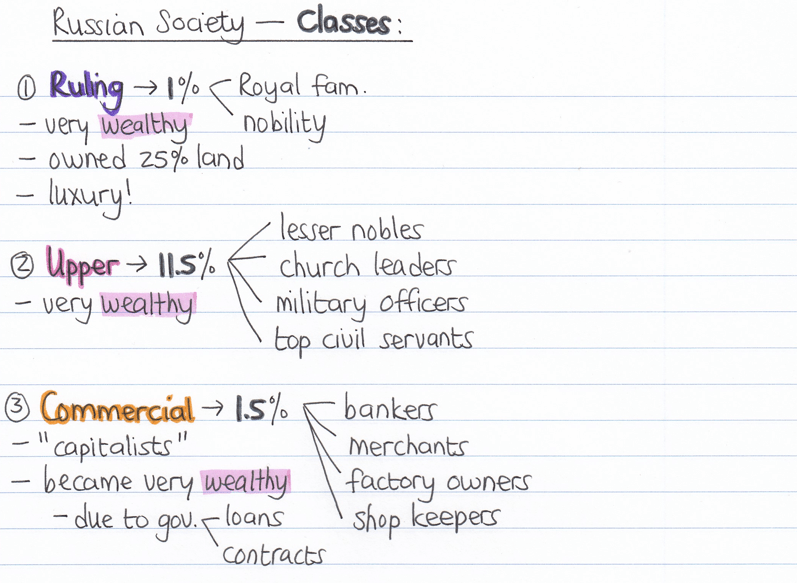
The diagram on “The Russian Empire and its resources“, and also the information on “Russian Society”, p.3.
4.
In the last “episode” of “Russia’s Lost Princesses” we saw Russia’s involvement in WW1 and how it caused a bit of an escape for the princesses from their very reclusive lives. Let’s watch the next 20 minutes…
Tsarist Russia – Part V. (19:38 minutes long.)
5.
Make study notes (in your homework book) on Russia in the early 1900’s (p.3). So, you need to make notes on:
Today we are going to continue watching the documentary and also finish the question on Nicholas’ coronation.
1.
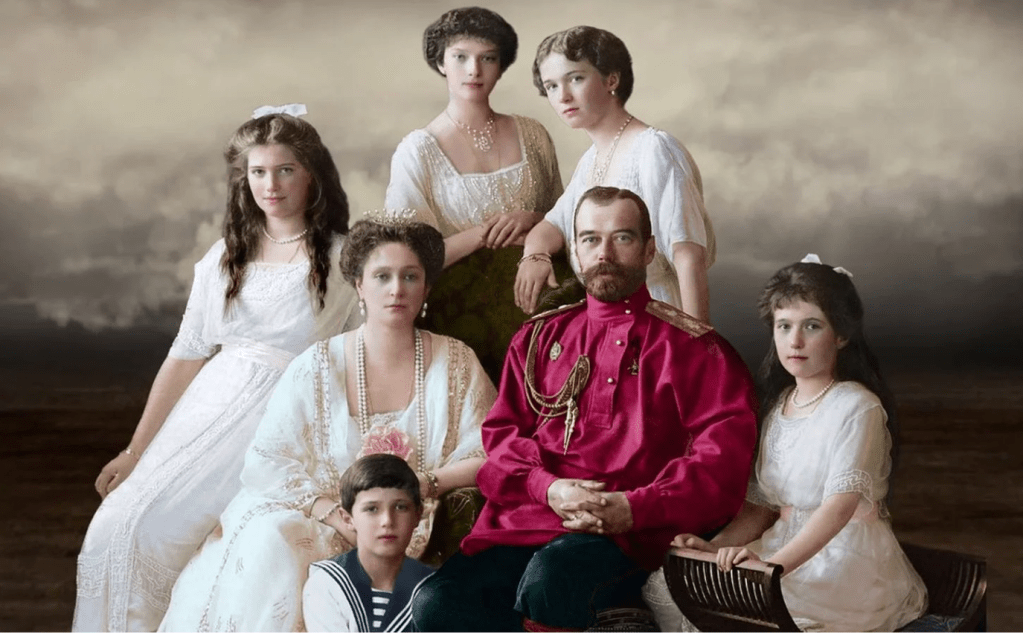
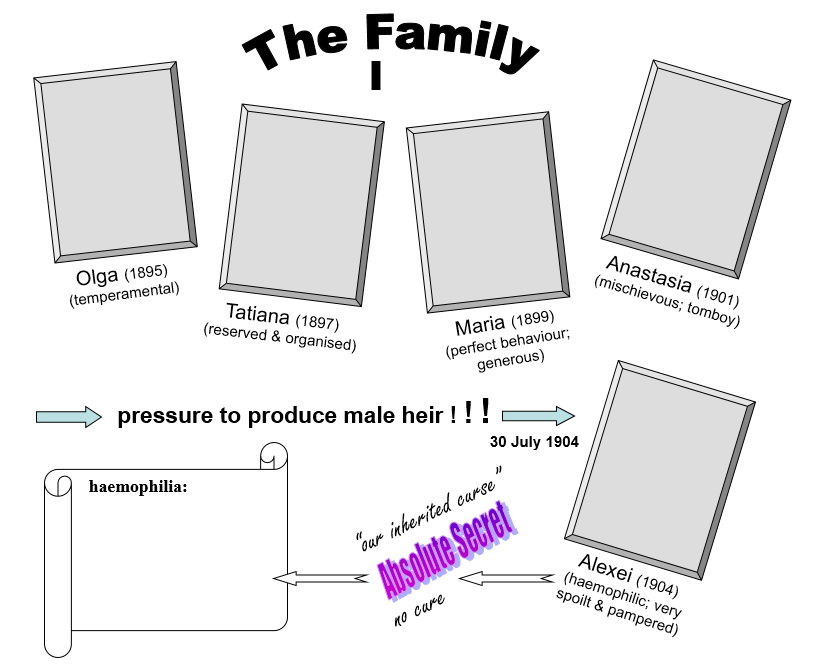
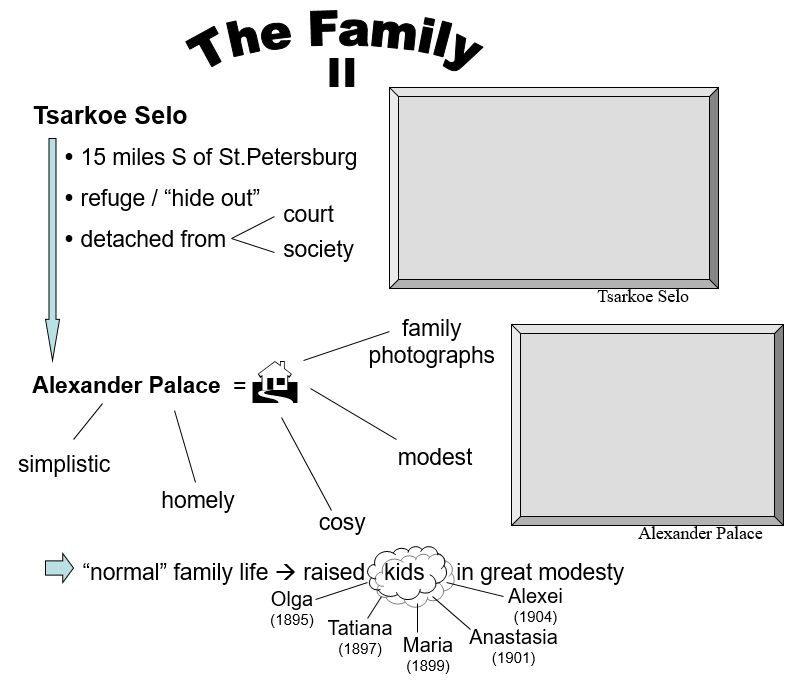
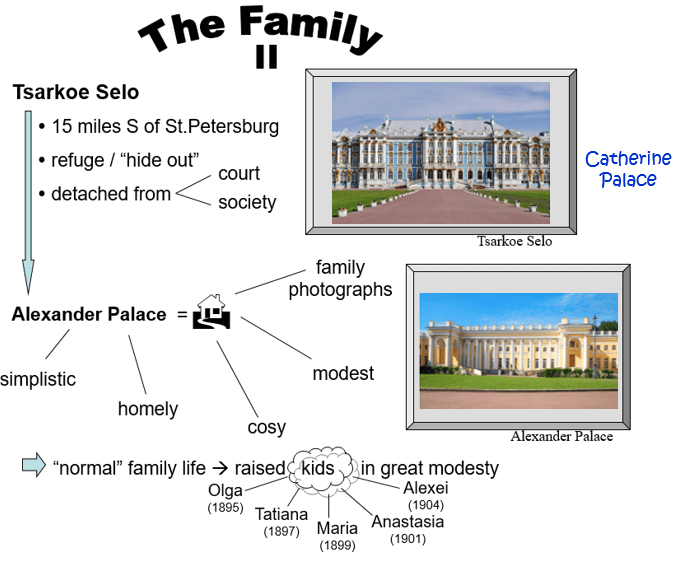
In the last “episode” of the documentary we learnt more about the family life and children of Nicholas and Alexandra. Here is a little recap of the content:
2.
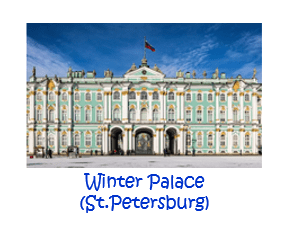
You need to print and stick photos onto the “Family I” and “Family II” worksheets and stick them into your books. Alternatively, can you tell who is who, using the photos below?
In the previous lesson we looked at source questions on the Coronation of Nicholas II. Use the rest of the lesson to complete the question on Nicholas’ coronation.
Today we are going to continue with the Russian History by examining the Coronation tragedy… (We will interrupt the documentary briefly and continue watching it in the next lesson.)
1.
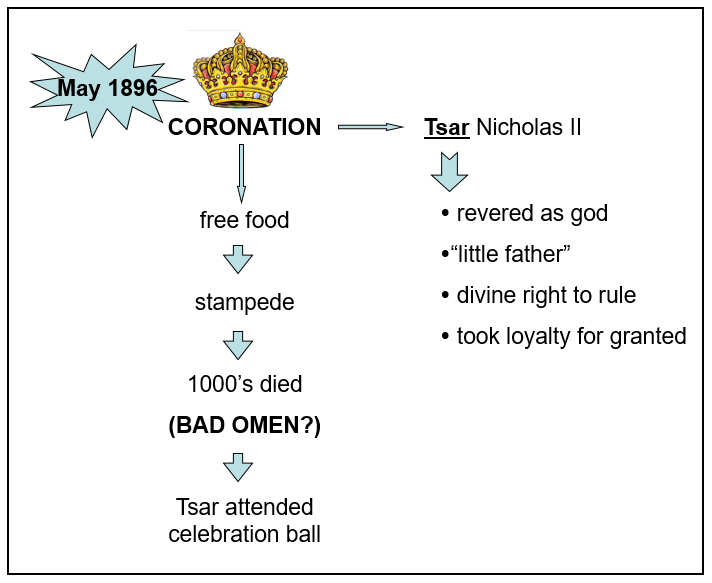
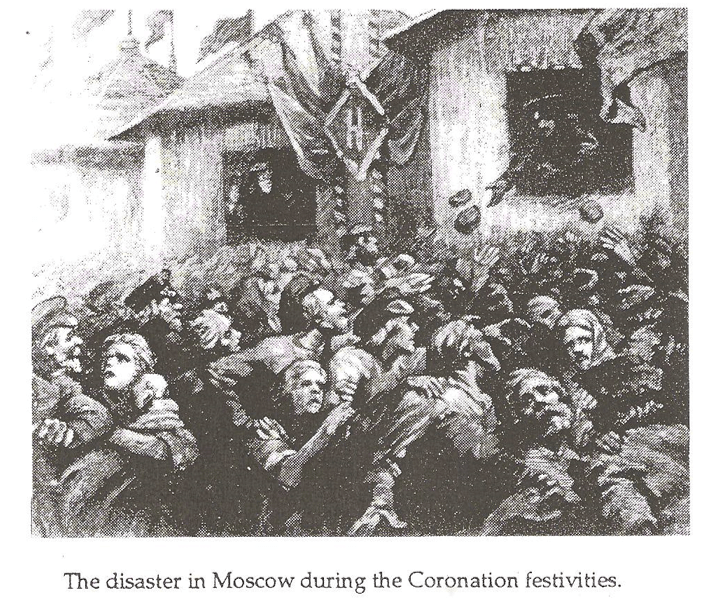
Previously you heard that there was a stampede at the coronation celebrations of Nicholas II.
2.
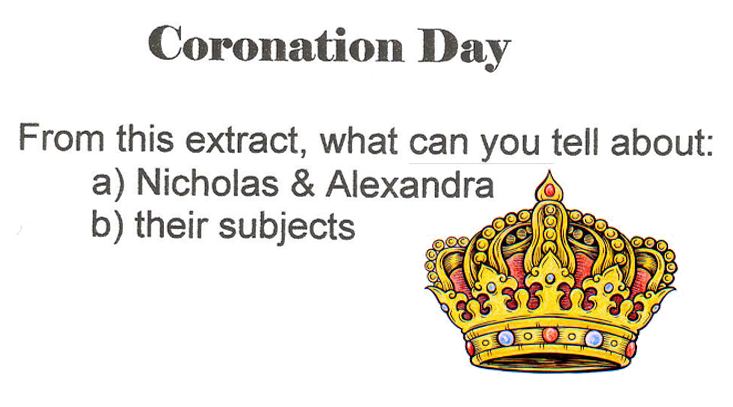
Do the following task about the Coronation of Nicholas II:
(You should have a handout of the worksheet stuck into your book.)
3.
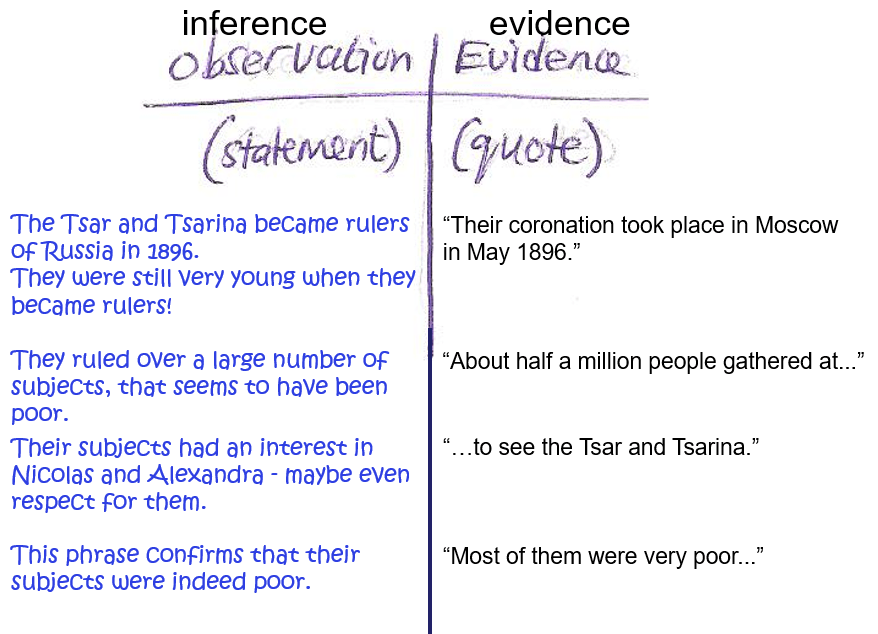
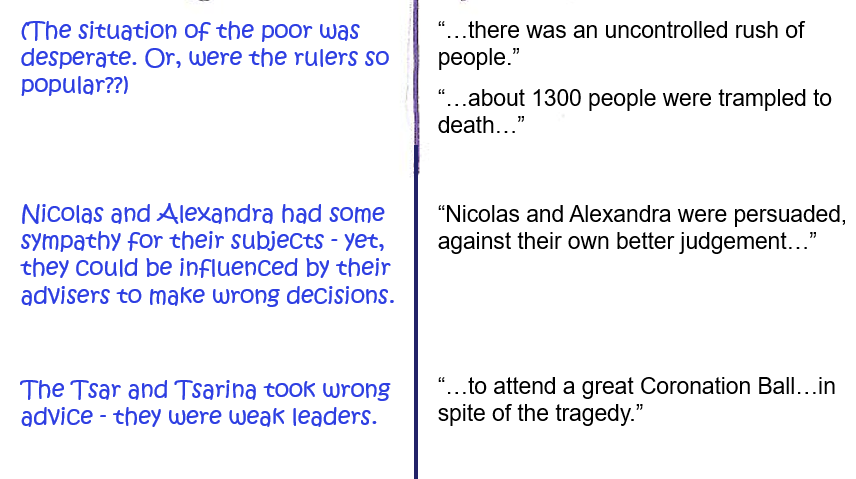
Here are examples of the information that is relevant to this task. (This is how you should have analysed the source.)
4.
It is always a good idea to record your findings in the form of a table, with a column for inferences or statements and a column with evidence (in the form of quotes) to back up your statements. So, draw a table (with 2 columns) in your book and write down some statements and quotes to answer the question “What can you tell about Nicholas, Alexandra, and their subjects?”.
5.
Watch the following slides to see if you have taken more or less the relevant information from the source.
6.
7.
Now, write at least two paragraphs to answer the question “What can you tell from this extract about Nicholas and Alexandra and about their subjects?”
8.
Here is a bit of advice (in the form of an example) on answering source questions. Each statement made needs some evidence…
Today we are going to start with the Russian History!
(Follow the instructions step by step!!)
1.
Before we start with our first topic, we need to talk about homework…
What about homework?
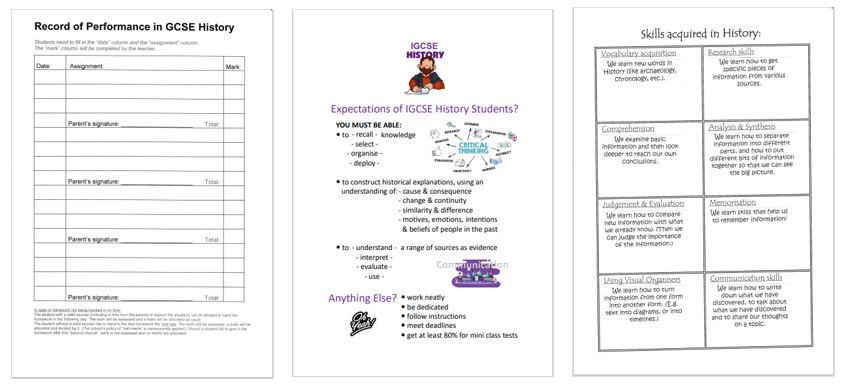
You will get homework on a regular basis. The aim is to help you revise what has been covered in class. There will be an ongoing task: make notes on the information covered in class, in your homework book. In addition, you may be given additional tasks from time to time. These may, for example include essay writing or other activities.
You will also write short tests on a regular basis. Make sure that you study very well for these mini tests!!
2.
THE HISTORY OF HOMEWORK
Who Invented Homework? | COLOSSAL QUESTIONS. (2:00 minutes long)
Year 10 Homework. (1:28 minutes long)
3.
Here is a reminder “Why we do homework” …
4.
What do you know about Russia and its History?
5.
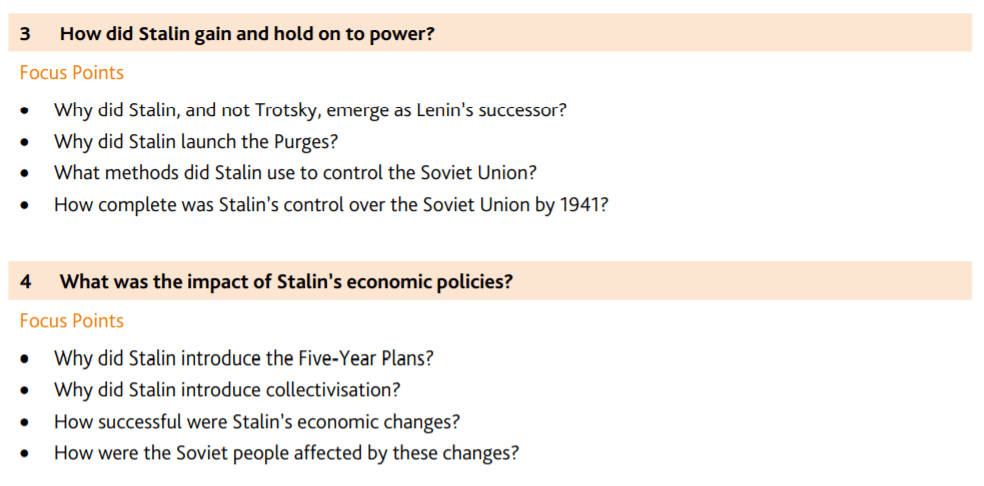
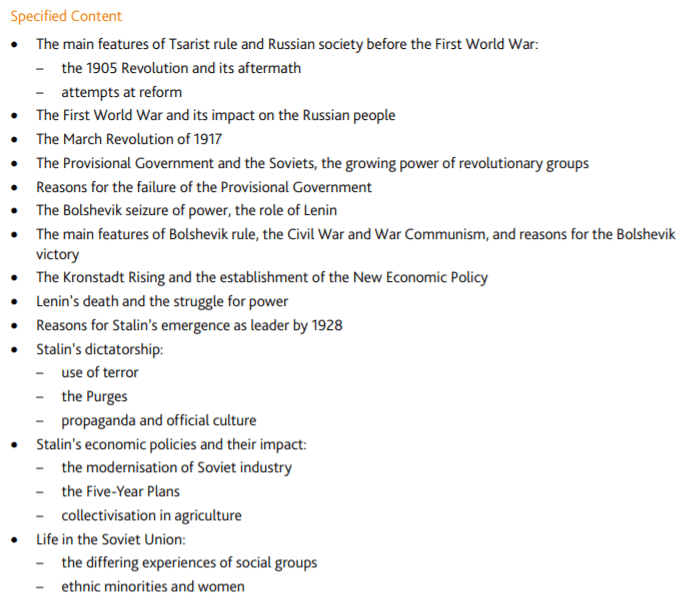
This is the content of the topic on Russia:
6.
As an introduction to the Russian History we are going to watch a documentary on:
Before we start looking at all the exciting things that this course has to offer we need look at a few organisational issues. So, here is what you have to do today:
(Follow the instructions step by step!!)
1.
It gives a bit more information about… “What is History”…
2.
Fill in the “My Fact File” form so that I can get to know you a bit better…
3.
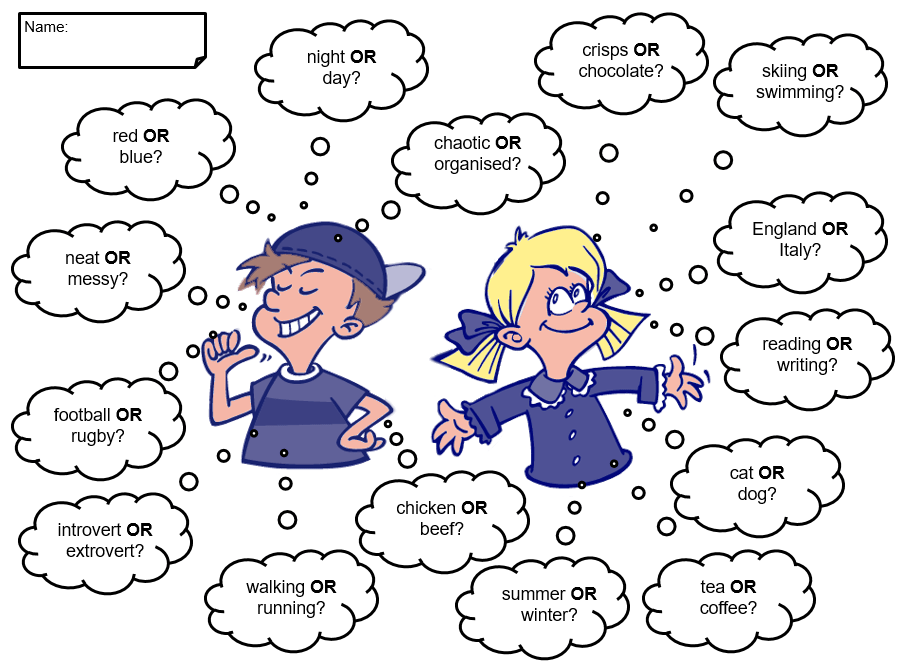
Fill in the “Coffee or Tea” form so that we can get to know each other a bit better…
And here’s what your teacher has to say…
4.
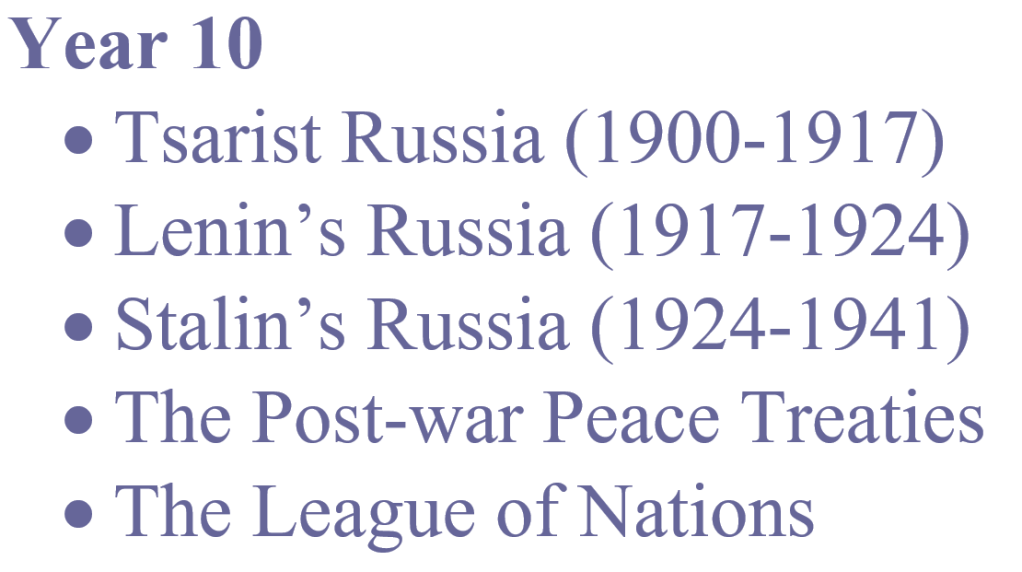
These are the topics that you will be doing in Year 10:
5.
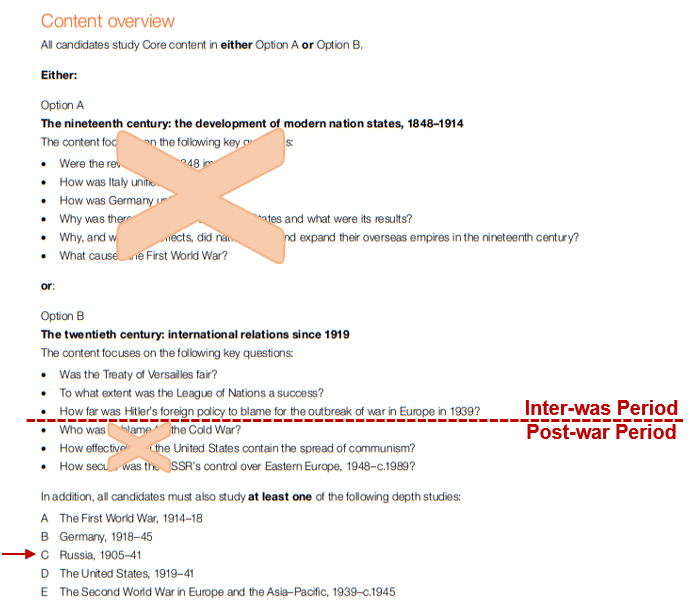
Let’s look at the specification in a bit more detail:
6.
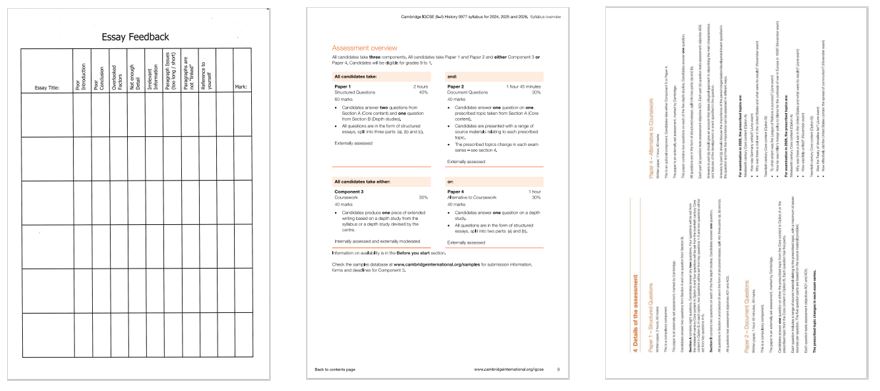
And what about assessment? Here is an overview of the IGCSE History course assessment:
7.
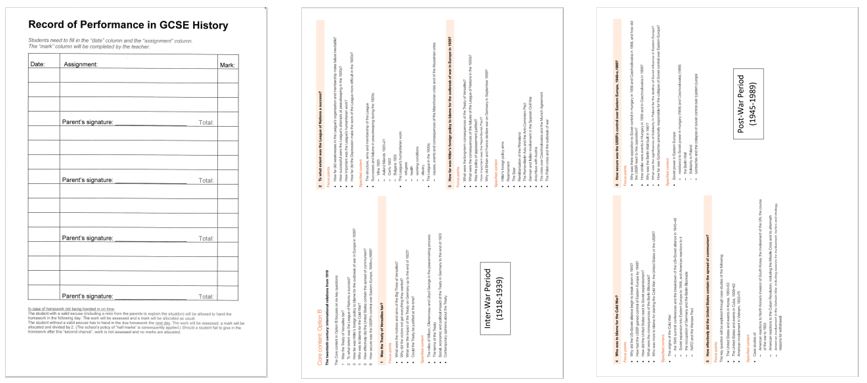
You will receive the following books for History:
an exercise book for the Russian History
an exercise book for the European History
an exercise book for Essay Writing
a History Study Notes book
Various Flipbooks based on the following textbooks:
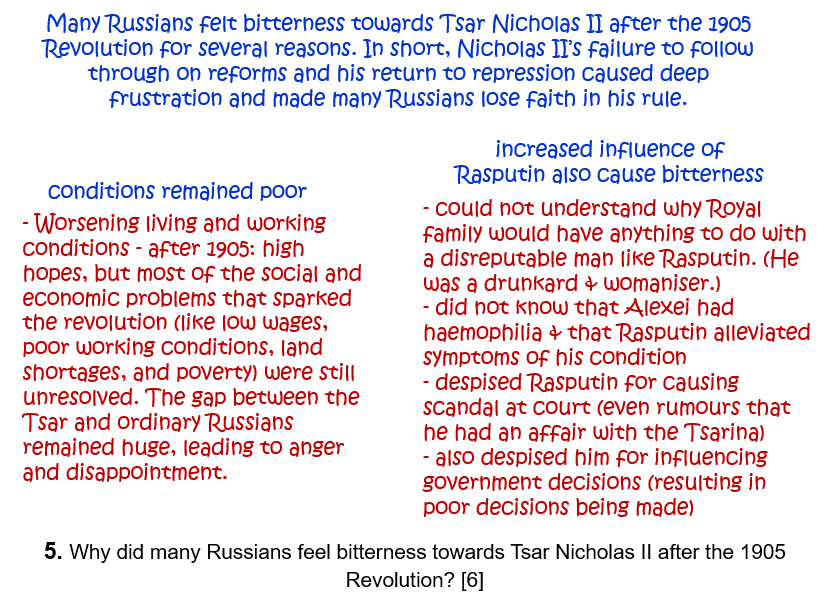
5. Why did many Russians feel bitterness towards Tsar Nicholas II after the 1905 Revolution? [6]
Question 6.
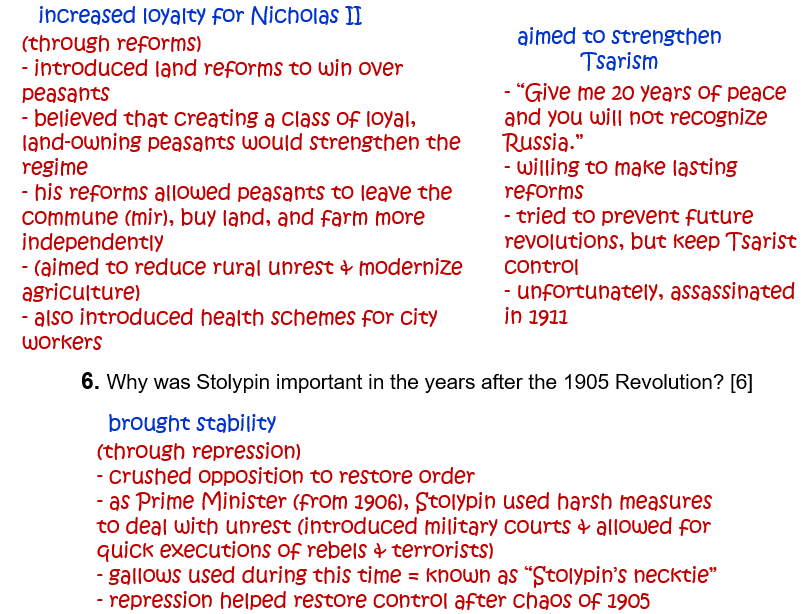
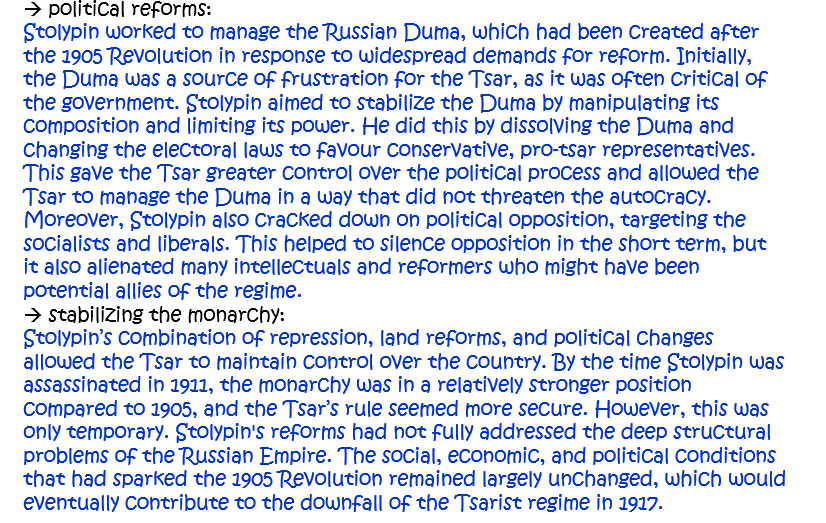
6. Why was Stolypin important in the years after the 1905 Revolution? [6]
Question 10.
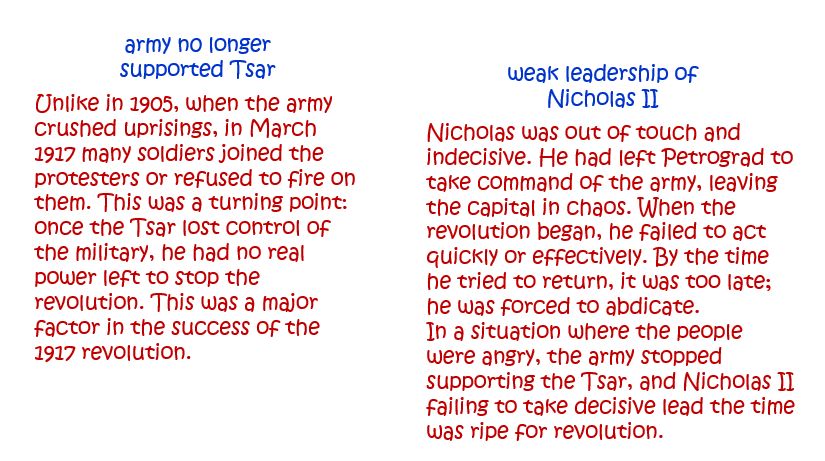
10. Why was the March 1917 Revolution successful? [6]
Question 13.
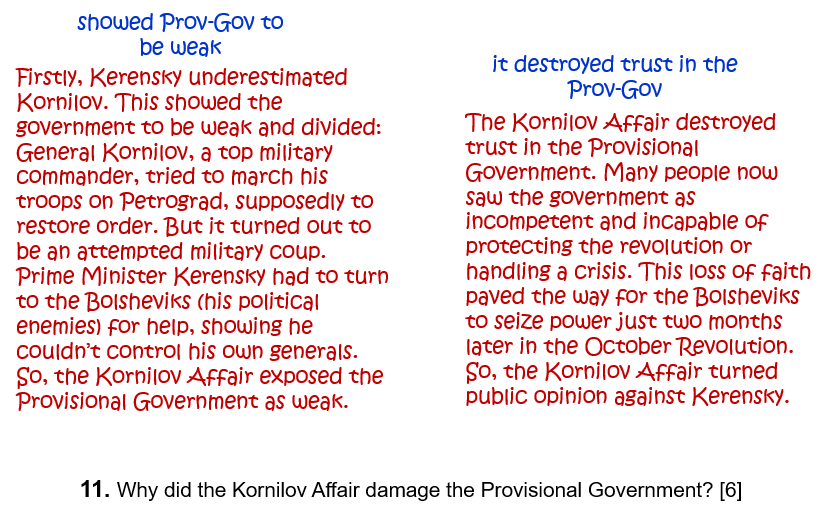
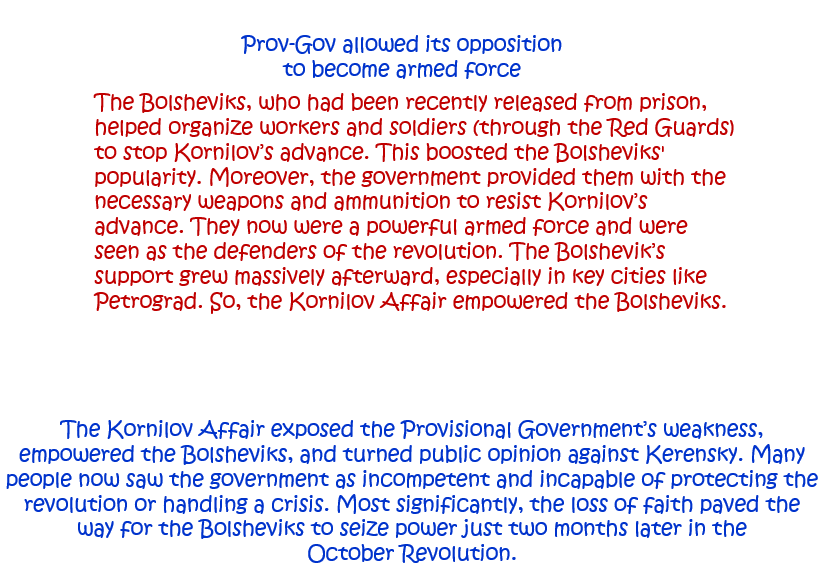
13. Why did the Kornilov Affair damage the Provisional Government? [6]
Lenin’s Russia.
Question 1.
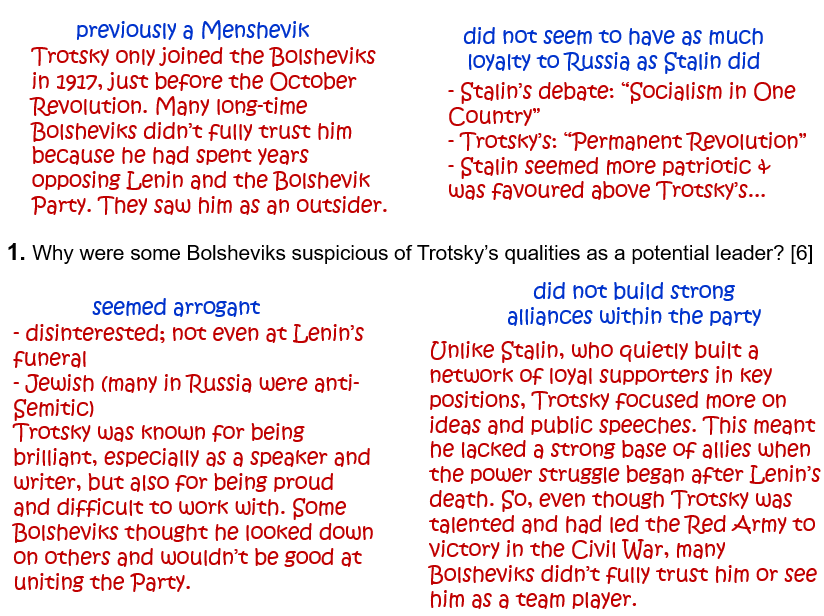
1. Why were some Bolsheviks suspicious of Trotsky’s qualities as a potential leader? [6]
Stalin’s Russia.
Question 2.
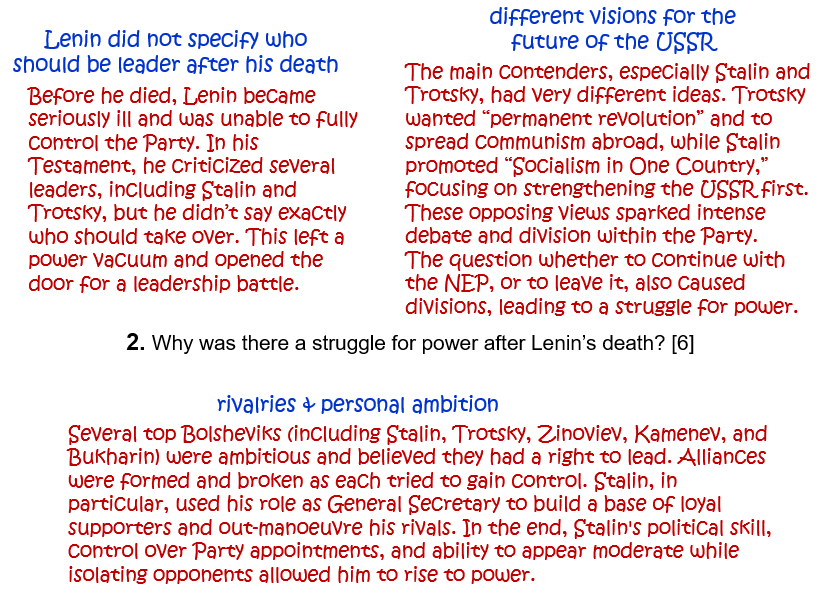
2. Why was there a struggle for power after Lenin’s death? [6]
Question 3.
3. Why were Stalin’s ideas more popular among Communist Party officials than those of Trotsky? [6]
Question 10.
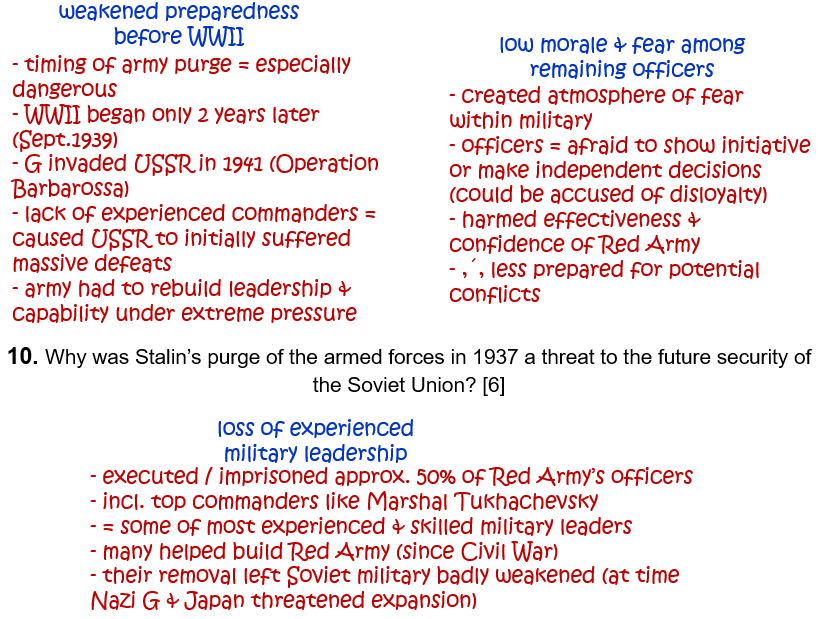
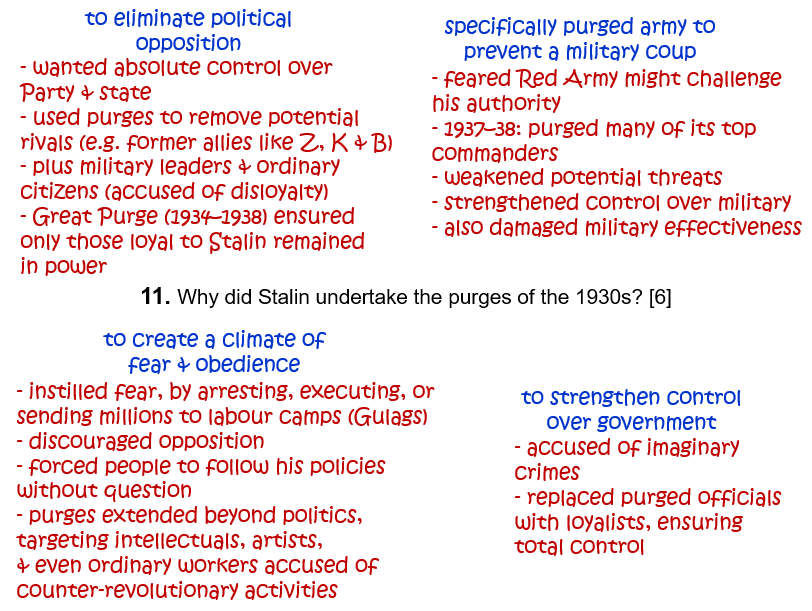
10. Why was Stalin’s purge of the armed forces in 1937 a threat to the future security of the Soviet Union? [6]
Question 11.
11. Why did Stalin undertake the purges of the 1930s? [6]
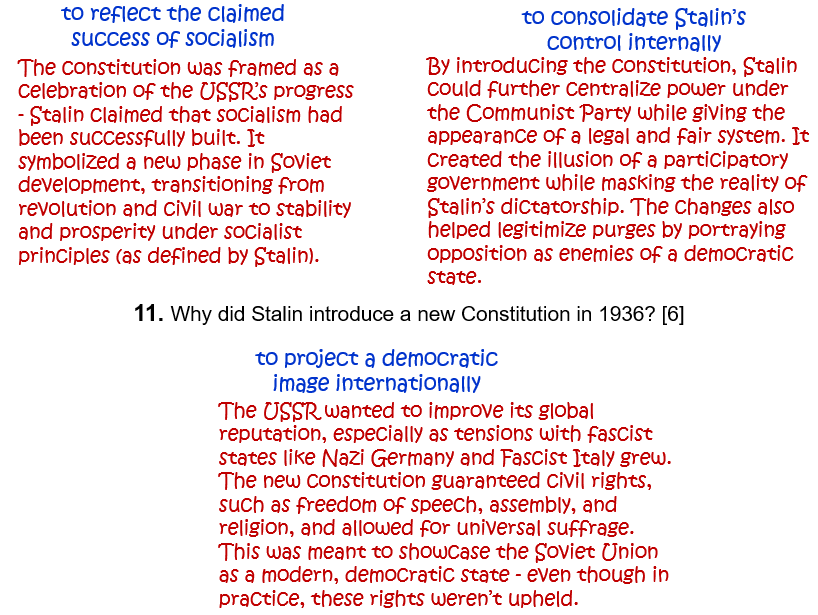
Question 13.
13. Why did Stalin introduce a new Constitution in 1936? [6]
Tsarist Russia.
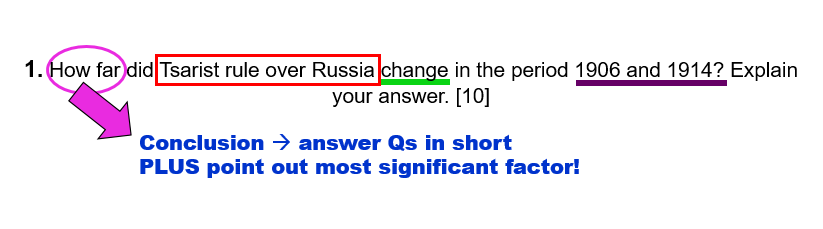
Question 1.
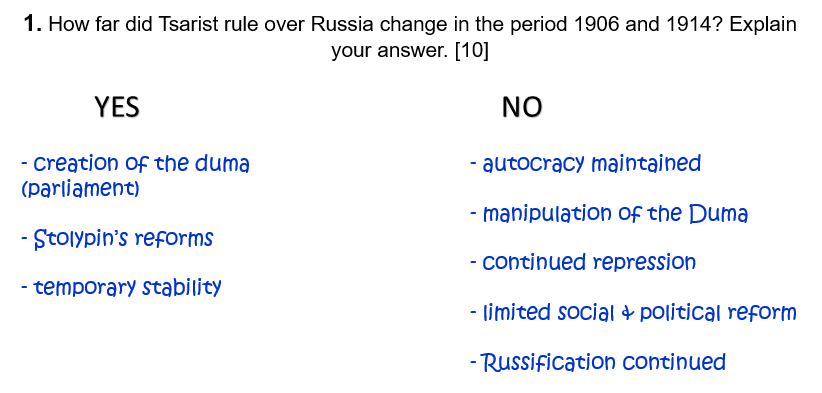
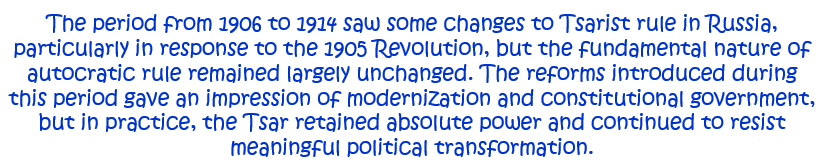
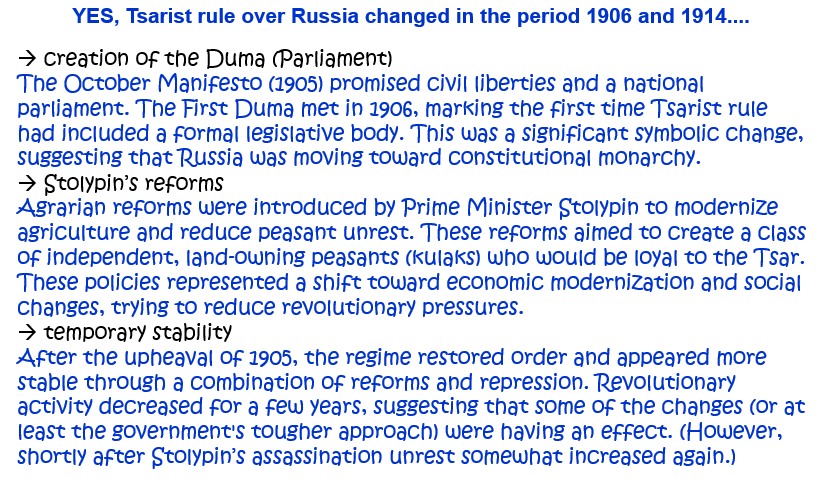
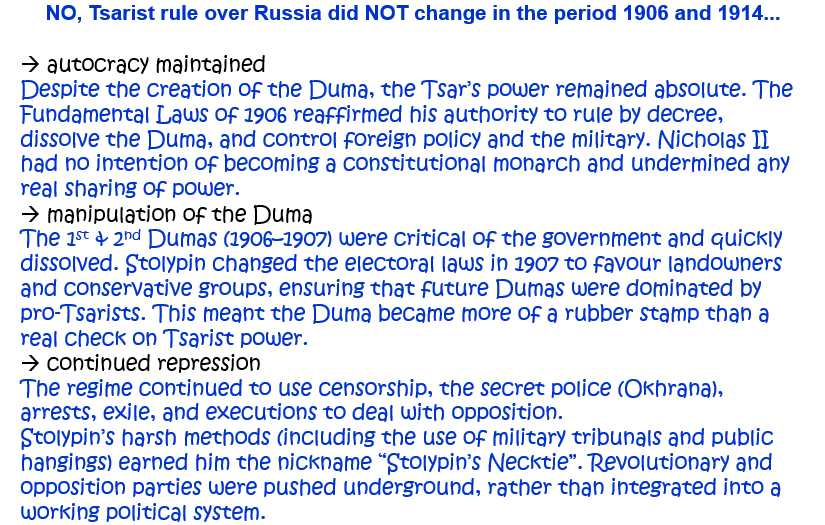
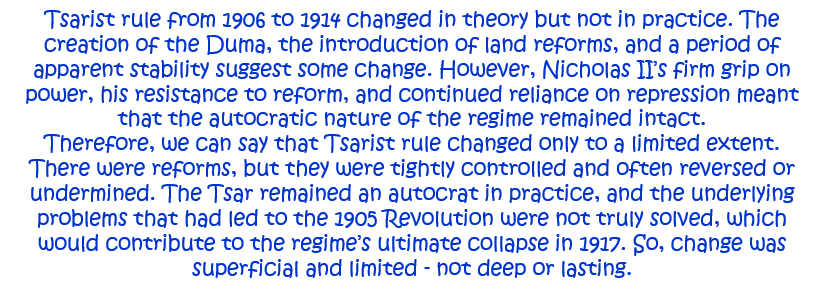
1. How far did Tsarist rule over Russia change in the period 1906 and 1914? Explain your answer. [10]
Question 2.
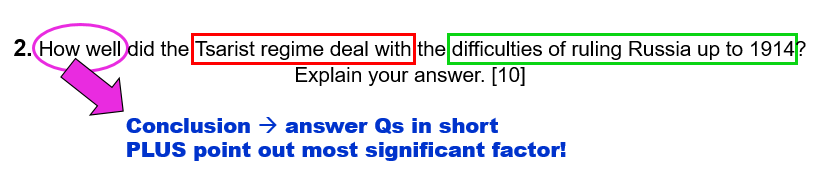
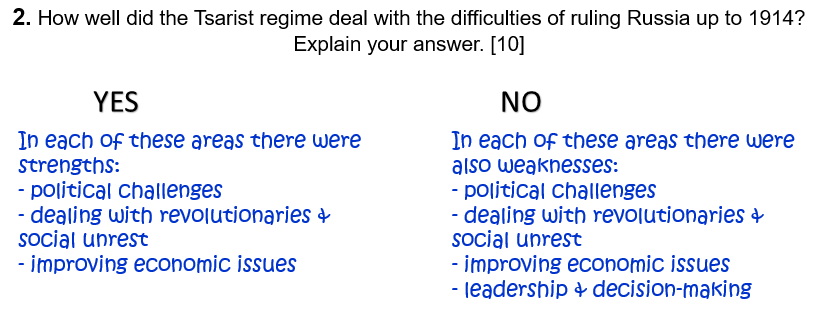
2. How well did the Tsarist regime deal with the difficulties of ruling Russia up to 1914? Explain your answer. [10]
Question 3.
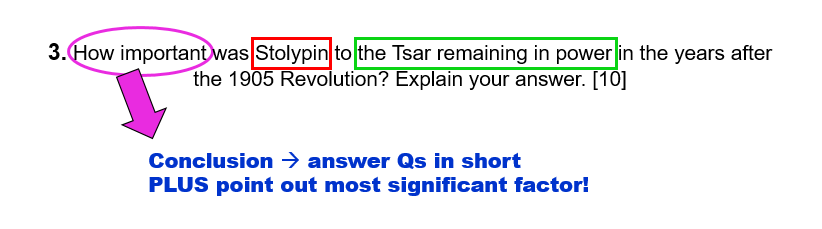
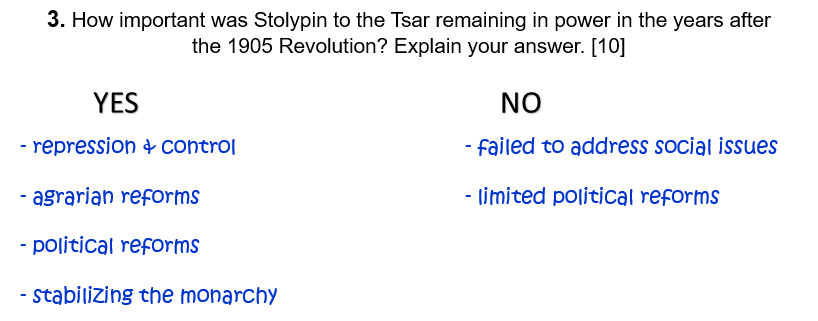
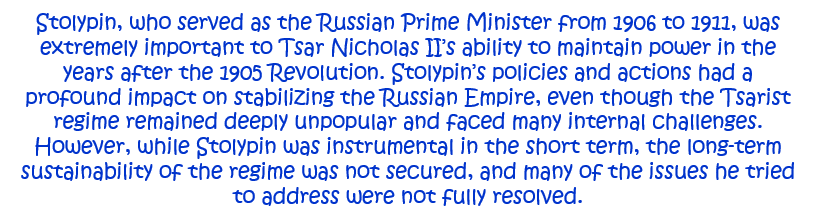
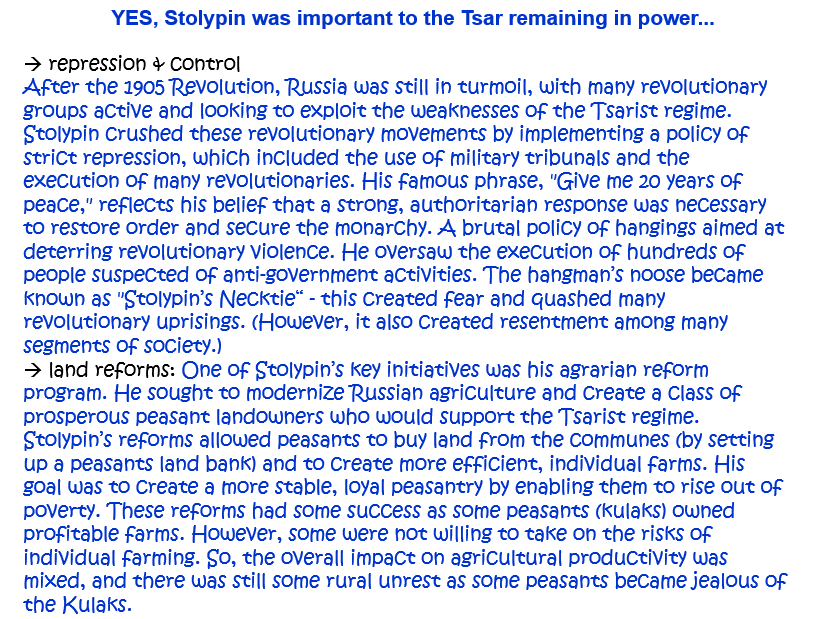
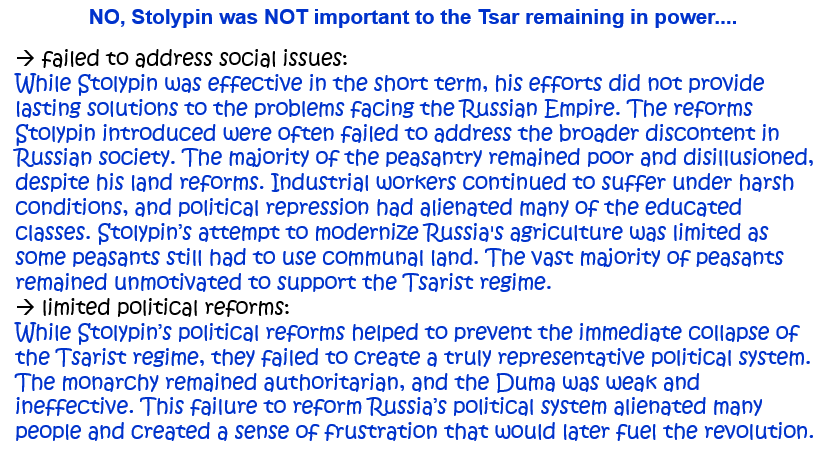
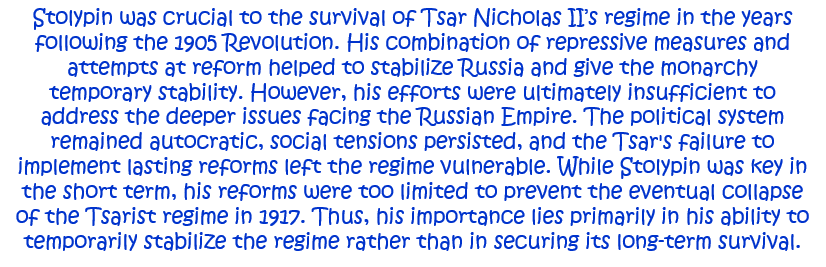
3. How important was Stolypin to the Tsar remaining in power in the years after the 1905 Revolution? Explain your answer. [10]
Question 8.
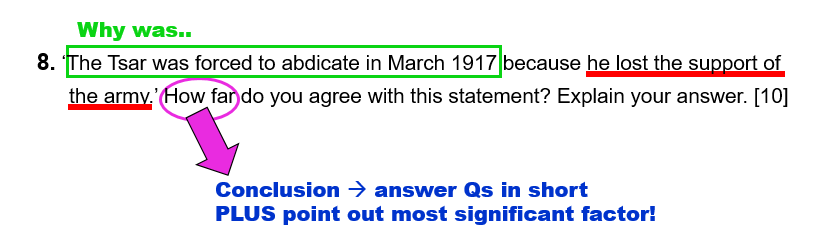
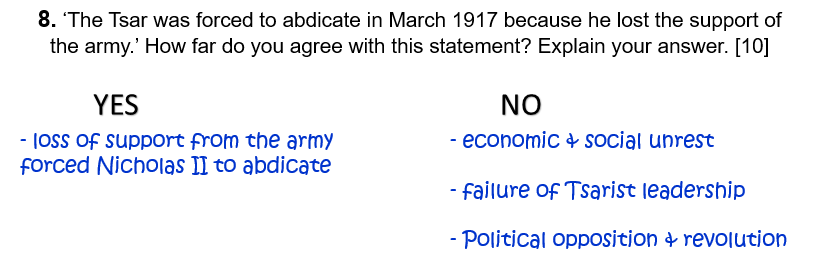
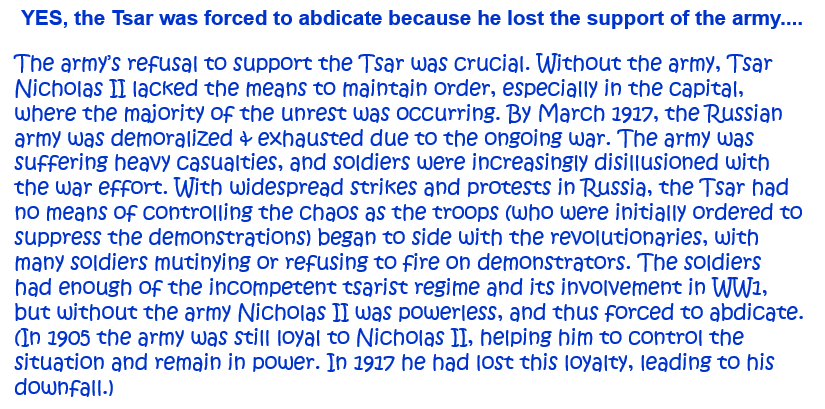
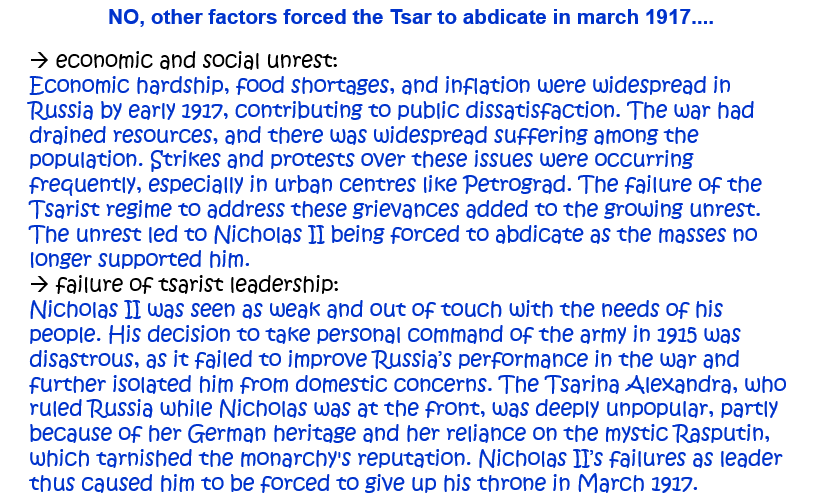
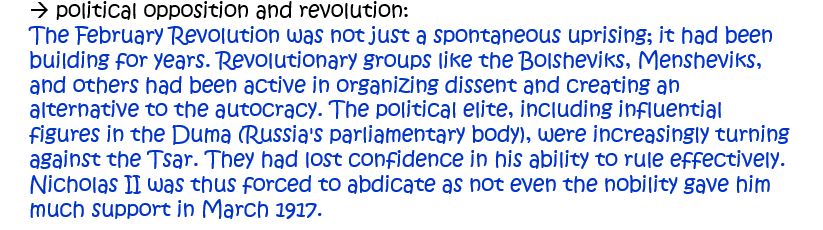
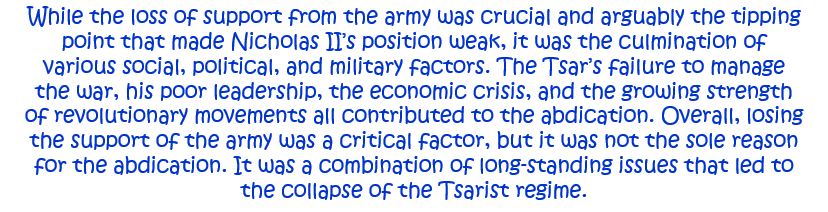
8. ‘The Tsar was forced to abdicate in March 1917 because he lost the support of the army.’ How far do you agree with this statement? Explain your answer. [10]
Question 10.
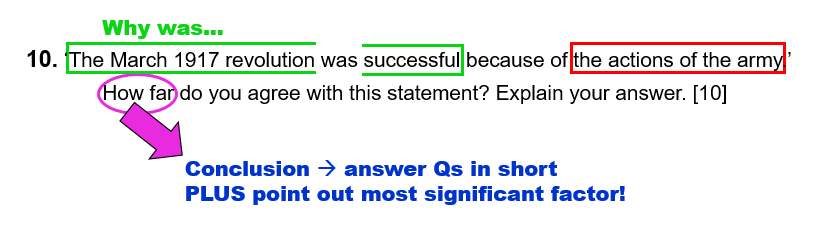
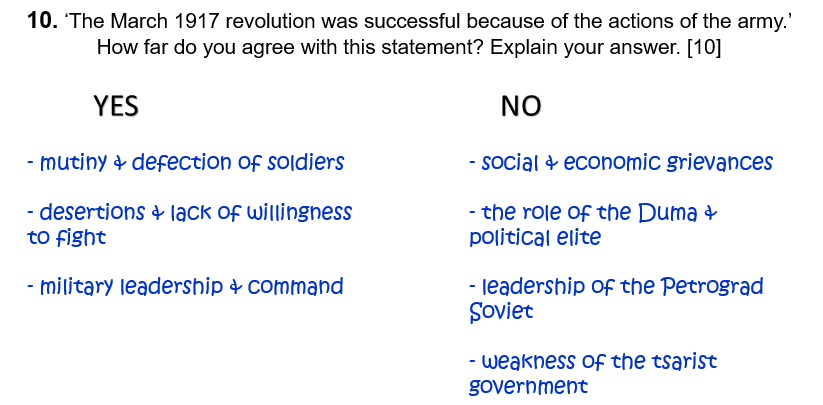
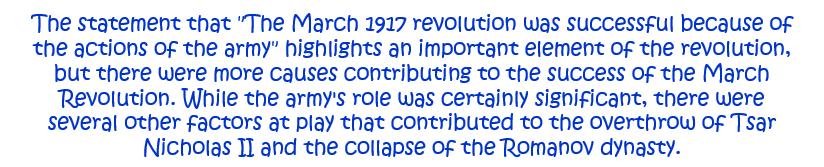
10. ‘The March 1917 revolution was successful because of the actions of the army.’ How far do you agree with this statement? Explain your answer. [10]
Lenin’s Russia.
Question 1.
(Alternative 3)
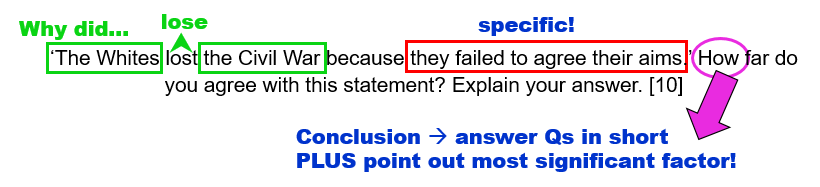
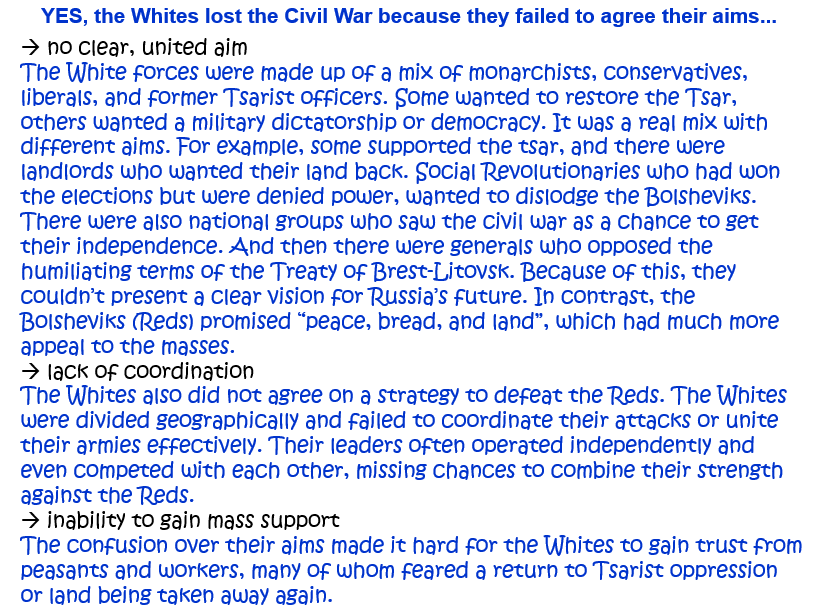
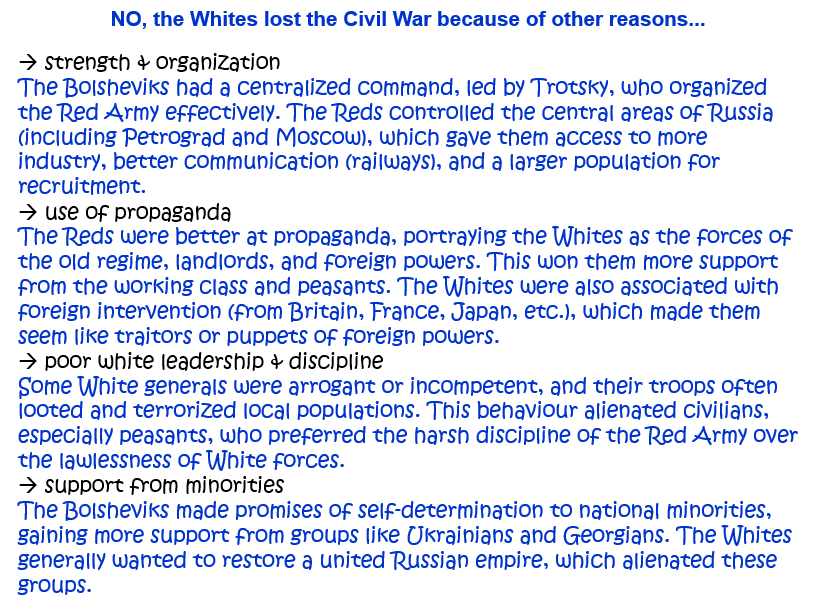
1. ‘The Whites lost the Civil War because they failed to agree their aims.’ How far do you agree with this statement? Explain your answer. [10]
Question 4.
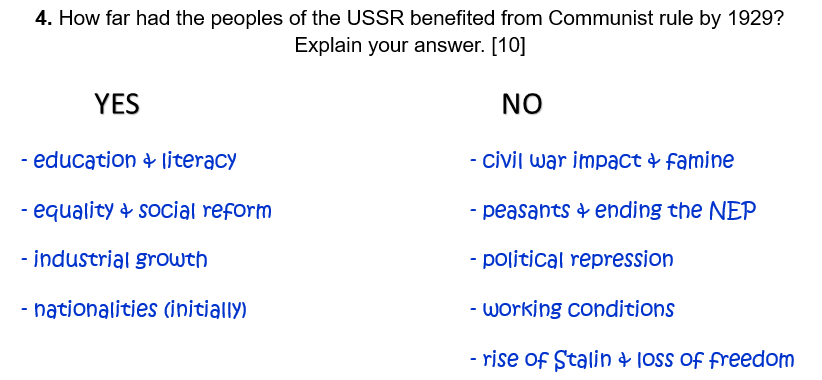
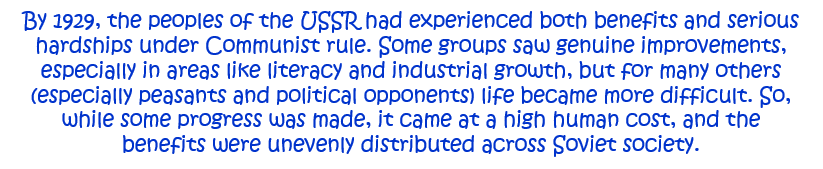
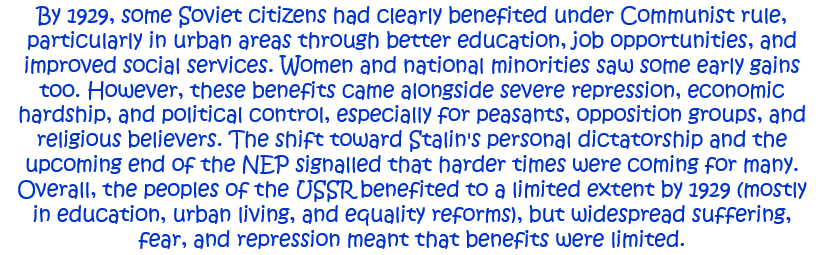
4. How far had the peoples of the USSR benefited from Communist rule by 1929? Explain your answer. [10]
Stalin’s Russia.
Question 2.
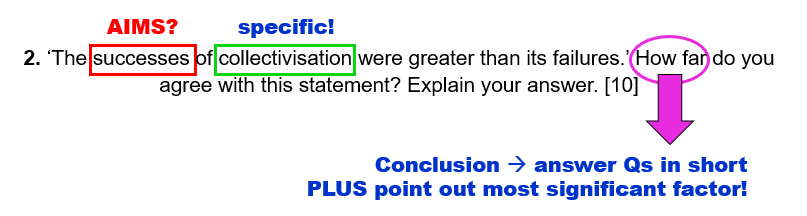
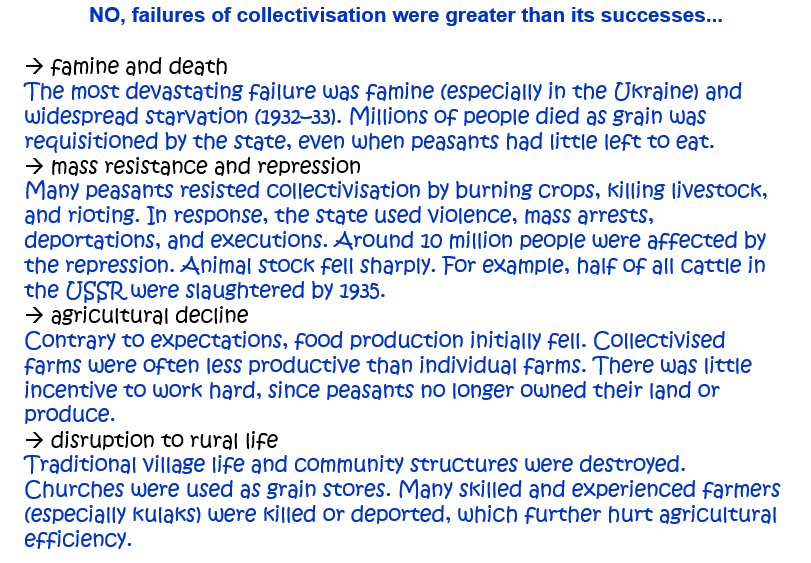
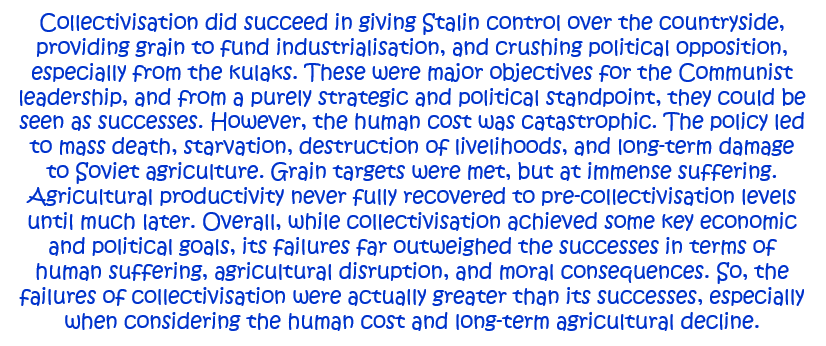
2. ‘The successes of collectivisation were greater than its failures.’ How far do you agree with this statement? Explain your answer. [10]
OR: How far was Stalin’s policy of collective farming successful? Explain your answer. [10]
Question 6.
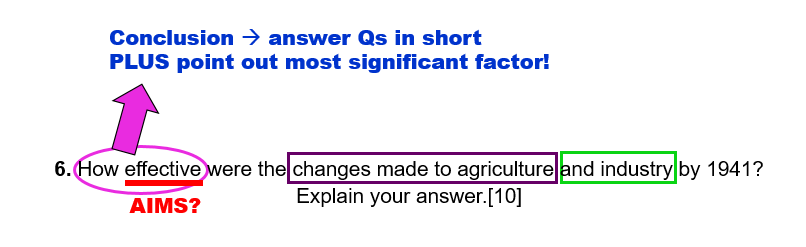
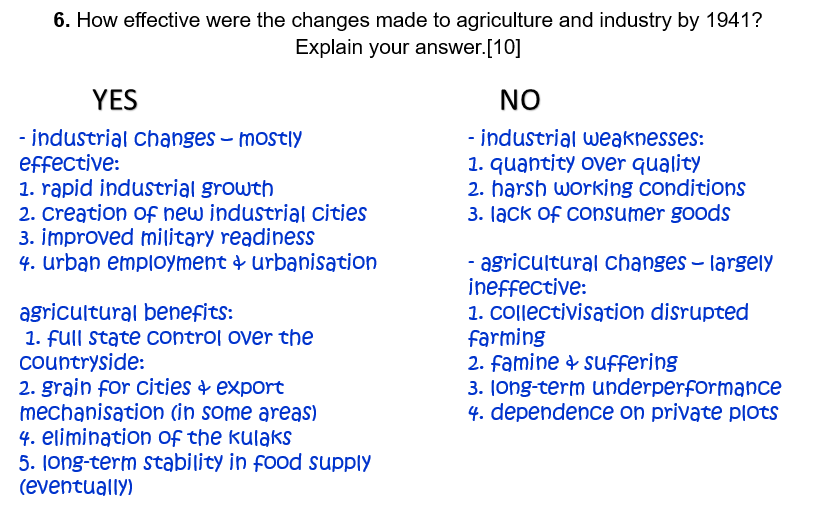
6. How effective were the changes made to agriculture and industry by 1941? Explain your answer.[10]on
OR: How successful was Stalin in increasing industrial and agricultural output up to 1941? Explain your answer. [10]
Question 8.
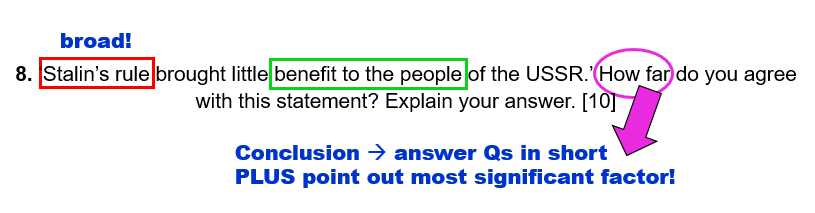
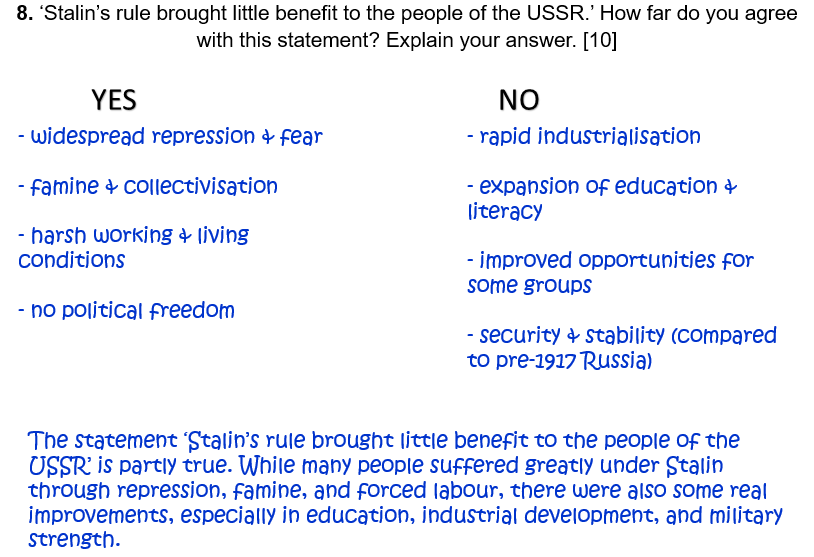
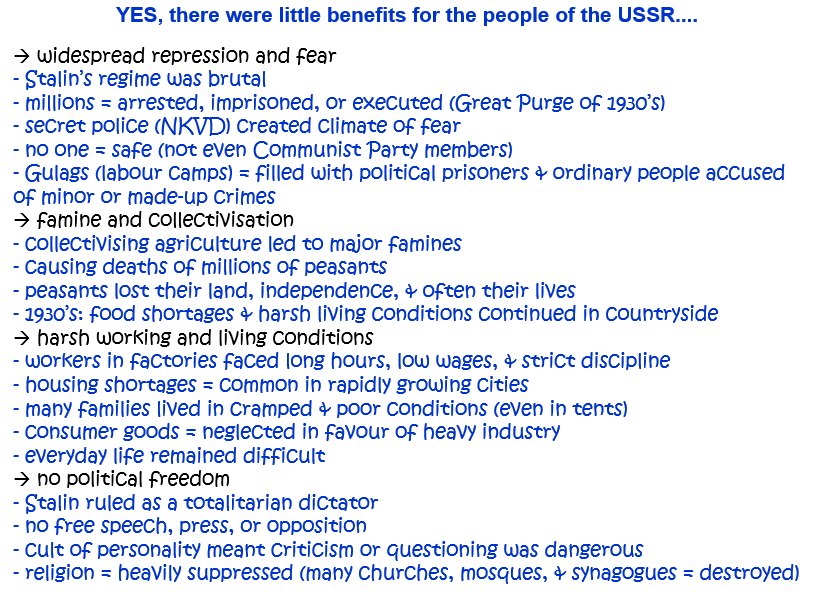
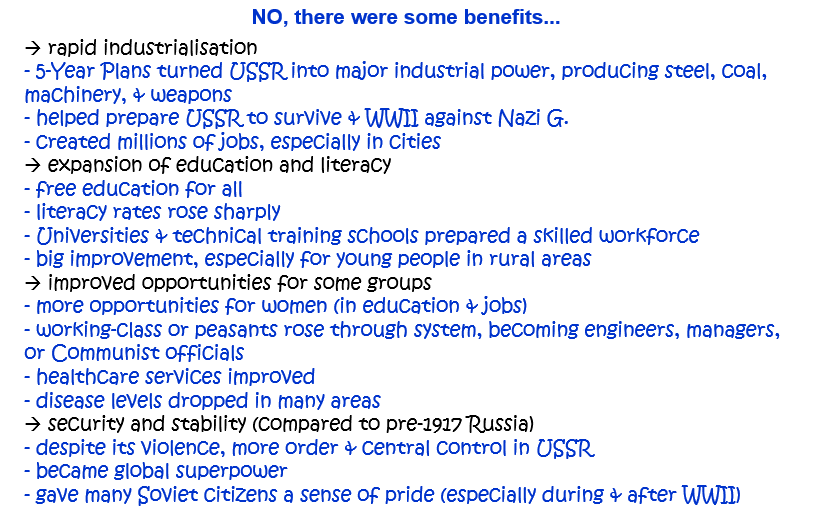
8. ‘Stalin’s rule brought little benefit to the people of the USSR.’ How far do you agree with this statement? Explain your answer. [10]
OR: How far did the lives of the Soviet people improve under Stalin’s rule to 1941? Explain your answer. [10]
Question 10.
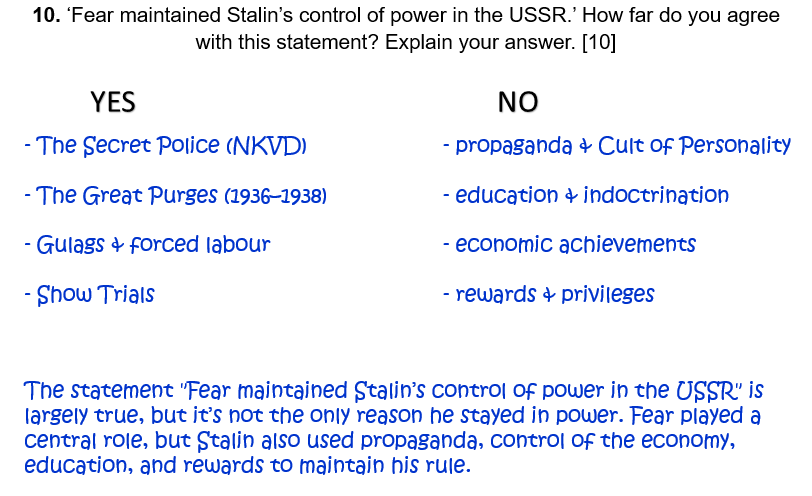
10. ‘Fear maintained Stalin’s control of power in the USSR.’ How far do you agree with this statement? Explain your answer. [10]
Question 11.
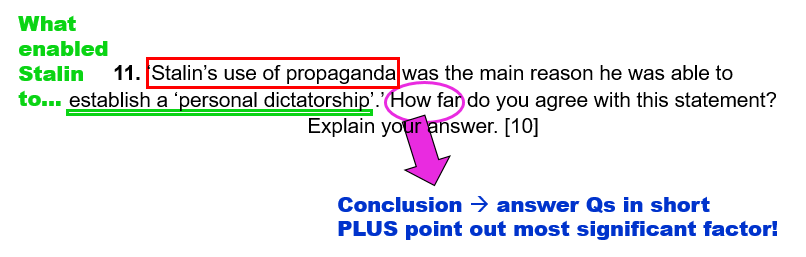
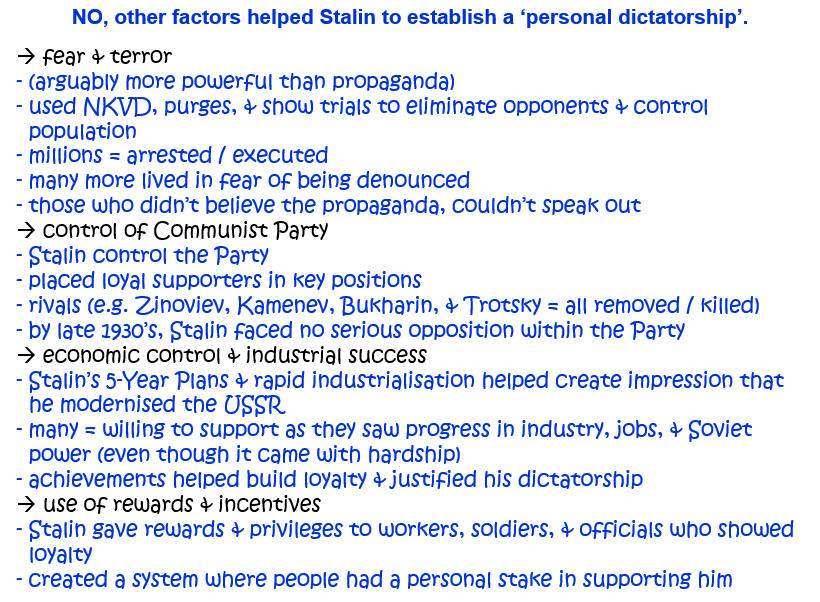
11. ‘Stalin’s use of propaganda was the main reason he was able to establish a ‘personal dictatorship’.’ How far do you agree with this statement? Explain your answer. [10]
Question 12.
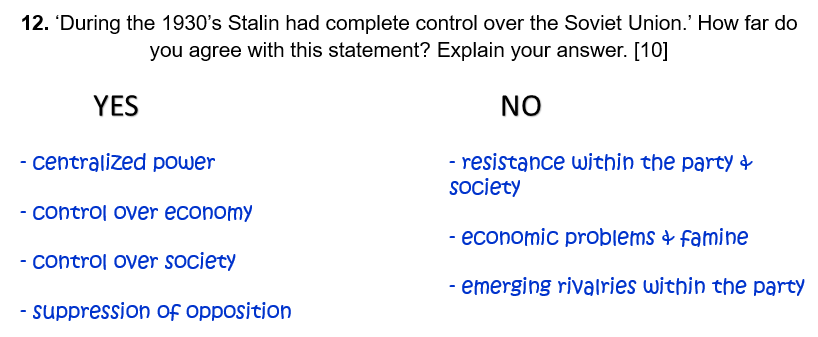
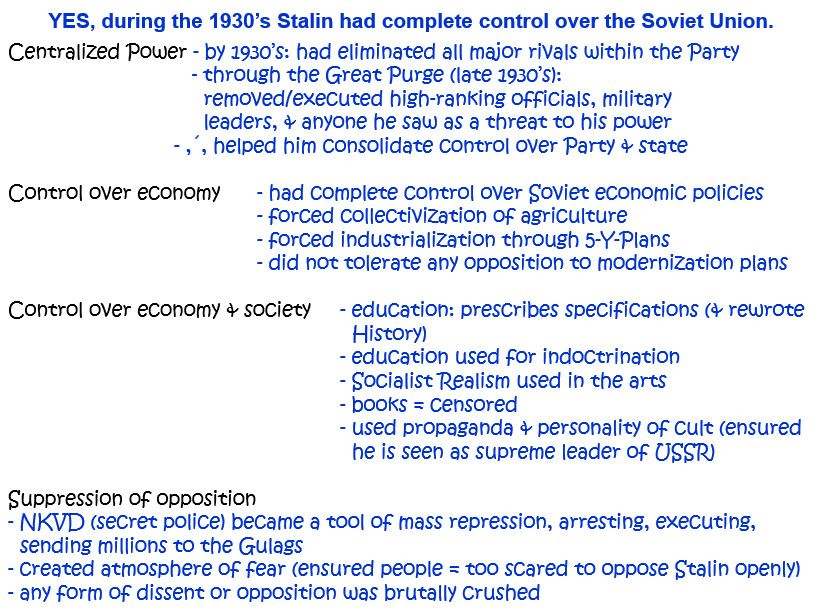
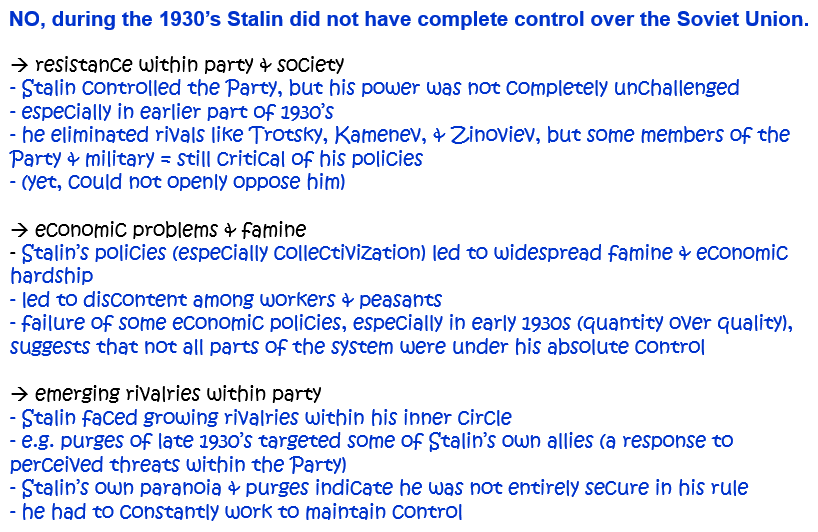
12. ‘During the 1930s Stalin had complete control over the Soviet Union.’ How far do you agree with this statement? Explain your answer. [10]
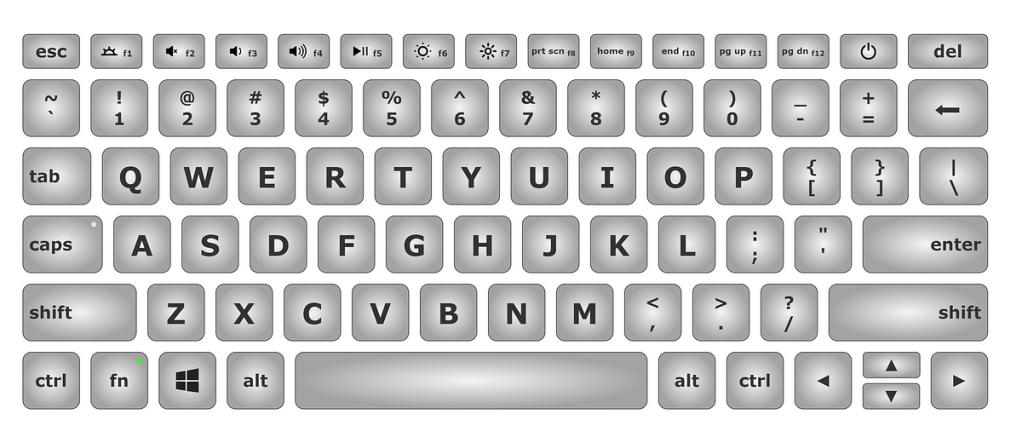
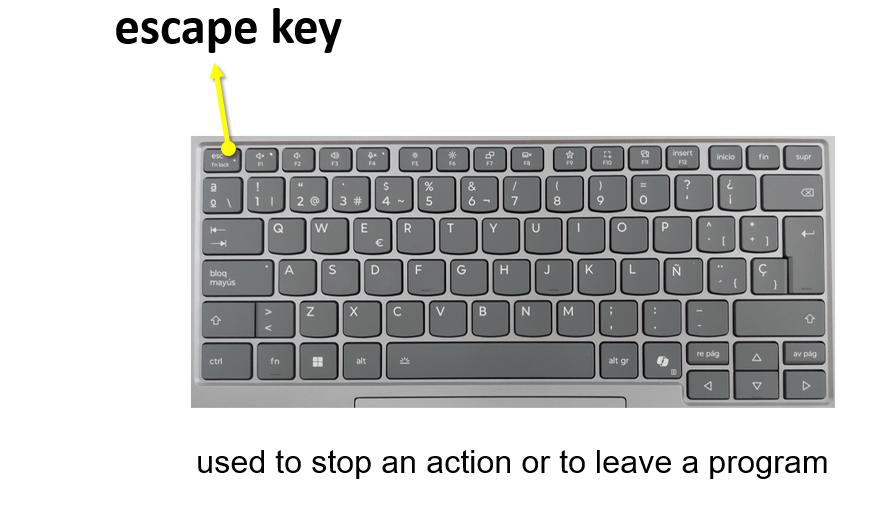
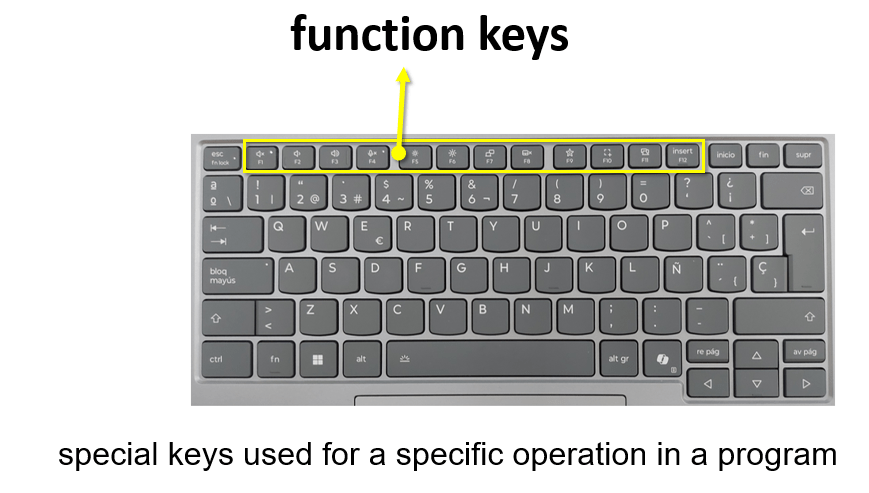
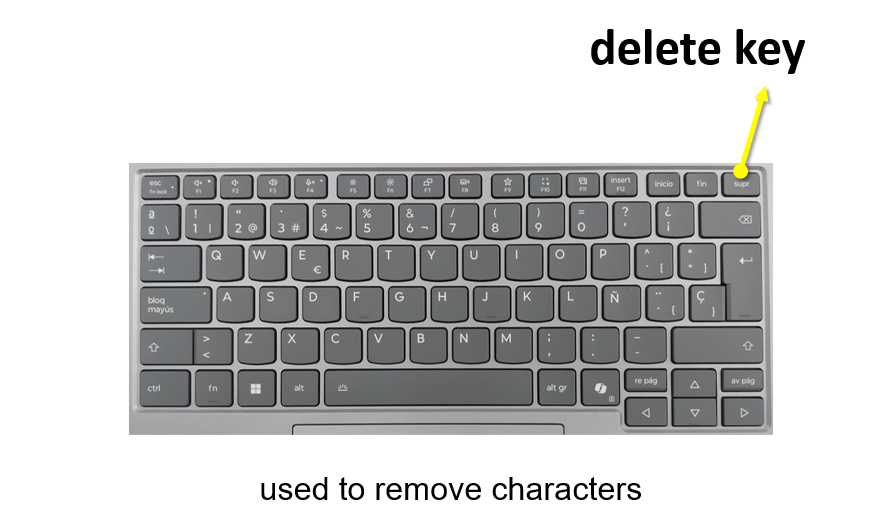
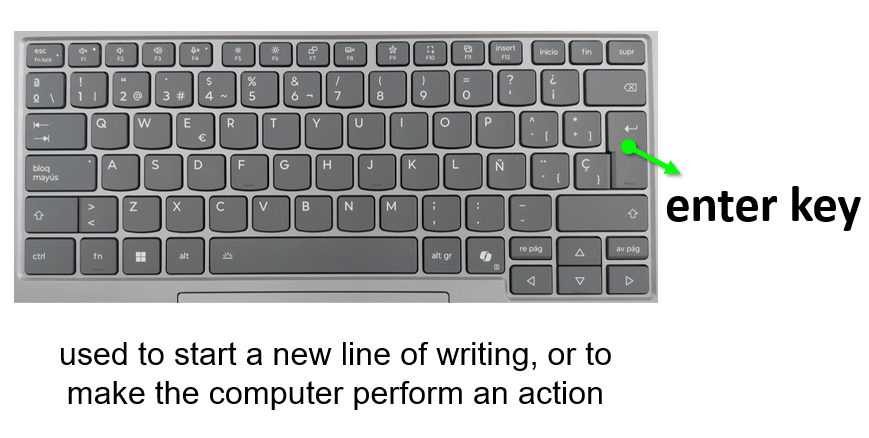
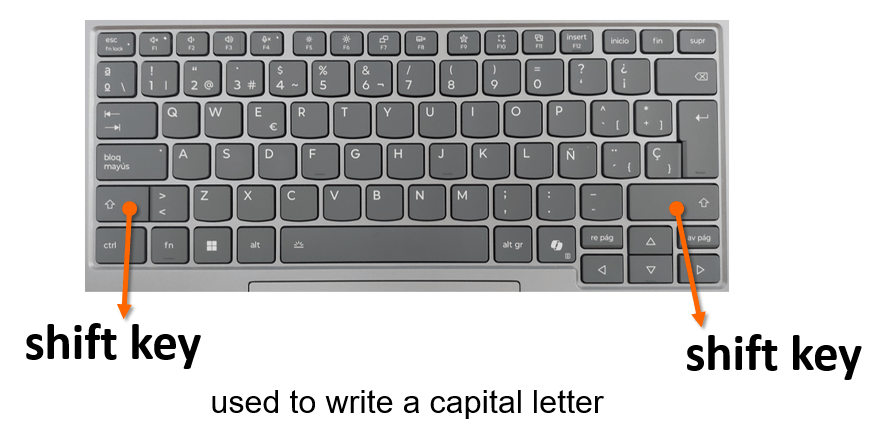
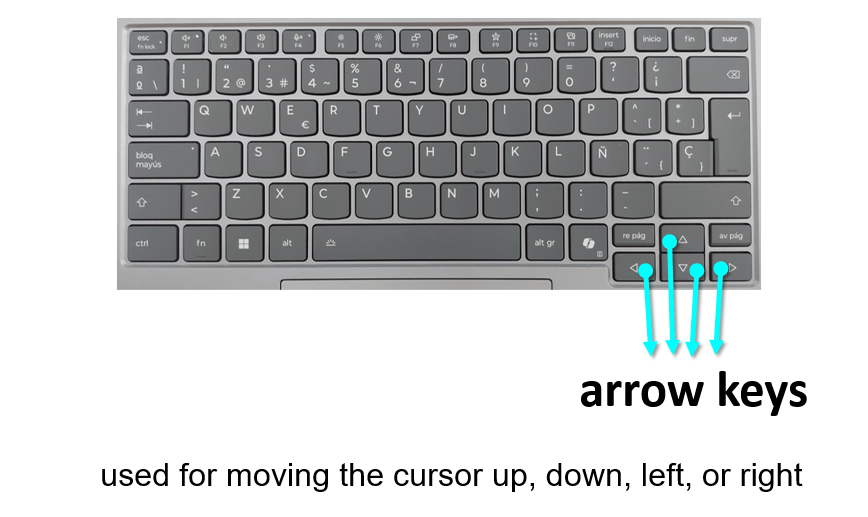
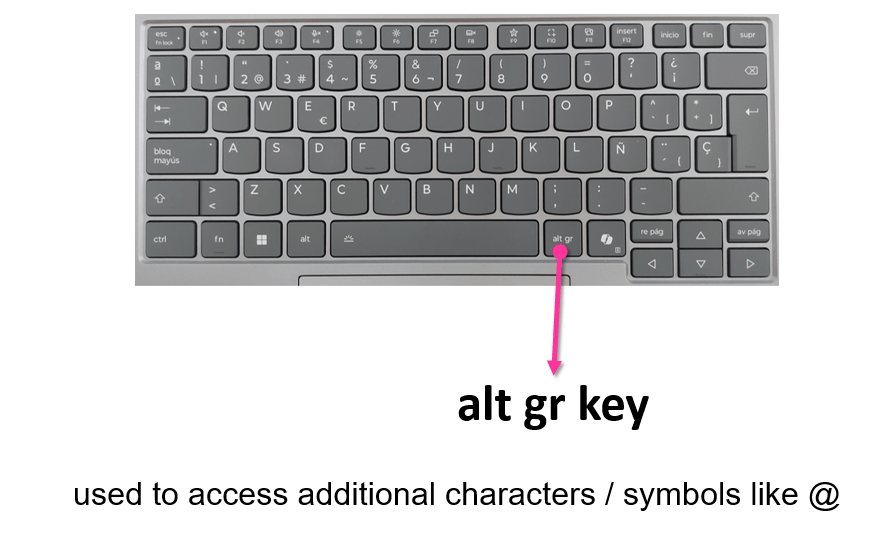
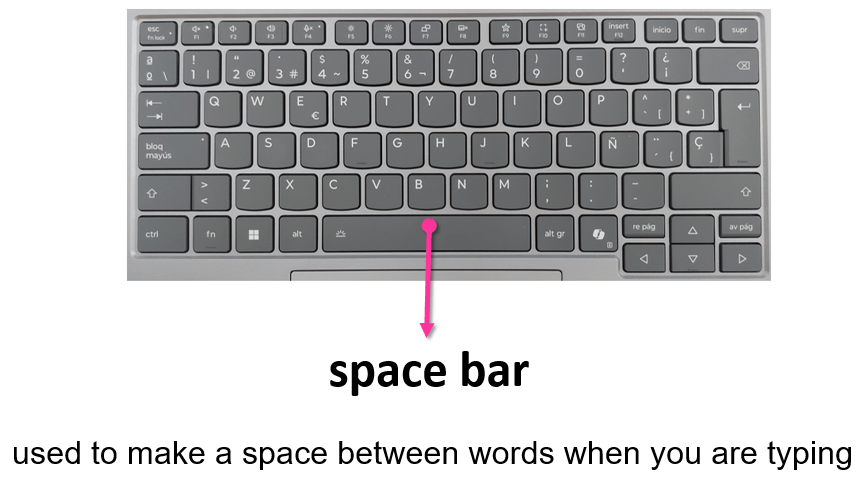
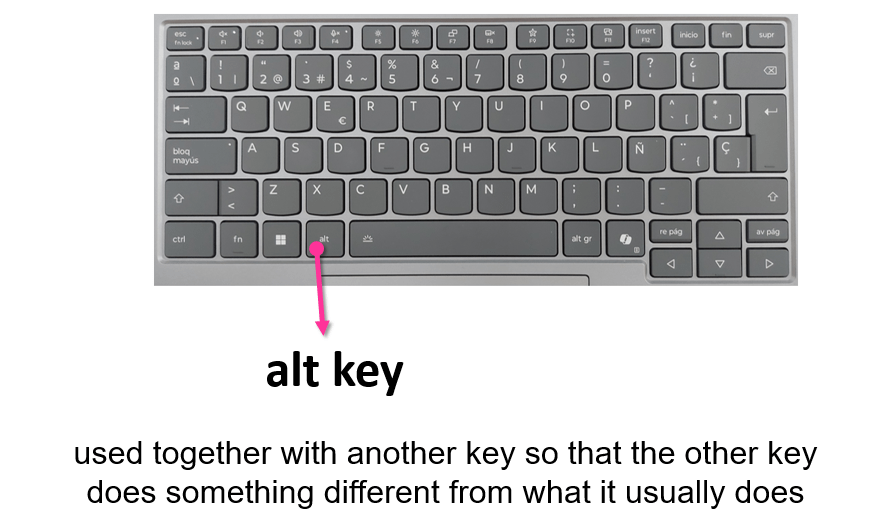
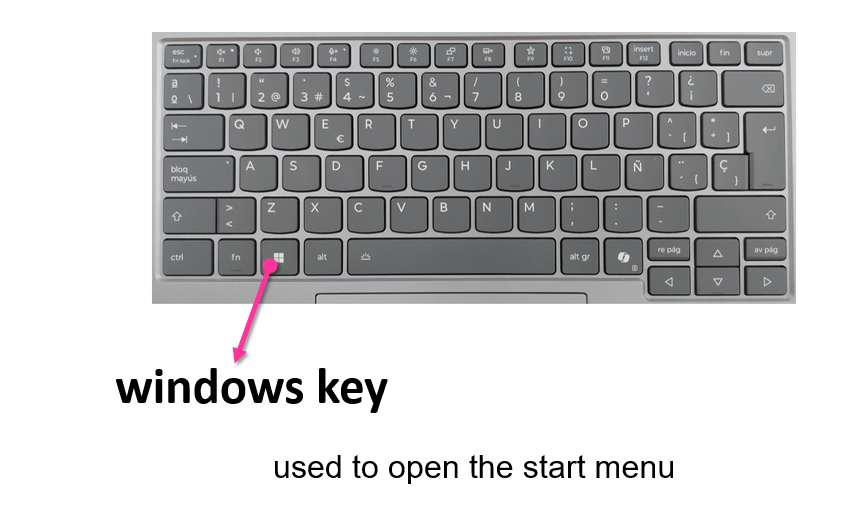
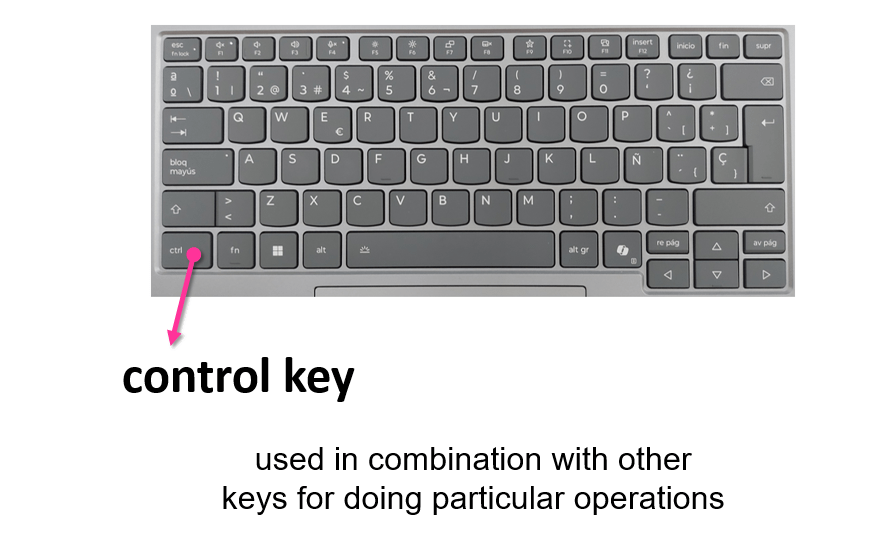
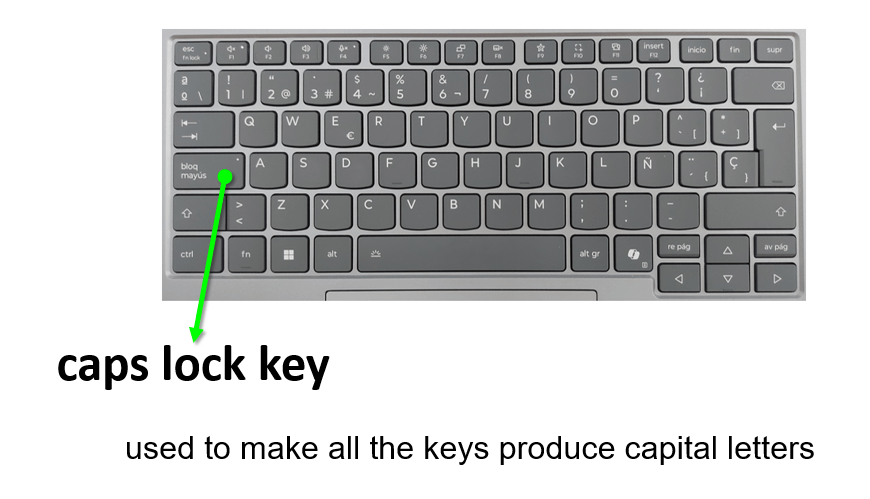
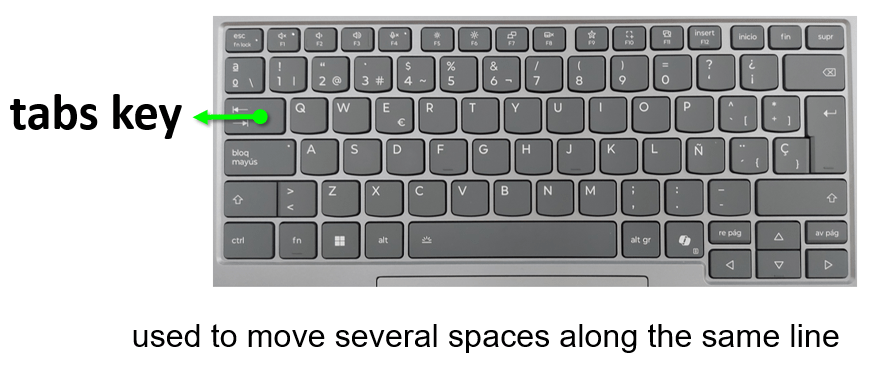
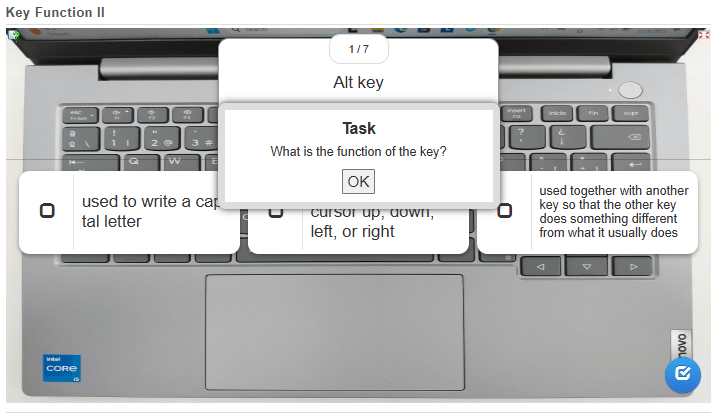
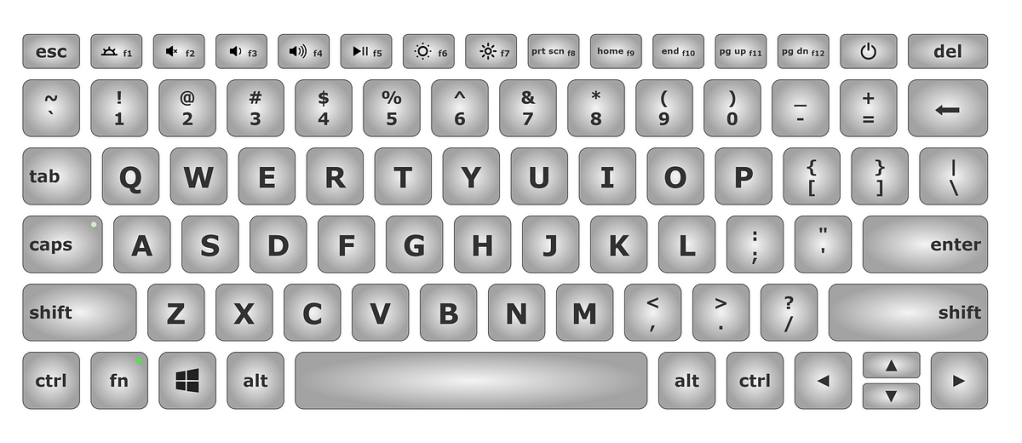
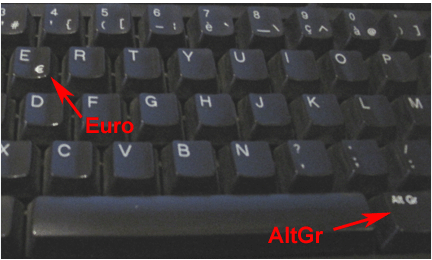
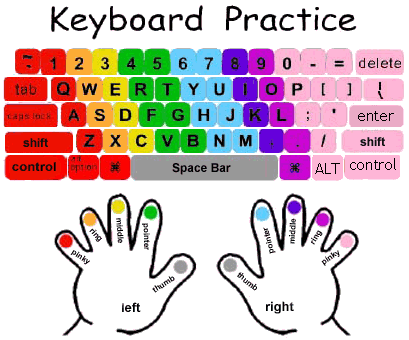
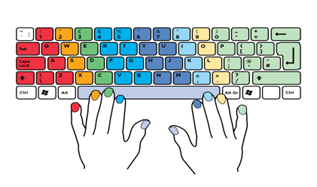
Your teacher will explain to you the functions of all these keys…
1.
2.
3.
4.
5.
6.
7.
8.
9.
10.
11.
12.
13.
14.
10.
Complete the following tasks online to test your knowledge on what you have learnt so far about the keyboard of your laptop. (You have to click on “OK” to start.)
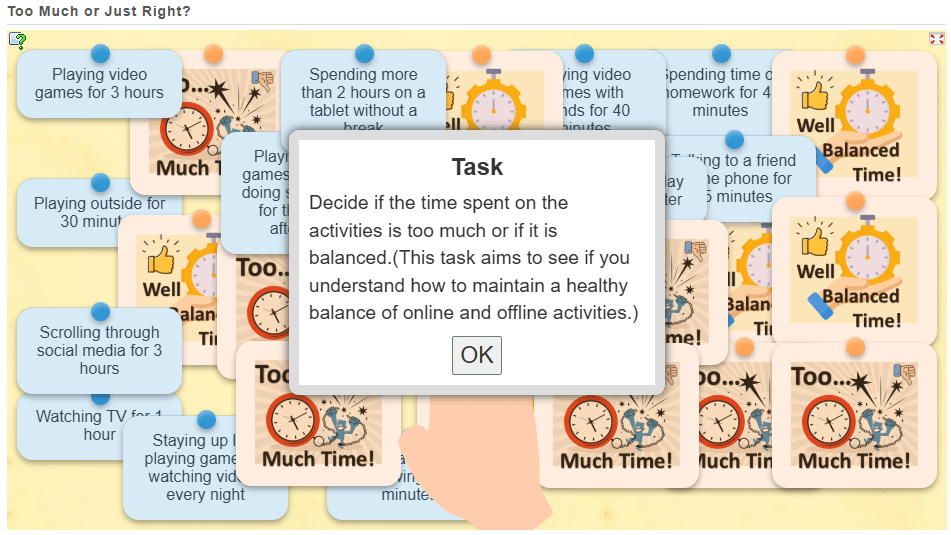
Complete the quiz below. It shows you various activities (e.g., playing outside, watching TV , etc.). You need to decide if it’s too much time spent, or balanced.
3.
Group Work: In small groups, make a “Healthy Screen Time Plan” with a balance of activities.
Here are some tips, showing Key Points to Maintain Balance!
Outdoor/Physical Play: At least 1-2 hours of physical activity each day is important for health and well-being.
Screen Time: Limit recreational screen time to about 1-2 hours per day, and use the rest of the time for non-screen activities.
Socializing: Encourage face-to-face time with family and friends.
Offline Creativity: Arts, crafts, and other hands-on activities help foster creativity and are important for development.
[This schedule balances the time kids spend using devices with time for physical activity, family interaction, and creative pursuits. It’s designed to keep children active, engaged, and happy while ensuring they have healthy boundaries for screen time.]
Steps to Create a “Healthy Screen Time Plan”
Discuss the Importance of Balance Start by talking to the students about the importance of balancing screen time with other activities, like playing outside, reading, and spending time with family. Reinforce that too much screen time can affect their health, while a good balance helps them feel happy and healthy.
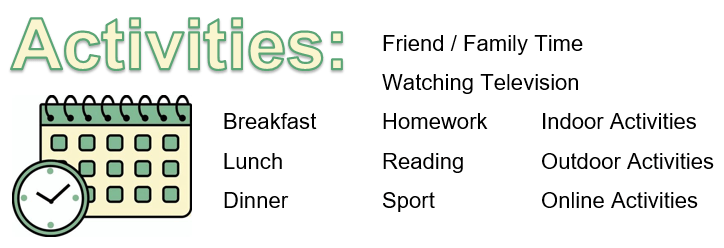
Brainstorm Different Types of Activities Ask students to brainstorm different types of activities they enjoy doing (both online and offline). For example:
Offline activities: playing sports, drawing, reading, playing board games, spending time with family, etc.
Online activities: playing games, watching videos, chatting with friends, educational apps, etc.
Set Screen Time Limits Help students set a time limit for how much screen time they think is reasonable each day. Based on their age, aim for about 1-2 hours of recreational screen time per day.
Example discussion question: “How much screen time do you think is healthy for you each day? Would you prefer 30 minutes, 1 hour, or 2 hours for fun activities on the screen?”
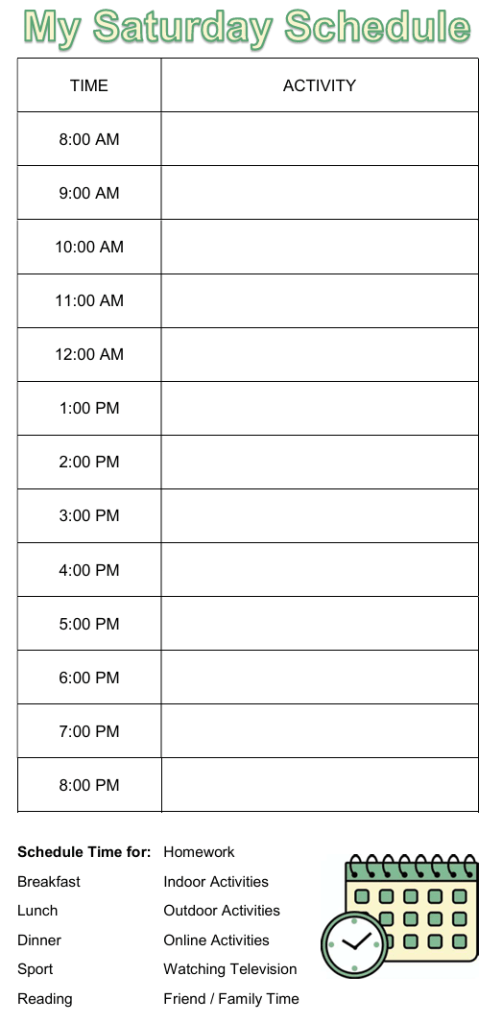
Write the Plan Have students write down their plan in a simple format. You could provide a worksheet with times of the day, and they can fill in their activities (both online and offline). They can also use pictures or symbols to make it easier for them to understand and remember.
4.
Create Your Own Schedule
Guide students to fill in their schedule with a balance of screen time and other activities. Here’s how they can use the example to make their own plan:
Morning: They can decide when to wake up and do something healthy, like a short workout or breakfast. This time is also good for offline activities like reading or chatting with family.
Mid-Morning: Set aside time for homework or learning activities that don’t involve screens, followed by screen time (e.g., watching an educational video or playing a fun game).
Afternoon: Include time for creative offline activities (e.g., drawing, building something with blocks), followed by outdoor play or screen-free time.
Late Afternoon/Evening: Schedule family time or quiet activities like reading a book. Then, decide if they want a short time for a movie or playing a game on a device.
Wind Down: End the day with some relaxing offline time, like a story, drawing, or chatting with family.
Personalize the Plan Students should make choices based on their interests and schedule. Encourage them to think about what they want their day to look like, and let them decide what works best for them.
Questions for reflection:
“What activities do you enjoy doing the most? How can you balance those with your screen time?”
“What can you do during your screen time to make it fun and educational?”
5.
Key Points to Maintain Balance:
Outdoor/Physical Play: At least 1-2 hours of physical activity each day is important for health and well-being.
Screen Time: Limit recreational screen time to about 1-2 hours per day, and use the rest of the time for non-screen activities.
Socializing: Encourage face-to-face time with family and friends.
Offline Creativity: Arts, crafts, and other hands-on activities help foster creativity and are important for development.
[This schedule balances the time kids spend using devices with time for physical activity, family interaction, and creative pursuits. It’s designed to keep children active, engaged, and happy while ensuring they have healthy boundaries for screen time.]
6.
Set a “Screen-Free Challenge” for one evening and report back!
7.
Create a personal screen-time goal!
8.
Share one way one can balance screen time.
9.
Here are some awesome internet safety games that not only entertain but will also teach you essential online skills.
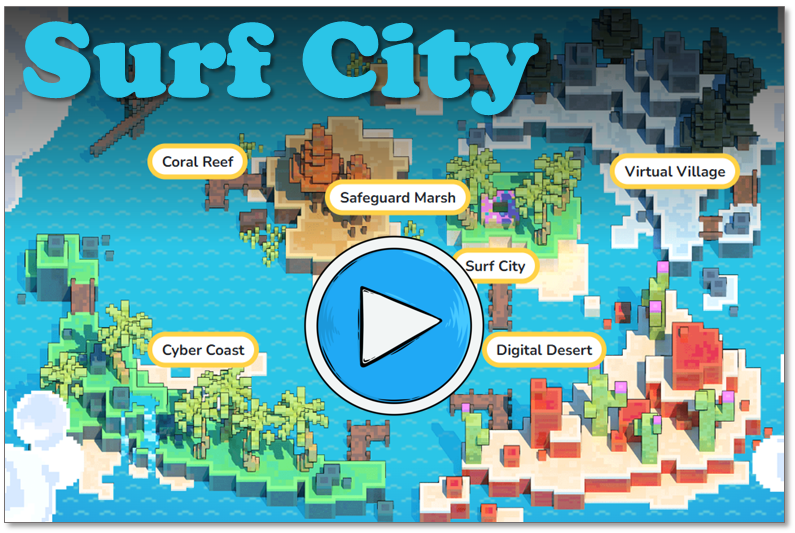
As you navigate through a virtual city, you will get pop-up questions at different points. By answering these questions, you do in an interactive quiz that helps you to learn essential internet safety skills.
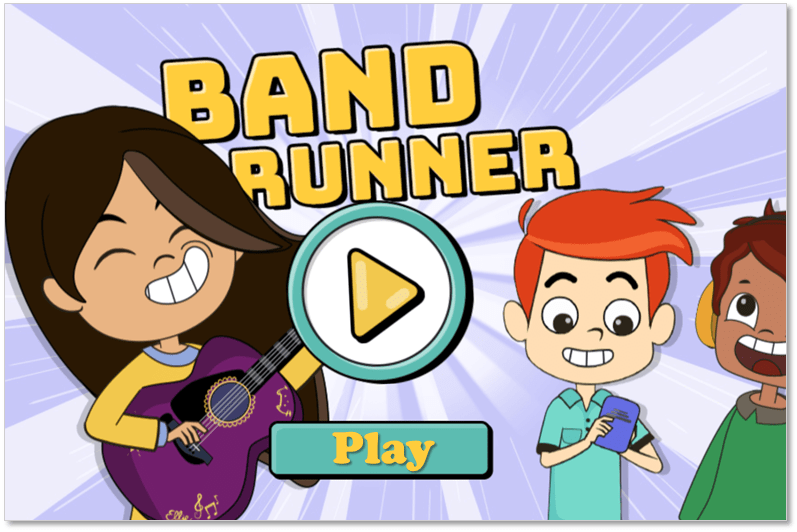
Band Runner blends fast-paced action with important safety lessons. You play as characters Alfie and Ellie. They run from potential dangers. You will help them recognize online predators and make quick, safe decisions.
This story helps us to understand what cyberbullying looks like, the impact it has, and how to respond appropriately.
Discussion Points for “Jake and the Cyberbully”
How did Jake feel when he was being bullied online?
Guide students to express how Jake might have felt: sad, frustrated, confused, and hurt.
Help them understand that cyberbullying can cause feelings of loneliness.
What did Jake do when he first saw the mean messages?
Discuss the importance of ignoring bullies and not responding to their hurtful messages.
Explore why Jake felt he couldn’t ignore the bullying at first.
How did Jake’s friend Leo help him?
Leo encouraged Jake to talk to a trusted adult and report the bully. Discuss how friends can help each other when they’re going through tough situations.
What would you do if someone was bullying you online?
Discuss what actions students should take: don’t respond to the bully, tell an adult, and report the bully.
Why is it important to talk to an adult when you experience cyberbullying?
Reinforce that adults can help solve problems and protect kids from cyberbullying.
Do you think it’s okay to be mean to others online, even if you don’t see them in person? Why or why not?
Encourage students to think about empathy and treating others with kindness online, just like they would in real life.
6.
It’s important to treat others kindly online.
If you experience cyberbullying, tell a trusted adult.
Don’t engage with bullies or respond to mean comments. Instead, report it.
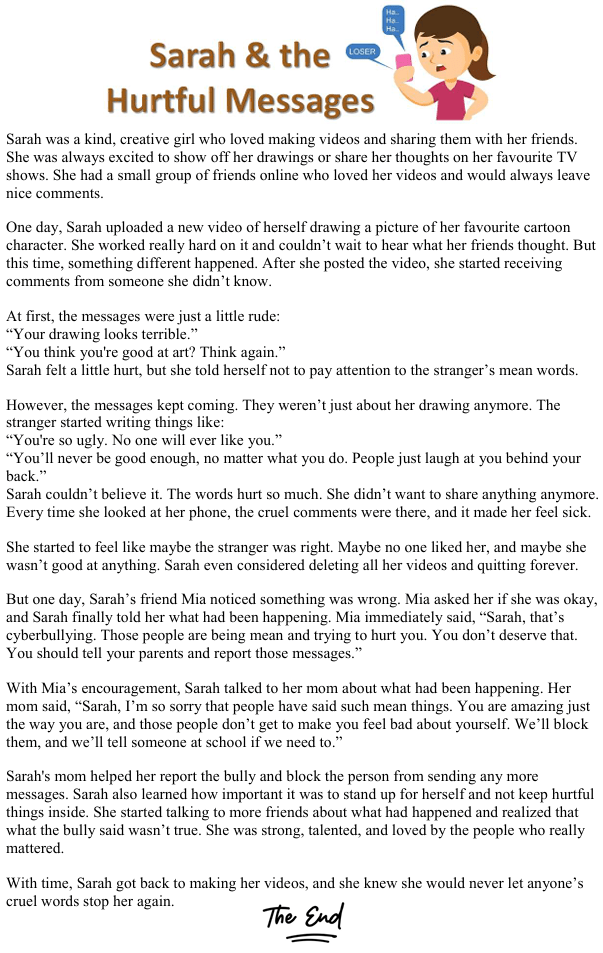
This story highlights a more severe instance of cyberbullying, with a focus on how it can impact a child’s emotions and self-worth. It also emphasizes the importance of talking to trusted adults, reporting the behavior, and recognizing that the bully’s words do not define the victim.
Discussion Points for “Sarah and the Hurtful Messages”
How did Sarah feel when she started receiving mean messages from the stranger?
Guide students to identify feelings like sadness, hurt, and confusion. Encourage empathy by asking how they would feel if something like that happened to them.
What made Sarah stop wanting to share her videos or create new ones?
Discuss how cyberbullying can make people feel like giving up on things they enjoy. Reinforce the idea that bullies want to make others feel bad, but their words don’t reflect the truth.
How did Mia help Sarah when she found out about the bullying?
Discuss how friends can support each other in tough situations, and why it’s important to tell someone you trust when you’re being hurt online.
What advice would you give Sarah if she were a friend of yours?
Have students share ideas of how they would comfort and encourage Sarah, such as reminding her of her talents, supporting her decision to report the bully, and helping her feel better.
How did Sarah’s mom help her?
Emphasize the importance of involving a trusted adult to stop bullying. Discuss how parents and teachers can help solve problems and keep children safe online.
Why is it important to tell an adult and report a bully?
Discuss how reporting helps protect the person being bullied and prevent the bully from hurting others.
What would you do if you saw someone else being bullied online?
Encourage students to stand up for others who are being bullied by telling an adult or offering kind words of support.
9.
Cyberbullying can be really hurtful, but it’s never your fault.
Always talk to a trusted adult when someone is being mean to you online.
Don’t listen to bullies—what they say is not true. You are valuable and worthy of kindness.
It’s important to report cyberbullying so it doesn’t happen to you or others.
10.
General Discussion Points for Both Stories…
These discussion points help students understand the seriousness of cyberbullying while also teaching them the steps they can take to protect themselves and others. 😊
What is Cyberbullying?
Help students define what cyberbullying is: using technology to be mean, hurtful, or threatening to others.
How Can Cyberbullying Affect People?
Discuss the emotional impact of cyberbullying: it can make people feel sad, angry, or even scared.
Why Should We Always Be Kind Online?
Reinforce the importance of kindness in the digital world, just like in person. Teach students to treat others how they would like to be treated.
What Should You Do If You Are Cyberbullied?
Have students share steps they would take if they were cyberbullied: stay calm, don’t reply to the bully, tell a trusted adult, and report the bully.
What Should You Do If You See Someone Else Being Bullied?
Discuss the importance of standing up for others and helping them feel safe by reporting the situation to an adult.
Cyberbullying – How to Avoid Cyber Abuse. (3:00 minutes long)
12.
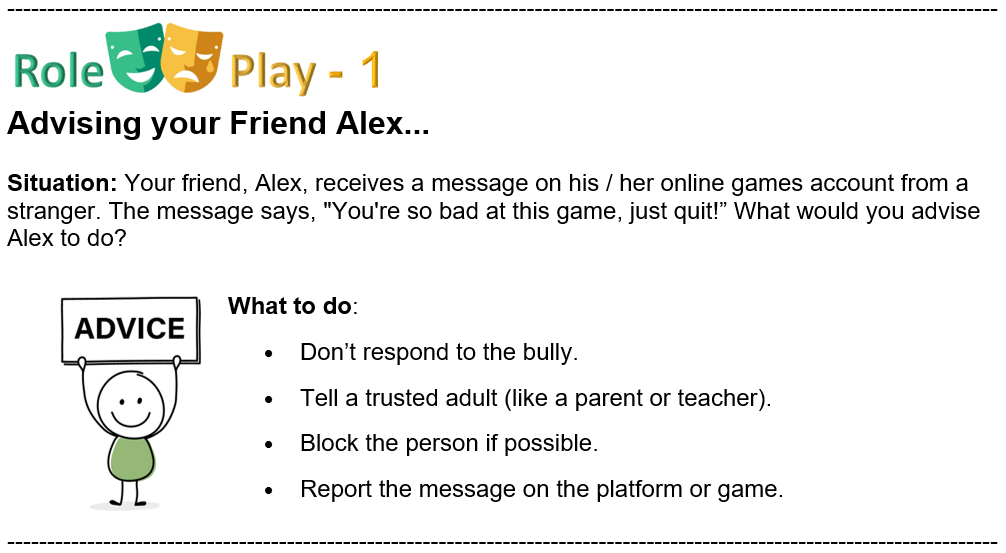
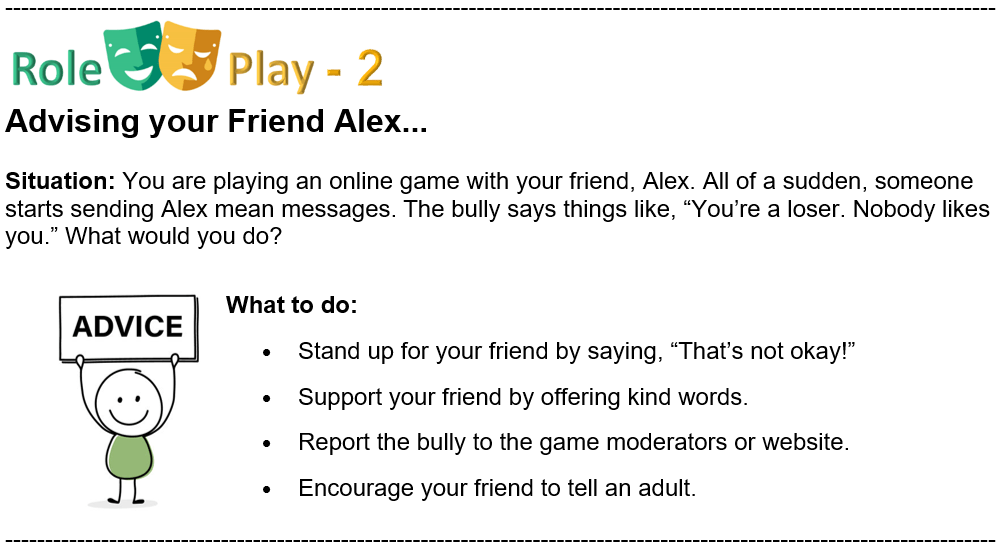
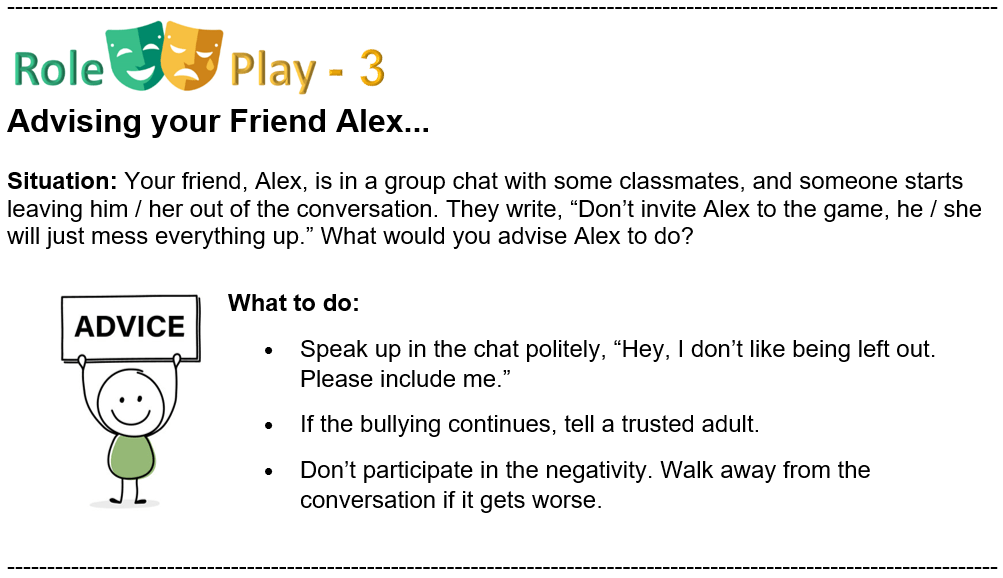
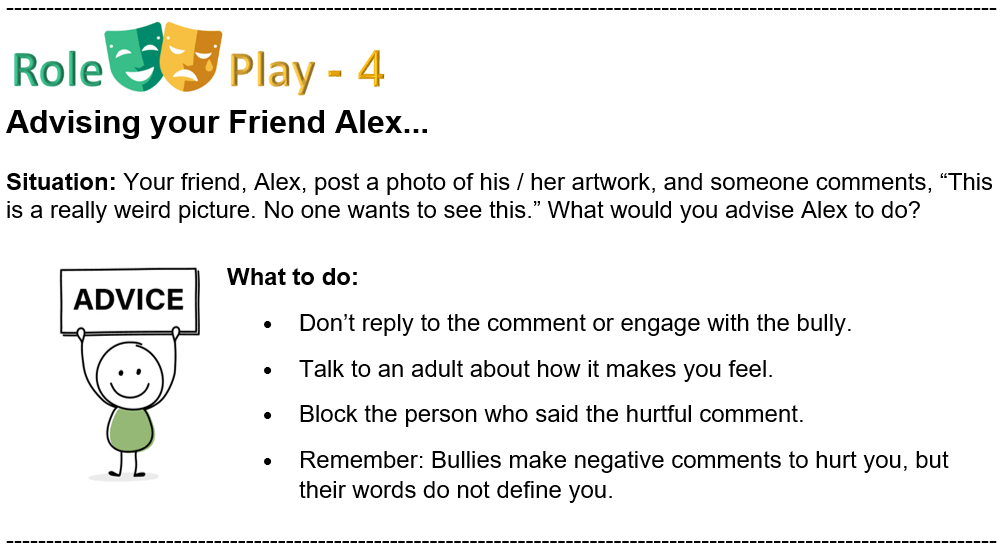
And now for a bit of role- play! You are going to role-play different scenarios, to practice (1) how to respond to a cyberbully, (2) how to report the behaviour, and (3) to seek help from an adult.
[Students act out different scenarios (e.g., receiving a mean message, seeing someone get bullied) and discuss what to do. These scenarios allow students to practice how they would respond to common cyberbullying situations. Encourage them to role-play different responses and discuss why those actions are helpful. You can also include follow-up questions to reflect on the feelings of the victim and the best ways to support them. Below are five role-play scenarios on cyberbullying, designed to help students practice different responses and discuss what to do when they encounter cyberbullying.]
Here are some awesome internet safety games that not only entertain but will also teach you essential online skills.
As you navigate through a virtual city, you will get pop-up questions at different points. By answering these questions, you do in an interactive quiz that helps you to learn essential internet safety skills.
Band Runner blends fast-paced action with important safety lessons. You play as characters Alfie and Ellie. They run from potential dangers. You will help them recognize online predators and make quick, safe decisions.
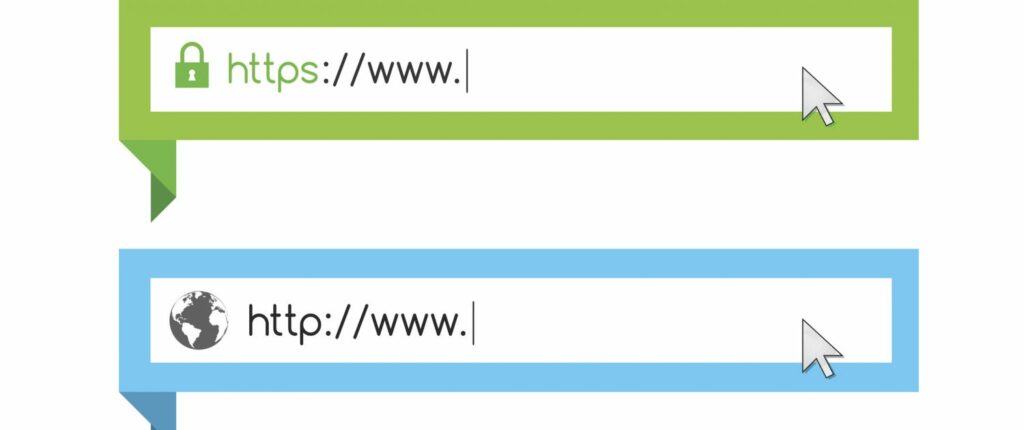
Look for “https://” at the beginning of the website address. It means the website is safe and keeps your information protected.
It Has a Privacy Policy
Safe websites tell you how they keep your information private and safe. They explain what they do with your information.
Parental Controls
Safe websites let parents check and control what kids can see and do on the website.
It’s from a Trusted Source
The website comes from a company, school, or group you know and trust, like your school website or a well-known store.
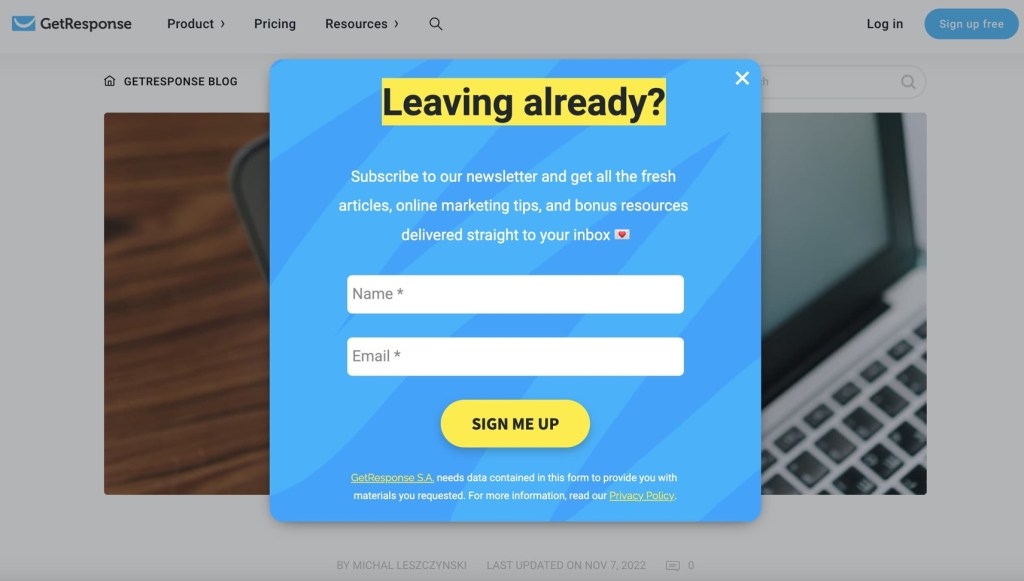
No Annoying Pop-Up Ads
Safe websites don’t have annoying pop-up ads that could take you to a bad website.
Clear Contact Information
The website shows where you can contact the people who run the website if you have questions or problems.
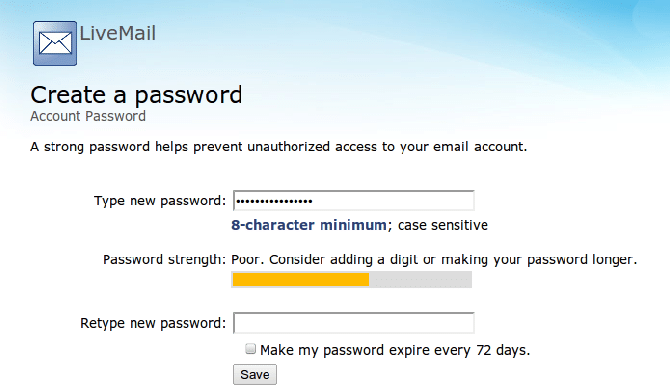
Strong Passwords
If you need to make an account, the website asks you to make a strong password with letters, numbers, and symbols to keep your account safe.
5.
We will now consider what makes a website unsafe:
Things That Make a Website Unsafe:
No “https” in the Website Address If the website doesn’t start with “https://,” it might not be safe to use.
No Privacy Policy Unsafe websites don’t tell you how they protect your personal information.
Pop-Up Ads or Weird Links Unsafe websites show pop-up ads or strange links that might trick you into clicking something bad.
Asking for Too Much Personal Info If the website asks for your address, phone number, or other private information that doesn’t seem needed, it might not be safe.
No Way to Contact Them If the website doesn’t have a way to contact someone for help or questions, it might be unsafe.
Spelled Wrong or Strange Name If the website has a funny name or weird spelling, it could be a trick to get you to a fake website.
Confusing or Fake Information If the website has confusing information or promises things that seem too good to be true, it’s best to stay away.
6.
Let’s look at ways in which websites are unsafe…
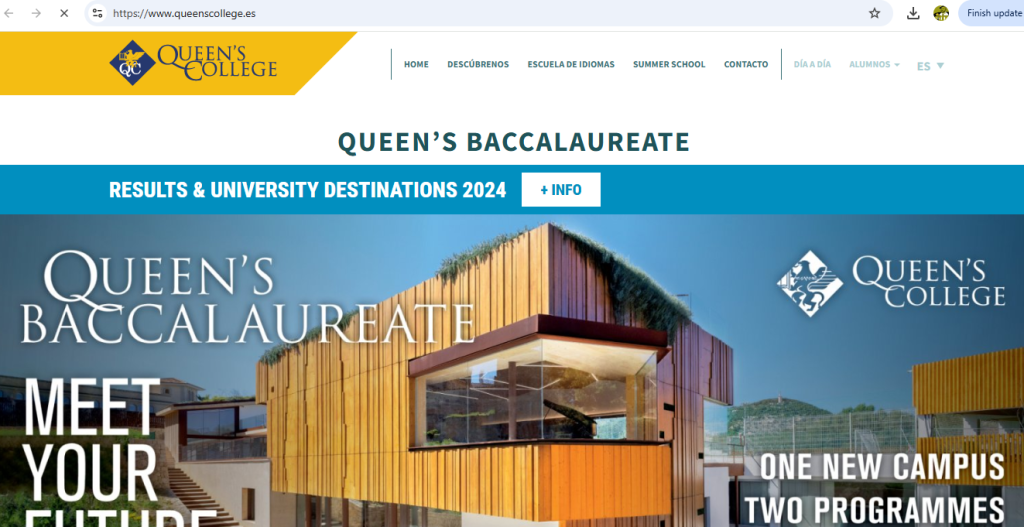
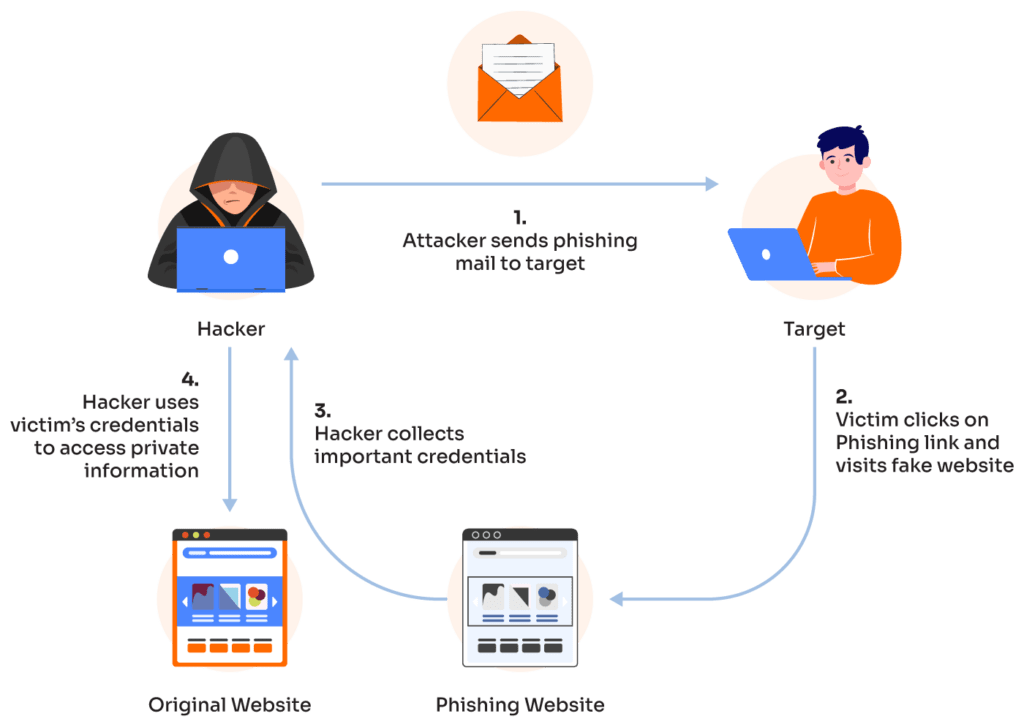
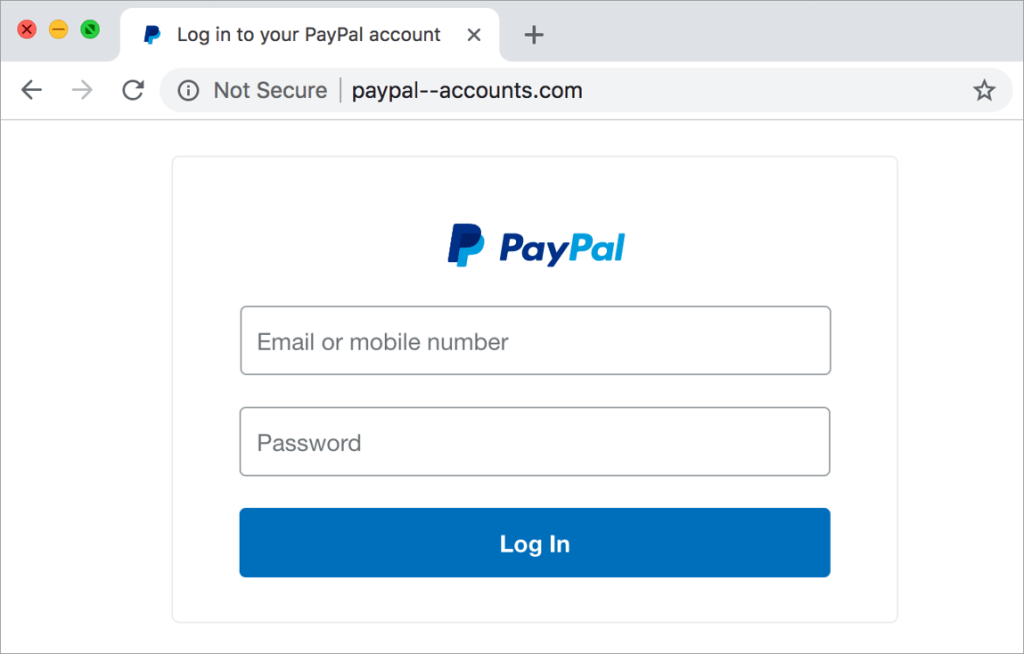
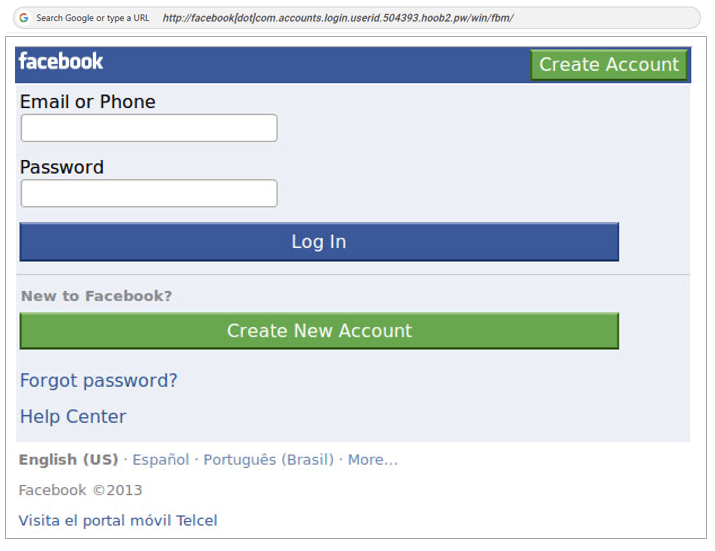
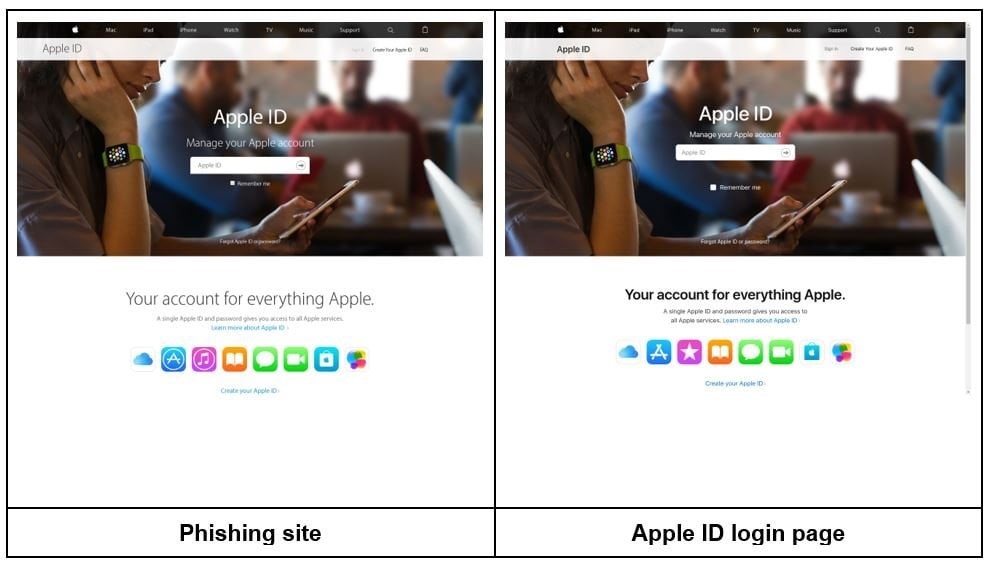
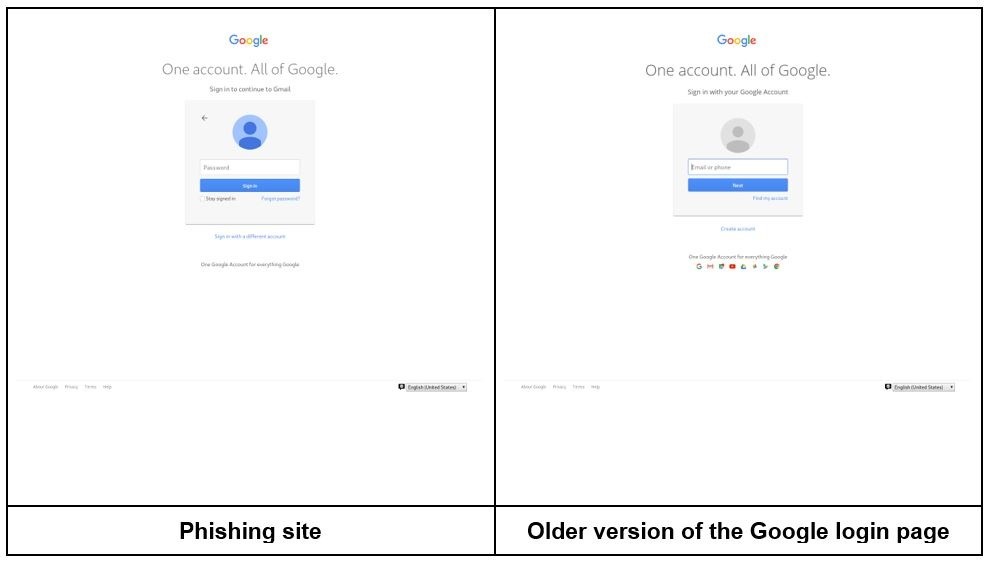
This is a fake login page that mimics a real service like Google or PayPal.
How does phishing work?
Phishing is a technique used by cybercriminals to trick people into giving up personal information such as credit card details and login details. It can come in many forms, including telephone phishing, smishing (SMS phishing), phishing emails, and phishing websites.
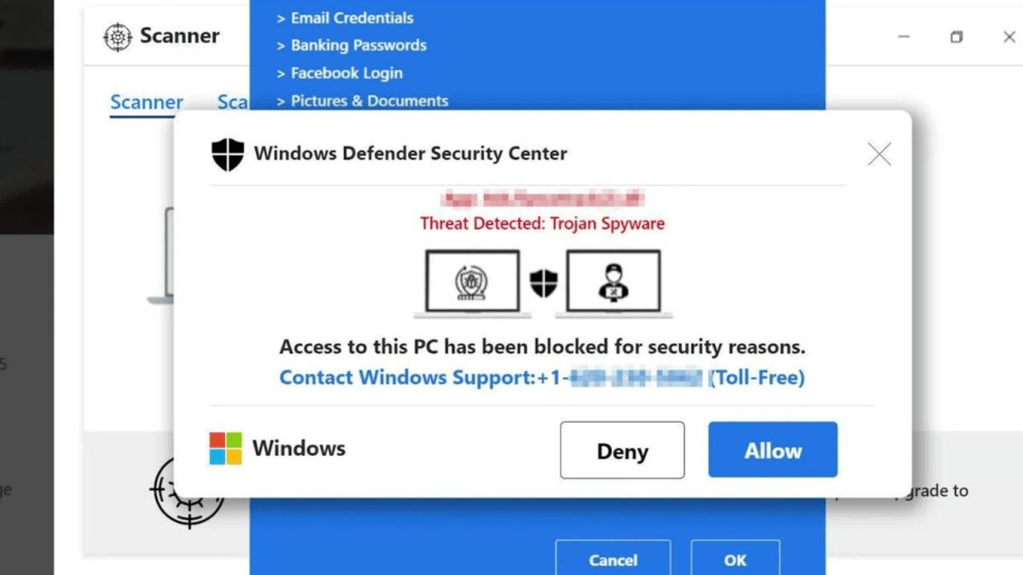
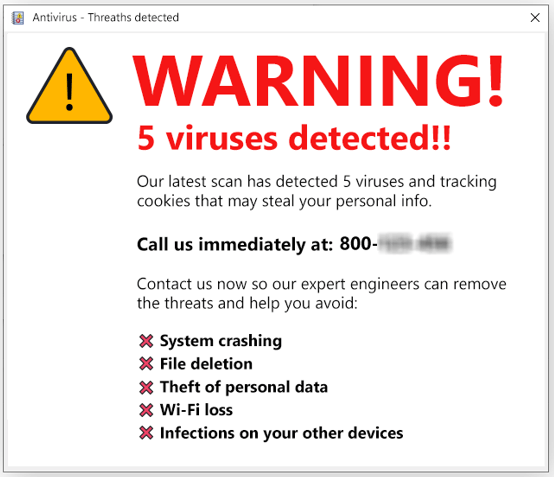
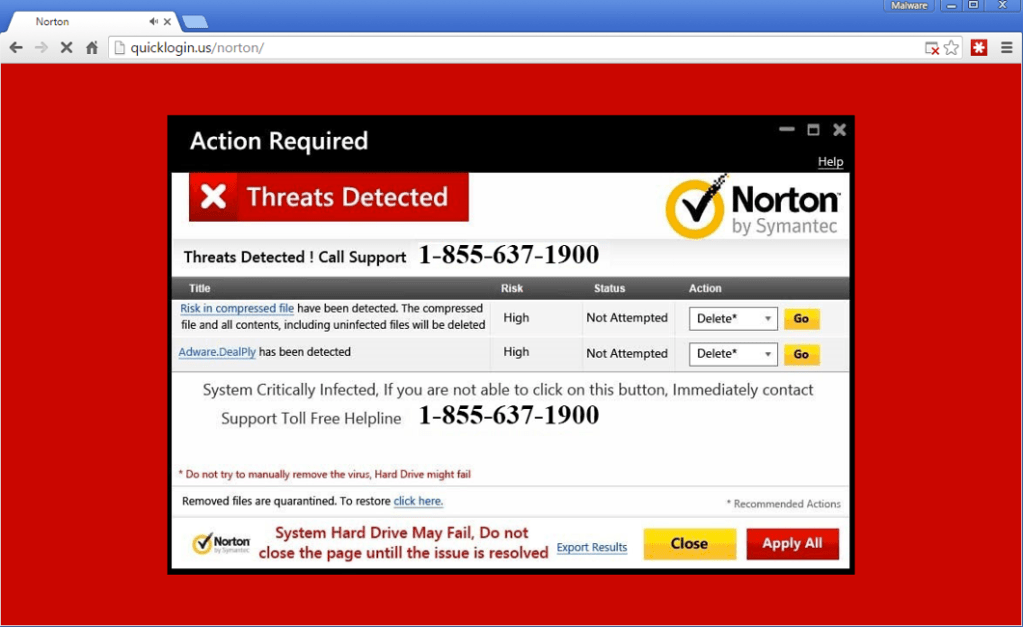
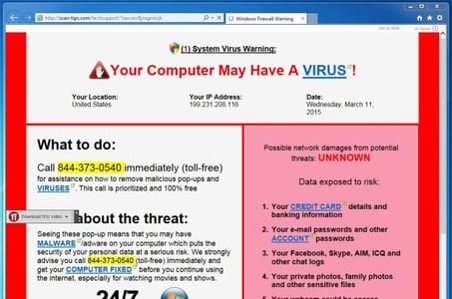
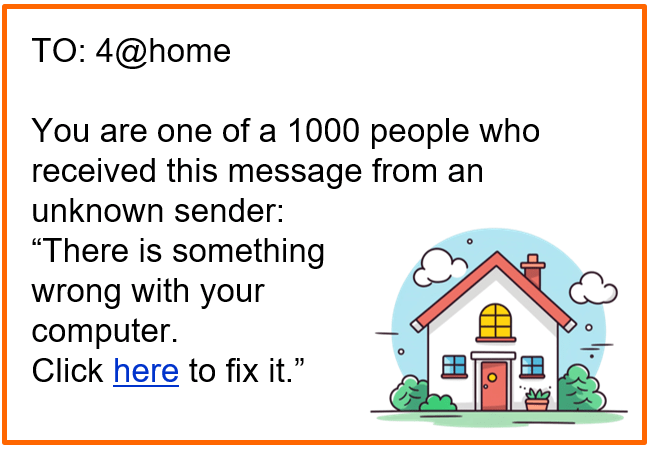
This is a flashing pop-up claiming “Your computer is infected! Click here to scan now!”
Some scare-war sites ask you to “contact a Helpline”. When you call the number, you would be asked to allow the technician to take remote control of your computer.
Does Your Computer Have A VIRUS? (5:46 minutes long)
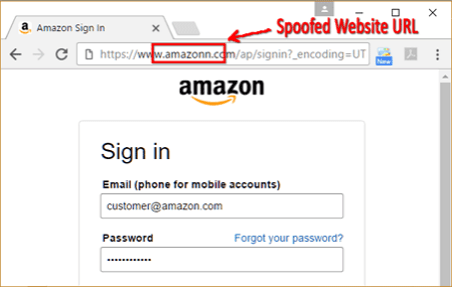
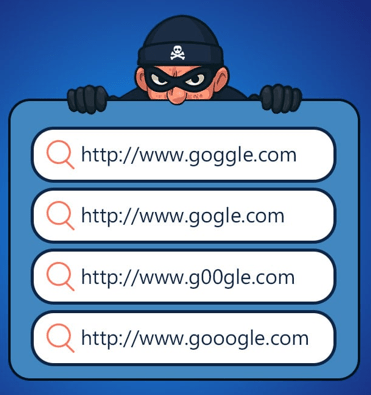
This is a website that looks like amaz0n.com instead of amazon.com, showing ads or malware downloads.
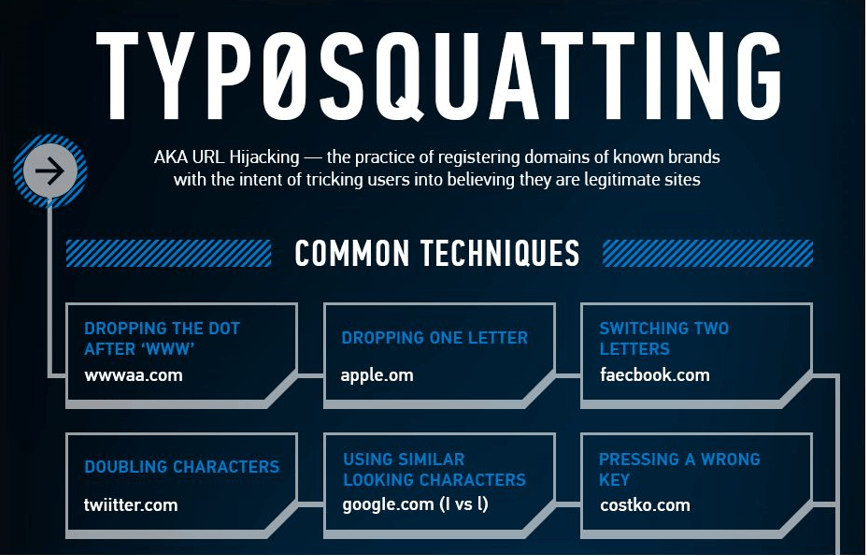
Typo-squatting, is a form of URL hijacking, where criminals register domain names that are slightly misspelled versions of legitimate websites. They do this to trick users into thinking that they use the real website.
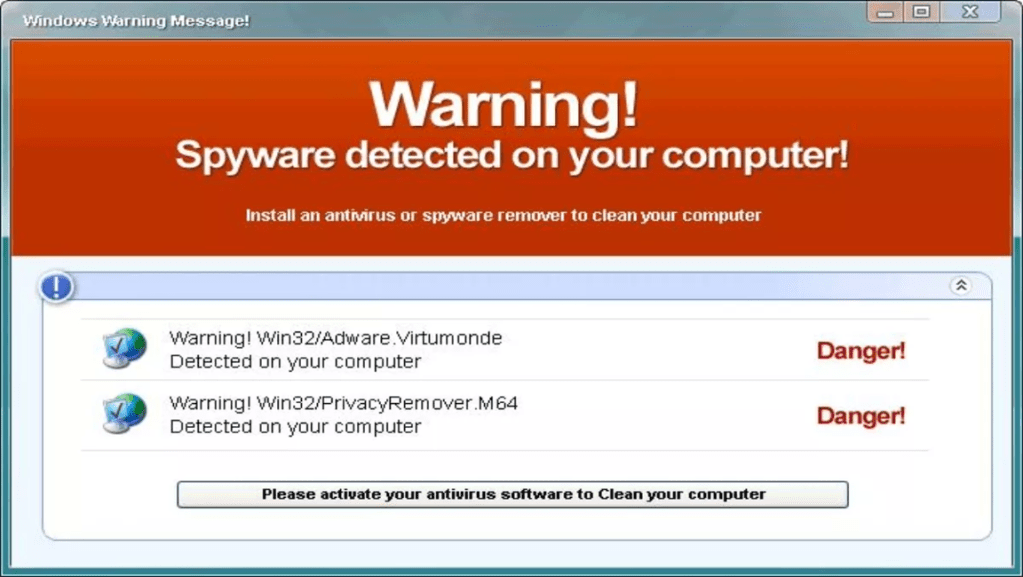
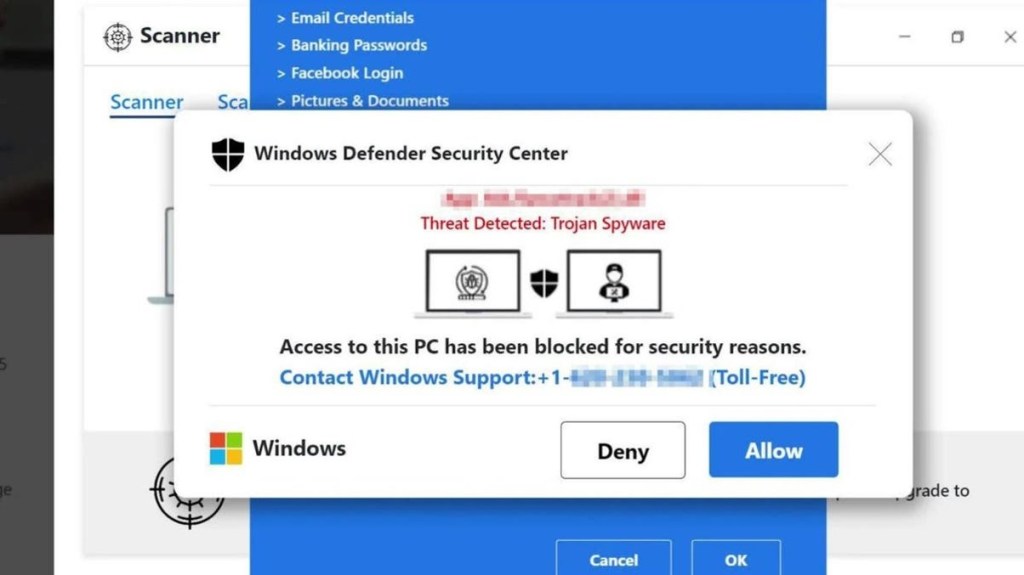
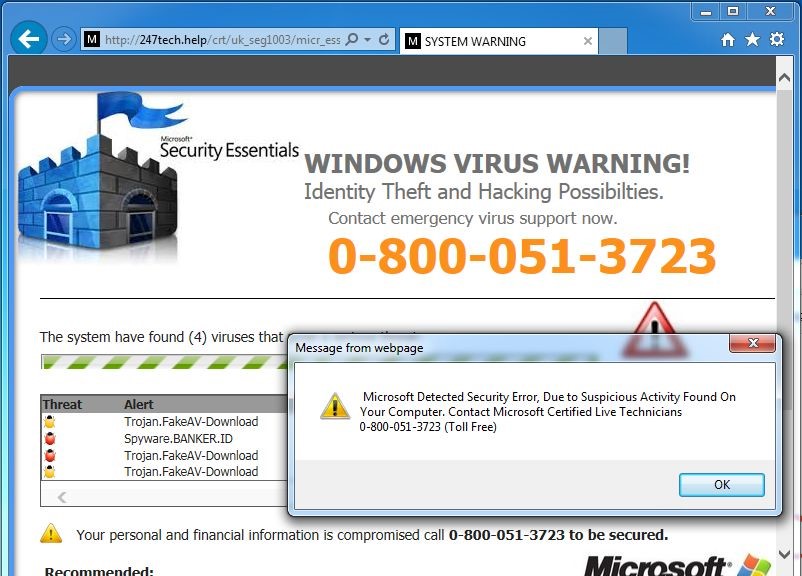
This is a page that locks the browser and displays a fake Microsoft or Apple warning with a phone number to call.
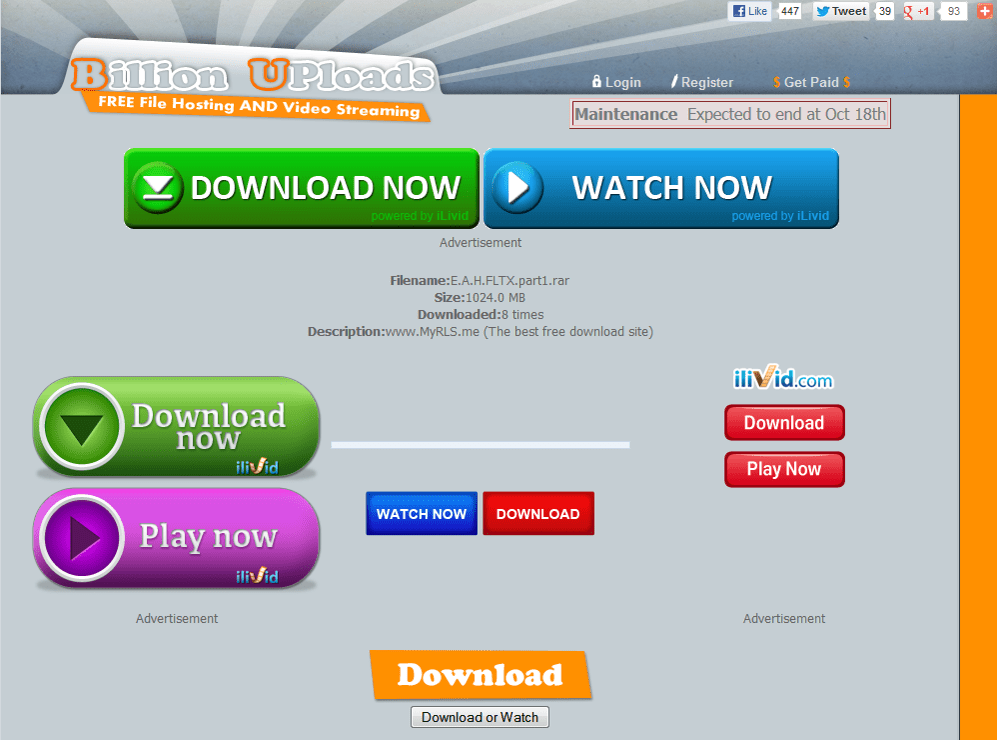
This is a a download page for popular software that includes multiple misleading “Download” buttons.
7.
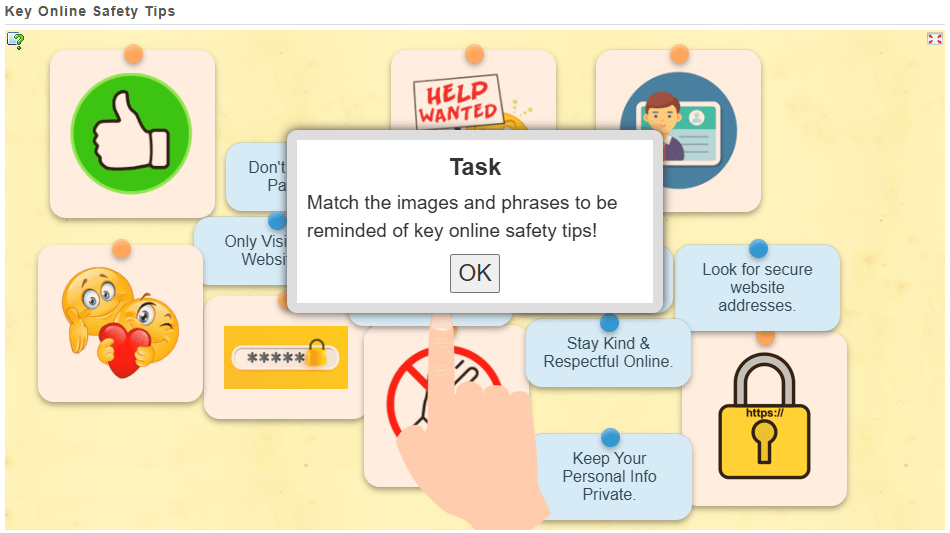
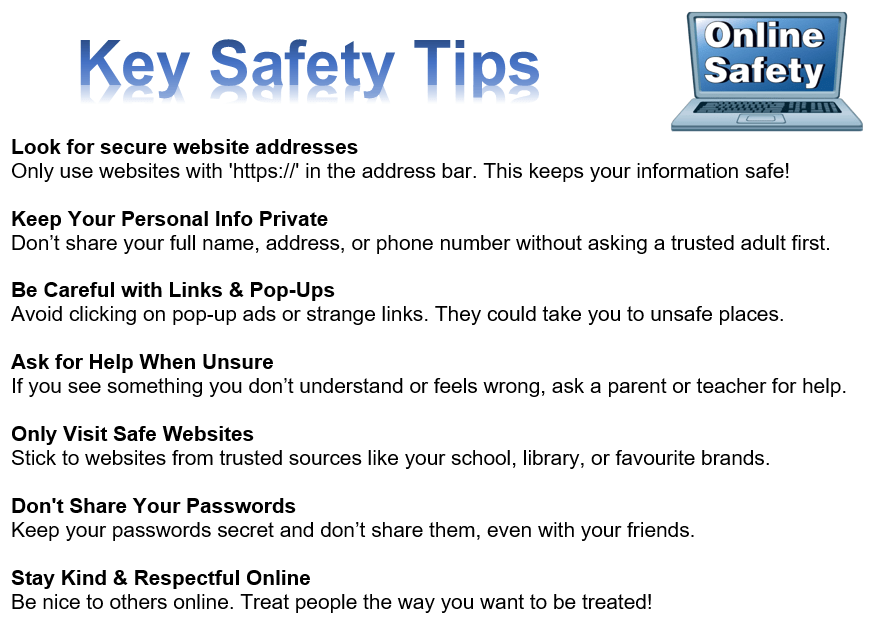
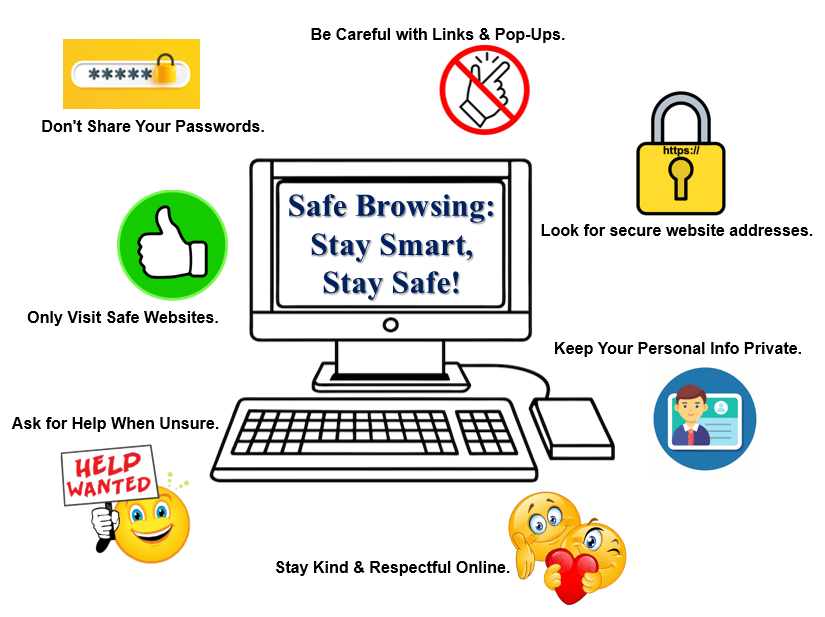
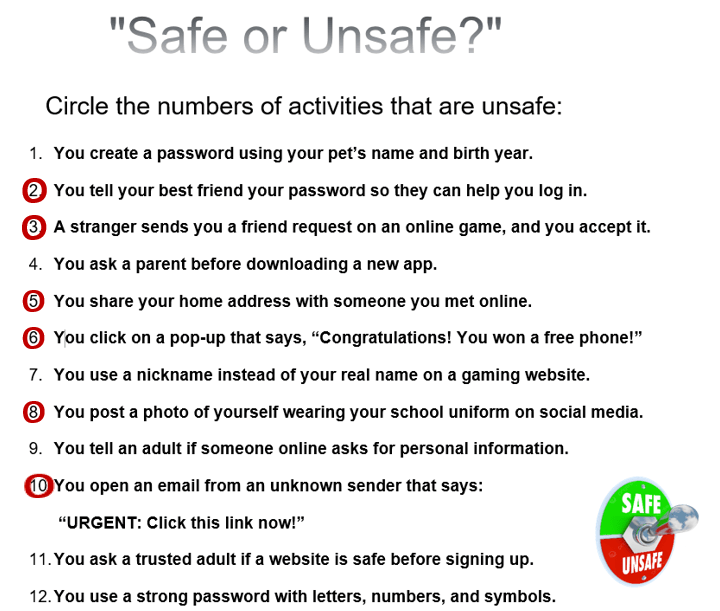
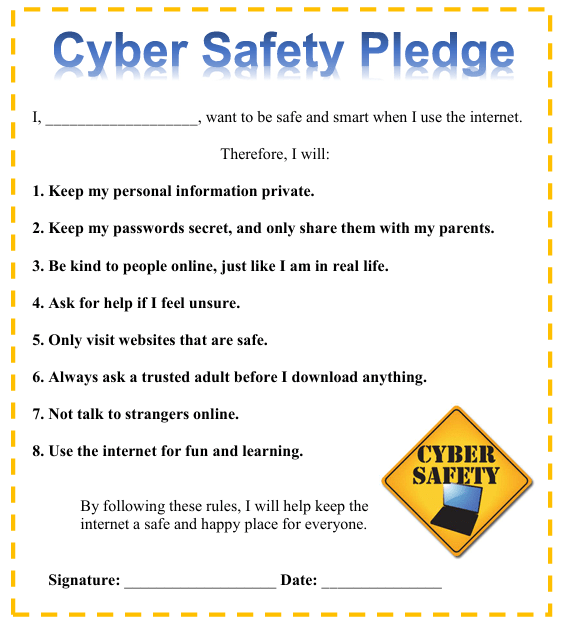
Do you remember these online safety tips?
8.
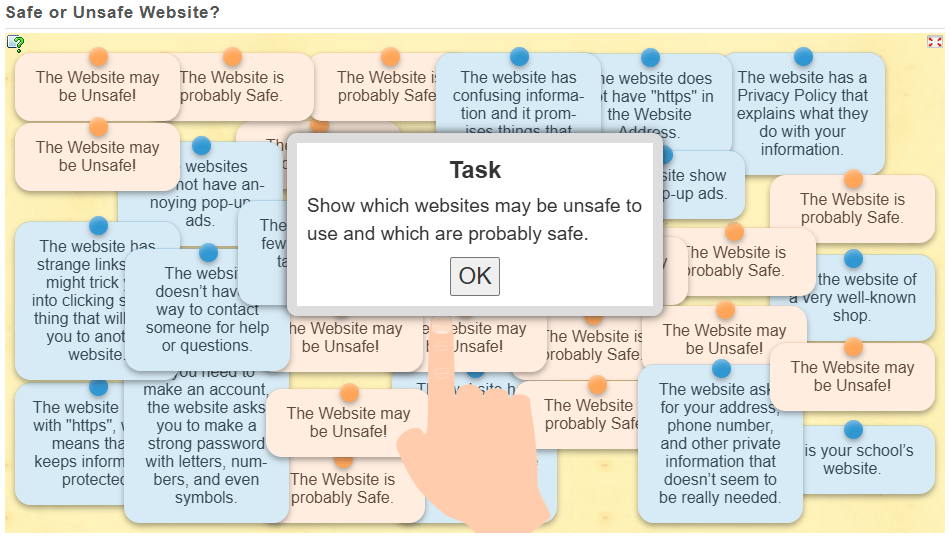
Can you identify which websites may be unsafe to use and which are probably safe?
Here are some awesome internet safety games that not only entertain but will also teach you essential online skills.
As you navigate through a virtual city, you will get pop-up questions at different points. By answering these questions, you do in an interactive quiz that helps you to learn essential internet safety skills.
Band Runner blends fast-paced action with important safety lessons. You play as characters Alfie and Ellie. They run from potential dangers. You will help them recognize online predators and make quick, safe decisions.
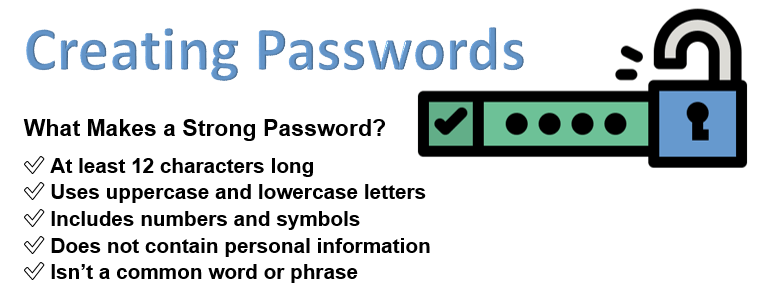
Now, let’s talk about the importance of strong passwords…
Weak passwords are easy to guess and unsafe!
123456 (Common and predictable)
password (One of the most commonly used passwords)
qwerty (Straight from the keyboard layout)
john2008 (Includes a name and birth year, which is easy to guess)
letmein (A simple phrase that hackers often try)
Strong passwords are difficult to guess and more secure!
G8f$3mLp@Xz (Random mix of letters, numbers, and symbols)
R@!nB0w_C@t99 (Uses a mix of uppercase, lowercase, symbols, and numbers)
Zebra4!Pine#Tree (A combination of three unrelated words with symbols)
Yt@#79LpQv! (Completely random mix of characters)
S!llyB@nana_34 (Uses a mix of words and symbols but is still unique)
5.
So…
✅ Is at least 12 characters long ✅ Uses uppercase and lowercase letters ✅ Includes numbers and symbols ✅ Does not contain personal information ✅ Isn’t a common word or phrase
6.
Before the next activity, look ate these tips for creating a strong password.
Use at least 12 characters
Mix uppercase, lowercase, numbers, and symbols
Avoid using your name, birthday, or common words
Use a passphrase (e.g., “Blue$ky!Jumps#Fast”)
Never share your password with others
7.
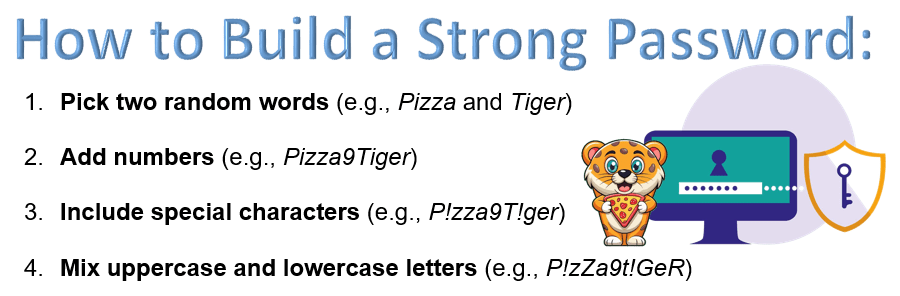
Now, let’s see if you can create a strong password, following this strategy!
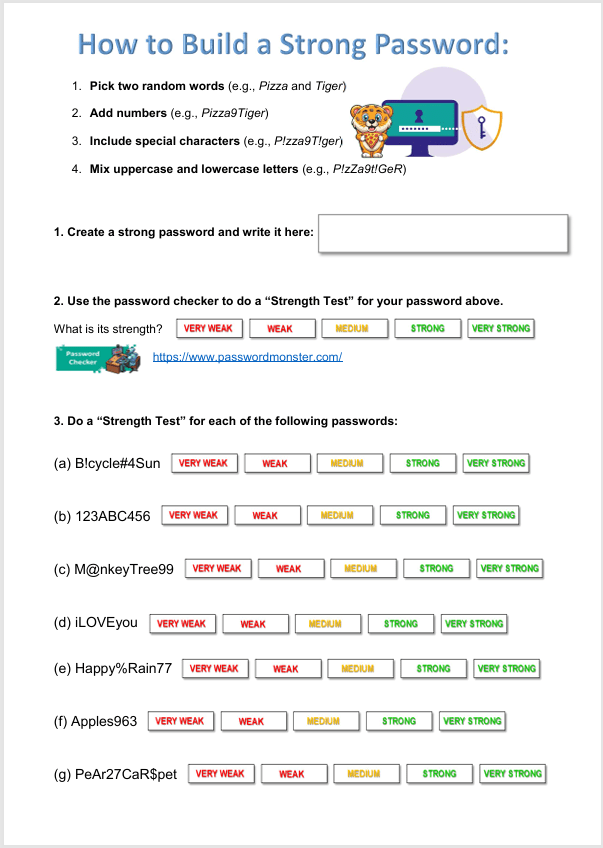
(Write the password on the worksheet provided.)
Swap the worksheet with a partner and check if the password follows all the strong password rules.
(This is just an exercise – you will not actually use these passwords online).
Can you come up with a fun but strong password you could actually use in the future?
(Just think about it – do not share this with the class!!!)
8.
What was easy or difficult about making a strong password?
How will you remember your password without writing it down in a place where someone can see it?
Why is it important not to share your password with anyone except a trusted adult?
9.
Complete the rest of the worksheet.
First, you need to test the strength of the password that you created, using the password checker below.
Then also test the strengths of the rest of the passwords on the worksheet.
Use this password checker. Click on GO to check if the passwords are strong or not…
Here are some awesome internet safety games that not only entertain but will also teach you essential online skills.
As you navigate through a virtual city, you will get pop-up questions at different points. By answering these questions, you do in an interactive quiz that helps you to learn essential internet safety skills.
Band Runner blends fast-paced action with important safety lessons. You play as characters Alfie and Ellie. They run from potential dangers. You will help them recognize online predators and make quick, safe decisions.
Here are some awesome internet safety games that not only entertain but will also teach you essential online skills.
As you navigate through a virtual city, you will get pop-up questions at different points. By answering these questions, you do in an interactive quiz that helps you to learn essential internet safety skills.
Band Runner blends fast-paced action with important safety lessons. You play as characters Alfie and Ellie. They run from potential dangers. You will help them recognize online predators and make quick, safe decisions.
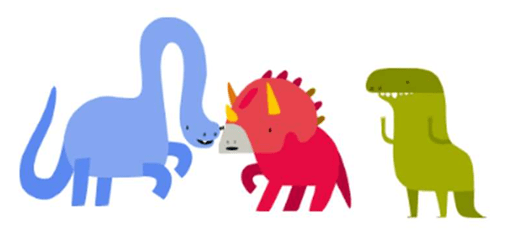
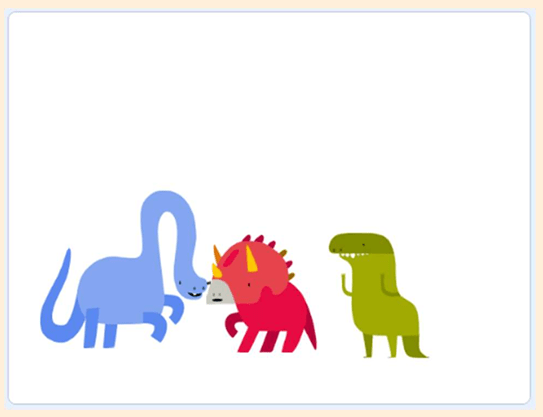
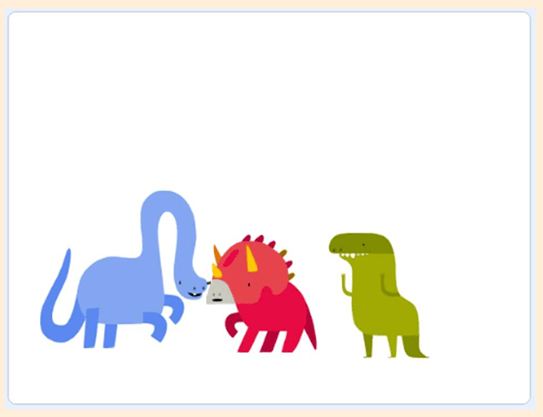
Look at the three dancing dinosaurs in this Scratch project.
What actions are they doing?
Click See inside to show the code for the three dancing dinosaurs.
Look at the blue dinosaur first. Click on the code for the blue dinosaur and carefully examine what actions it is doing, and how many times it does them. To stop the code, click on the red octagon next to the green flag.
Now, do the same for the green and the red dinosaurs.
How many times do they repeat the actions?
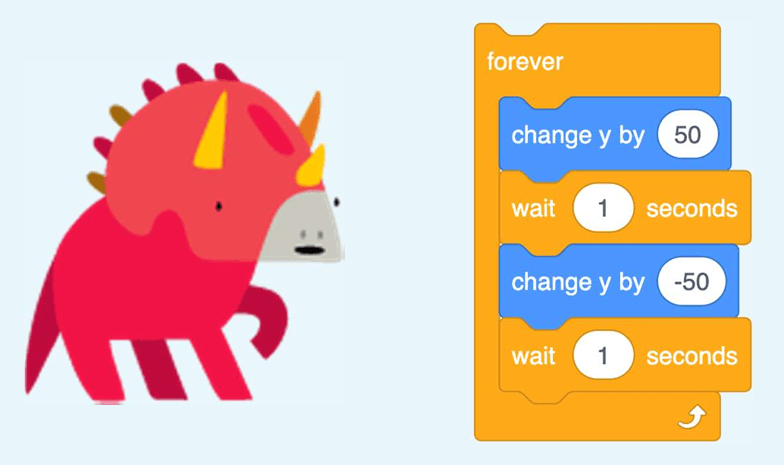
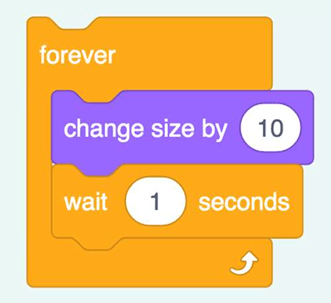
Have you noticed the repeat forever block inside the red dinosaur’s code?
What does it mean?
The actions will be repeated over and over again…
5.
Complete the ‘Dancing dinosaurs’ worksheet.
Use the ‘Dancing dinosaurs’ worksheet. Look carefully at what each dinosaur is doing in turn (on the sheet), and then fill in the sheet. Carefully look at the number of times these actions are repeated.
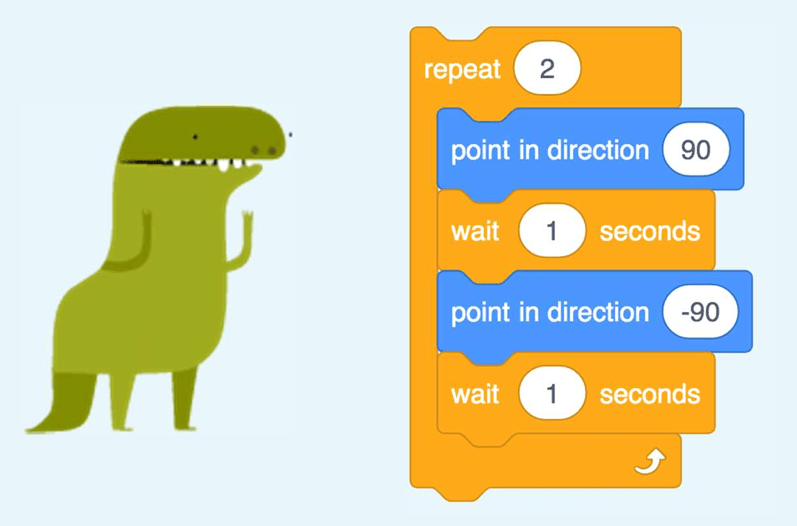
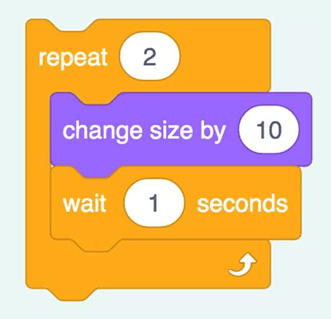
Have you noticed that the blue and red dinosaurs repeat forever, but the green dinosaur stops after a few moves?
Can we get all the dinosaurs to repeat their moves forever?
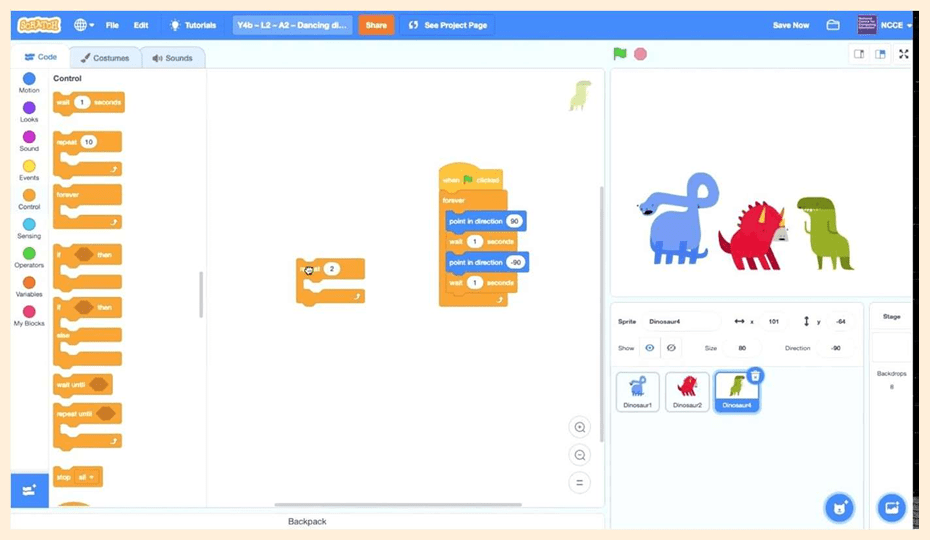
We need to modify the code for the green dinosaur. We need to swap the count-controlled loop for an infinite loop!
Here is a bit of guidance…
Watch the video (or look at a live demonstrate) how to move the blocks out of the count-controlled loop and into a forever loop.
Loop Changing. (0:30 minutes long)
Reference Costumes. (0:49 minutes long)
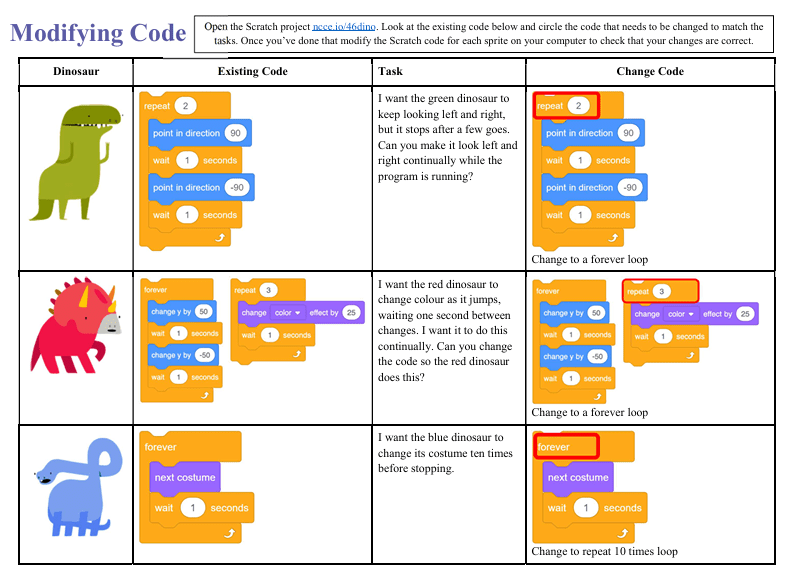
Modifying code — different kinds of loops:
Use the ‘Modifying code’ worksheet to write down the algorithms, and then modify the Scratch code. (You need to circle the code that needs to be changed to match the tasks.)
Then modify the Scratch code for each sprite (using the “same “Dancing Dinosaurs” Scratch project used previously) on a computer to check that the changes are correct.
10.
Test your knowledge:
— Question 1 —
You want to make your dinosaur sprite a bit bigger and pause for a few times before it starts dancing. Which loop would you use?
Infinite Loop
Count-controlled Loop
ANSWER
A count-controlled loop would be more suitable, as an infinite loop would mean the character would keep getting bigger until it is too big to see properly.
— Question 2 —
You want to make a bird sprite fly backwards and forwards across the top of the screen. Which loop would you use?
Infinite Loop
Count-controlled Loop
ANSWER
An infinite loop would be more suitable, as it would keep the bird flying. A count-controlled loop would mean that the bird would fly a short way and then stop.
— Question 3 —
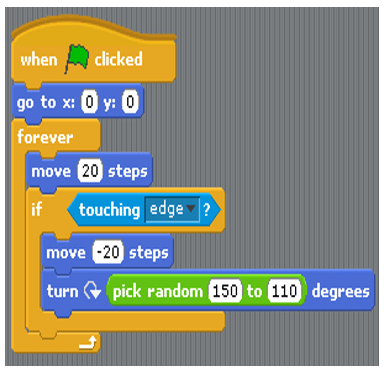
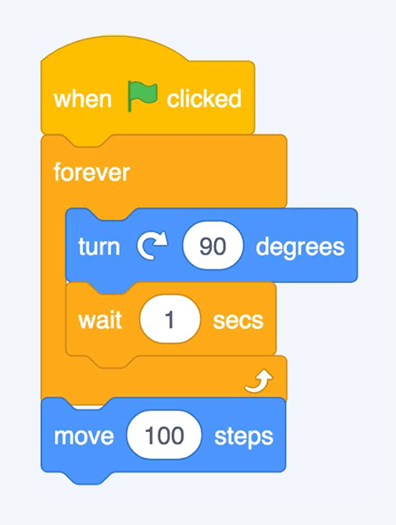
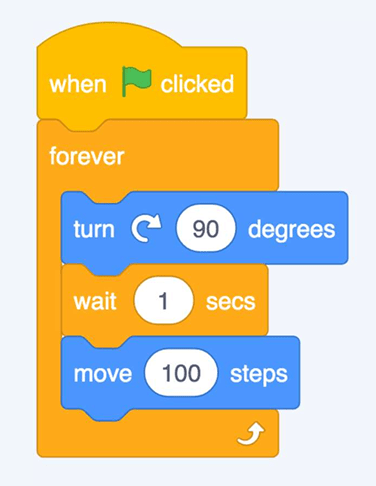
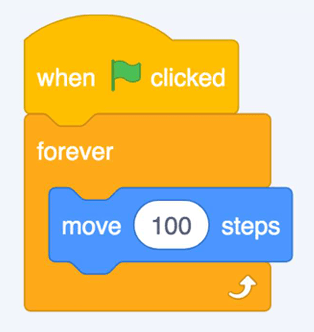
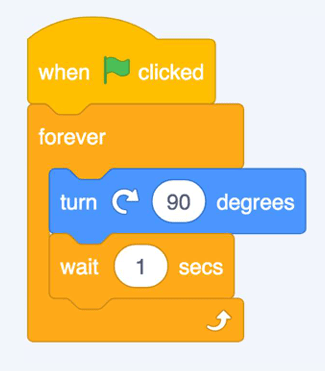
What is the problem with this code?
ANSWER
The move 100 block is outside the forever loop, so it will never be run.
— Question 4 —
What will happen when the green flag is pressed?
ANSWER
The sprite will turn, wait, and move, and keep repeating the sequence, as all the blocks are within the forever loop.
— Question 5 —
If there are two processes on the code area, what will happen when the green flag is pressed?
ANSWER
Both processes would be started, so the sprite would move and turn at the same time. (In Scratch, the green flag can be used to start lots of different things happening at the same time.)
11.
ANSWERS
12.
Use this worksheet to create the codes in Scratch.
This lesson is based on teachcomputing.org lessons.
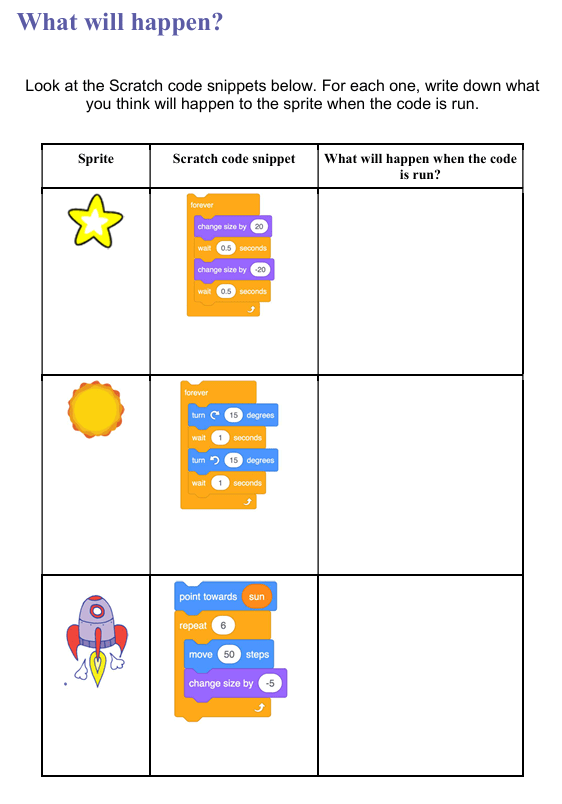
Today, you are going to….
list an everyday task as a set of instructions including repetition
predict the outcome of a snippet of code
modify a snippet of code to create a given outcome
1.
Computer programmers use codes and algorithms to tell computers what to do. One type of coding that we can use is called “block coding”.
2.
The videos below explain what block coding is.
ALL Scratch Blocks Explained in 2 Minutes. (2:10 minutes long)
Beginners Guide to Scratch – Blocks Explained! (5:51 minute long)
Scratch explained by a child…
3.
In coding, a loop is a command used to repeat a part of code until the desired process is complete.
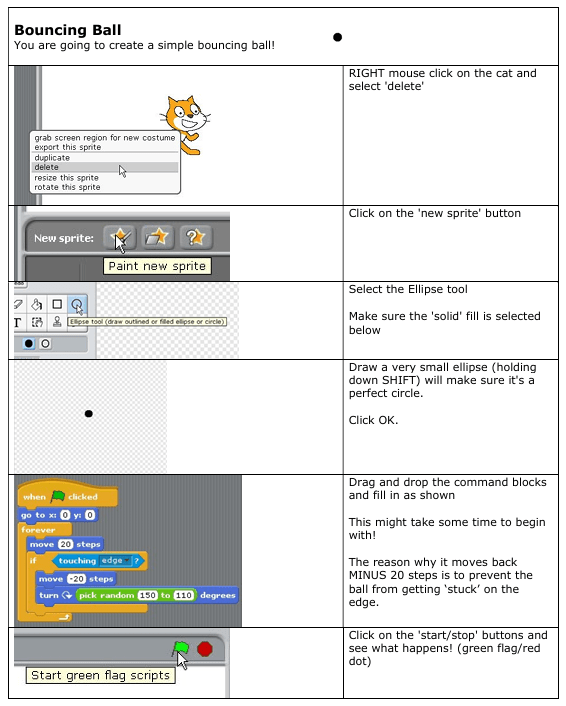
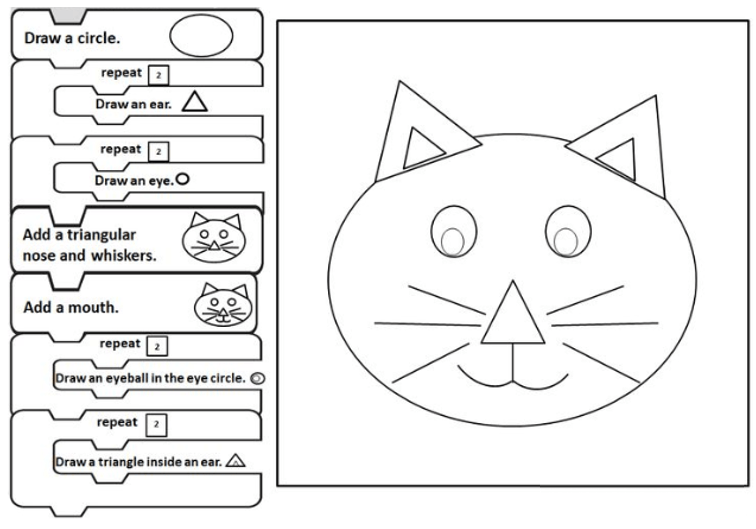
In the coding blocks that we used to draw the cat we used “commands” and “loops”?
4.
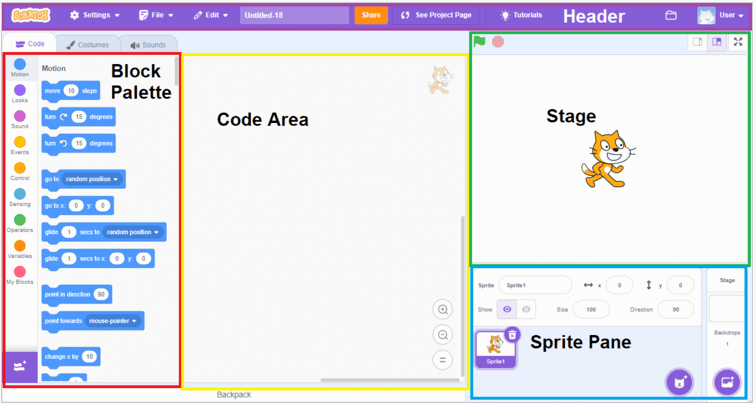
We can create moving images and even games, using websites like SCRATCH.
Scratch is a programming website that makes it easy to create interactive art, stories, and games. In the next lesson you will create a moving image, using Scratch.
5.
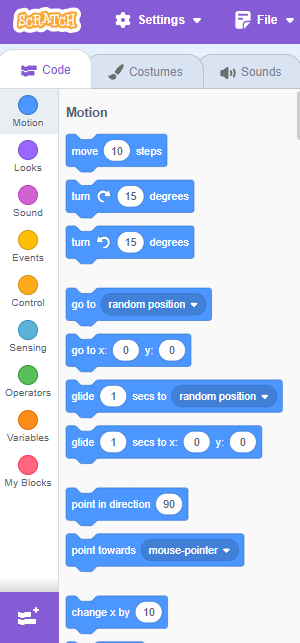
Code blocks in Scratch
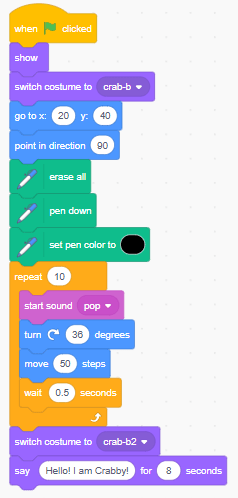
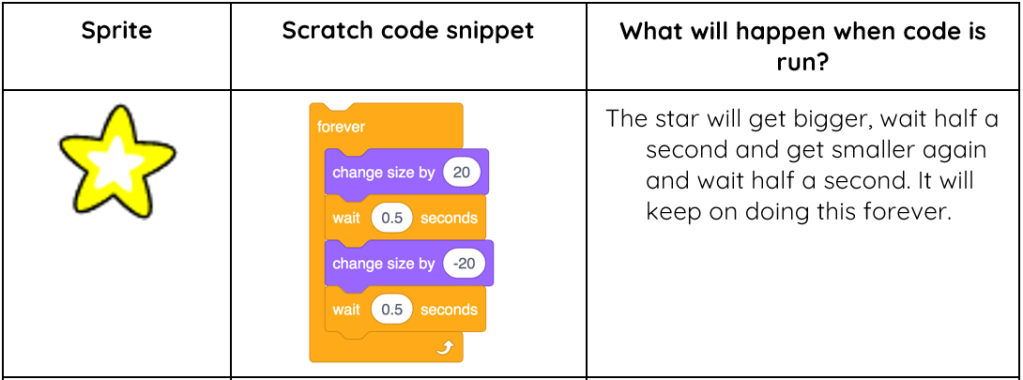
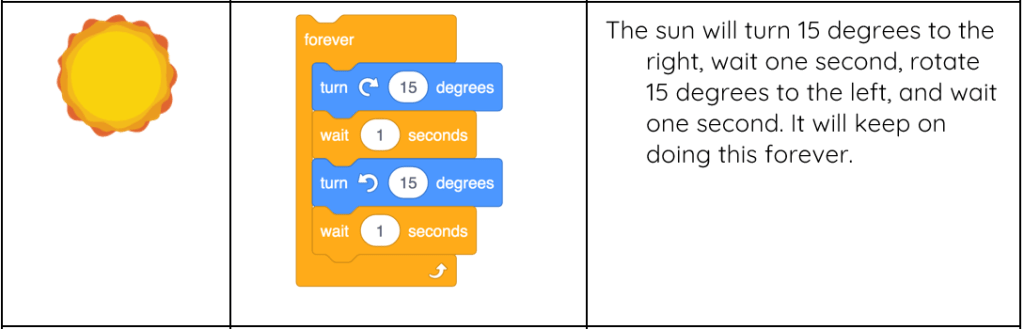
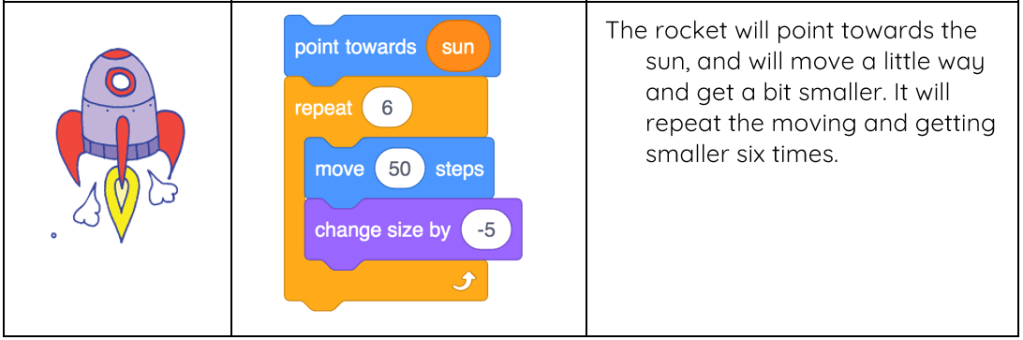
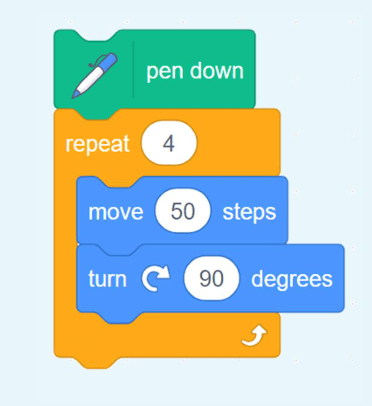
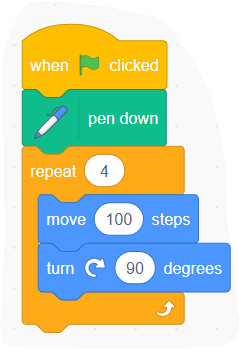
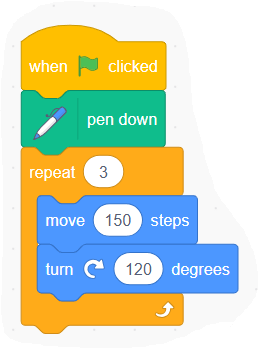
This sequence of code is from this programming tool, Scratch. It uses coloured blocks of code.
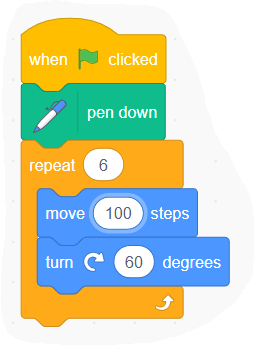
What will this code snippet do?
What each block might do…
The pen down block might use a pen to draw on screen.
The repeat block might repeat something four times.
The move steps block may instruct how to move.
The turn degrees block may instruct something to turn.
Can you predict what might be created on-screen once the code has been run?
The code blocks shown will draw a square on the screen. The repeat happens four times, and each turn is through 90 degrees.
6.
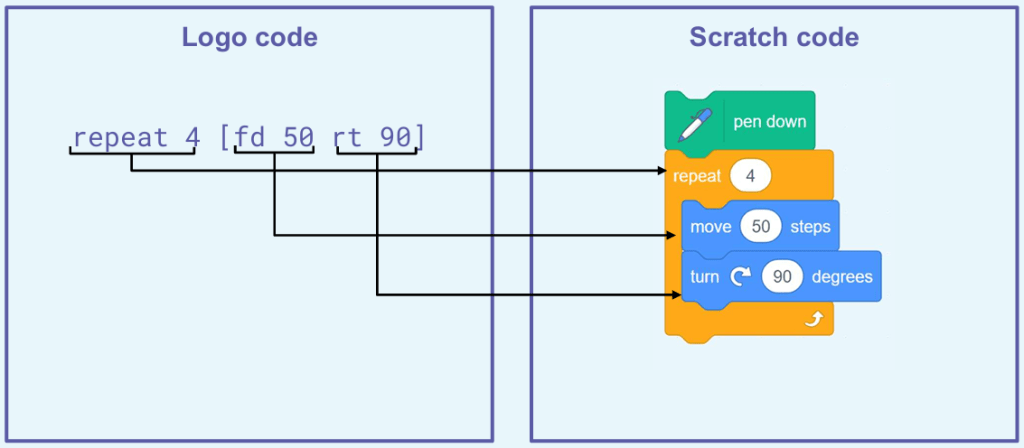
Here is another way of programming , called Logo.
What similarities can you see in these code snippets?
7.
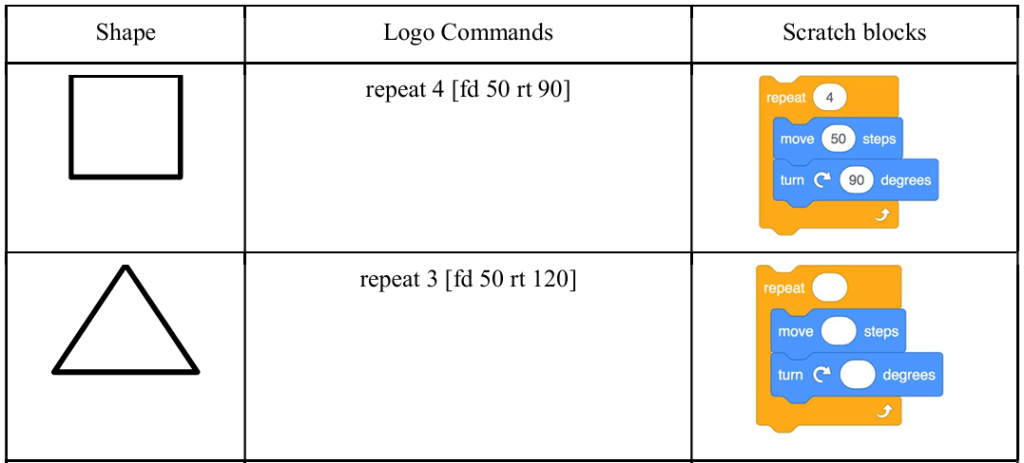
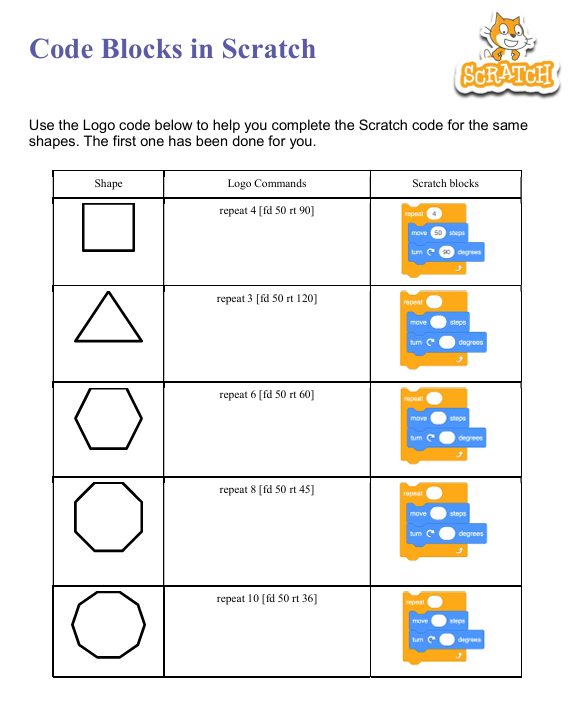
Complete the ‘Code blocks in Scratch’ on the worksheet. You need to create Scratch code snippets by using the Logo code snippets as a guide.
Code blocks in Scratch
Use the Logo code snippets on the ‘Code blocks in Scratch’ worksheet to help you complete the Scratch code snippets.
What is Block-Based Programming? | Block Coding for Kids. (1:44 minutes long)
Block Coding for Kids. (3:53 minutes long)
2.
Remember:
3.
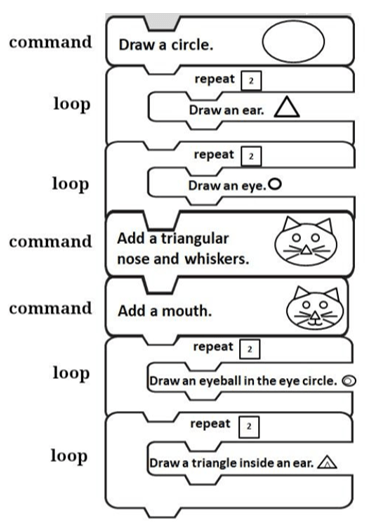
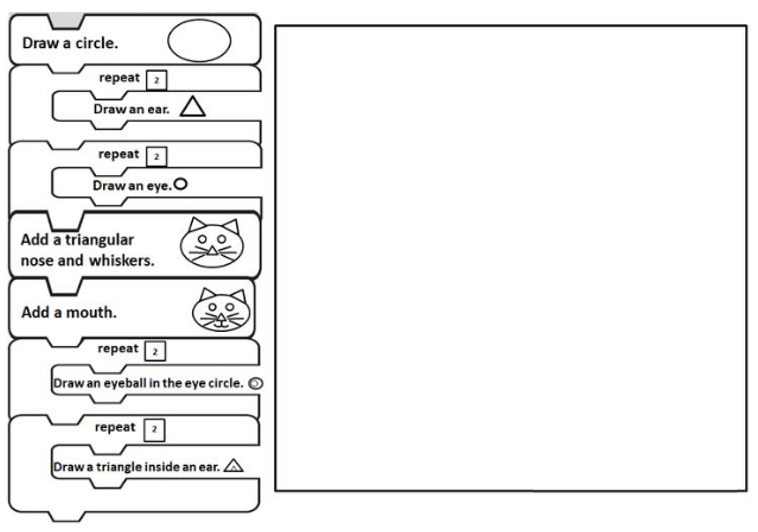
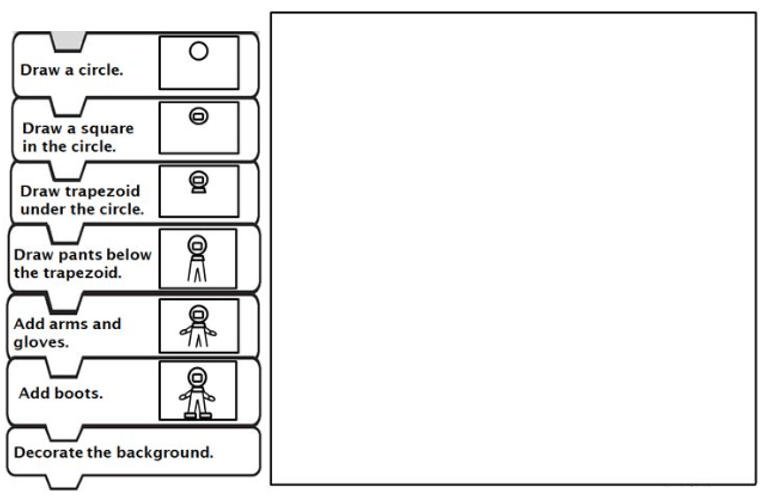
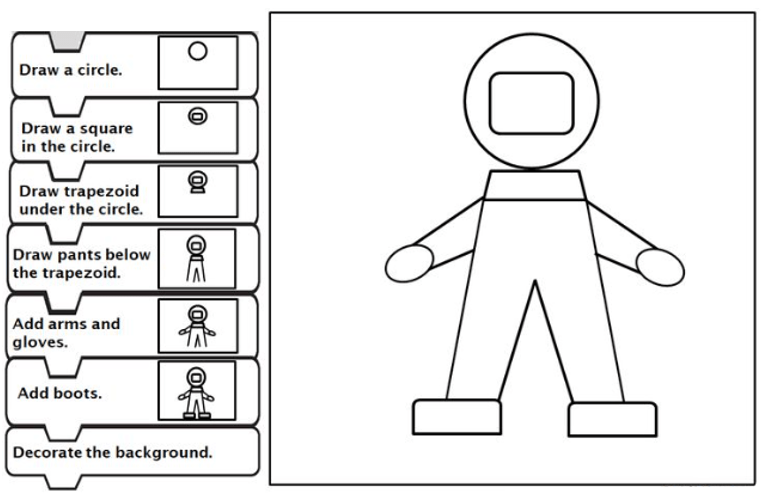
We will now complete worksheet to learn how block coding works. The worksheet shows us how to draw pictures using algorithms. The algorithms are shown in the form of coding blocks. Each coding block gives an instruction, or command.
4.
5.
6.
In coding, a loop is a command used to repeat a part of code until the desired process is complete.
Have you noticed that there are “commands” and “loops” in the coding blocks that we used to draw the cat?
7.
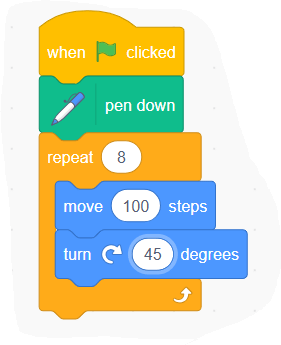
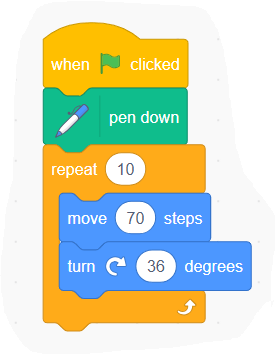
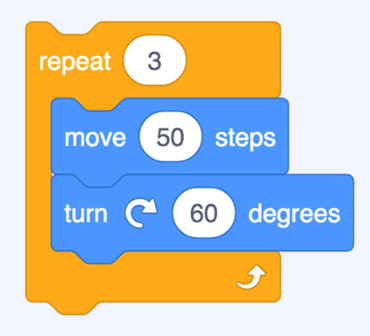
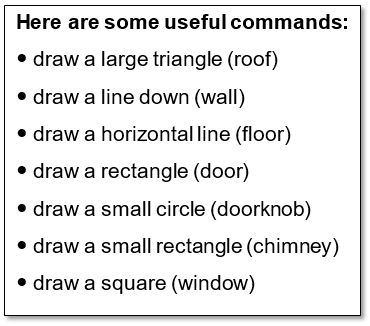
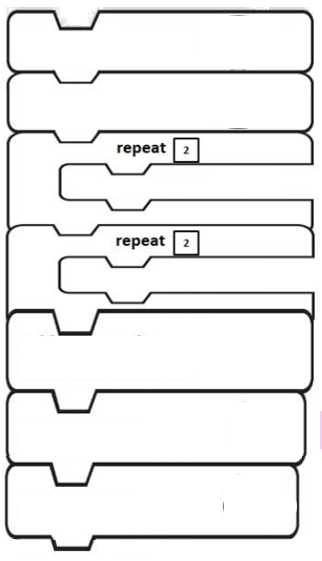
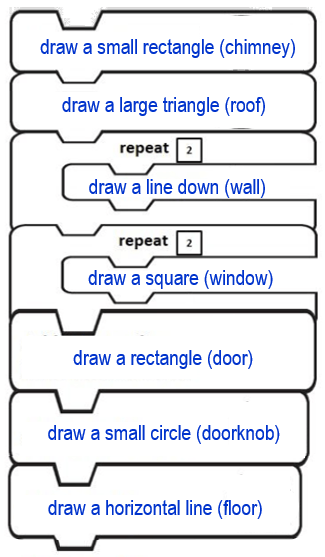
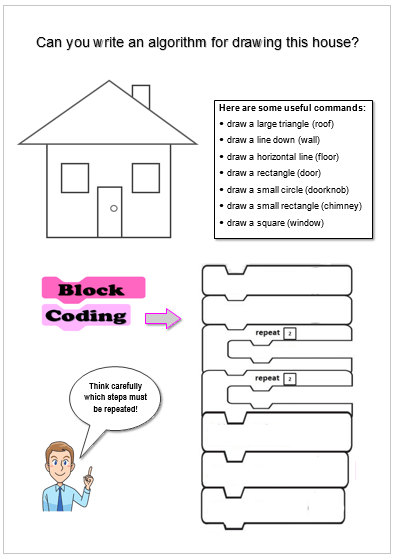
Using block coding, can you write an algorithm for drawing this house?
Here are the blocks that you will need:
8.
Complete the worksheet.
9.
Here is a bit more about Block Coding.
PROGRAMMING for kids 👦 Block Programming 💻 Part 2. (5:44 minutes long)
10.
We can create moving images and even games, using websites like SCRATCH.
Scratch is a programming website that makes it easy to create interactive art, stories, and games. In the next lesson you will create a moving image, using Scratch.
Watch video below. It explains what an algorithm is.
BBC Learning What Is An Algorithm. (1:07 minutes long)
2.
Also watch this video to learn more about what algorithms are.
Introduction to Algorithms | All About Computers | Tynker. (4:48 minutes long)
3.
A student will now demonstrate how a computer uses algorithms to perform certain tasks…
(Give a student instructions to make his way from point A to point B, and back to point A again, by giving instructions in the form of an algorithm. E.g.: 2 steps forward, turn L, 5 steps forward, turn R, etc.)
4.
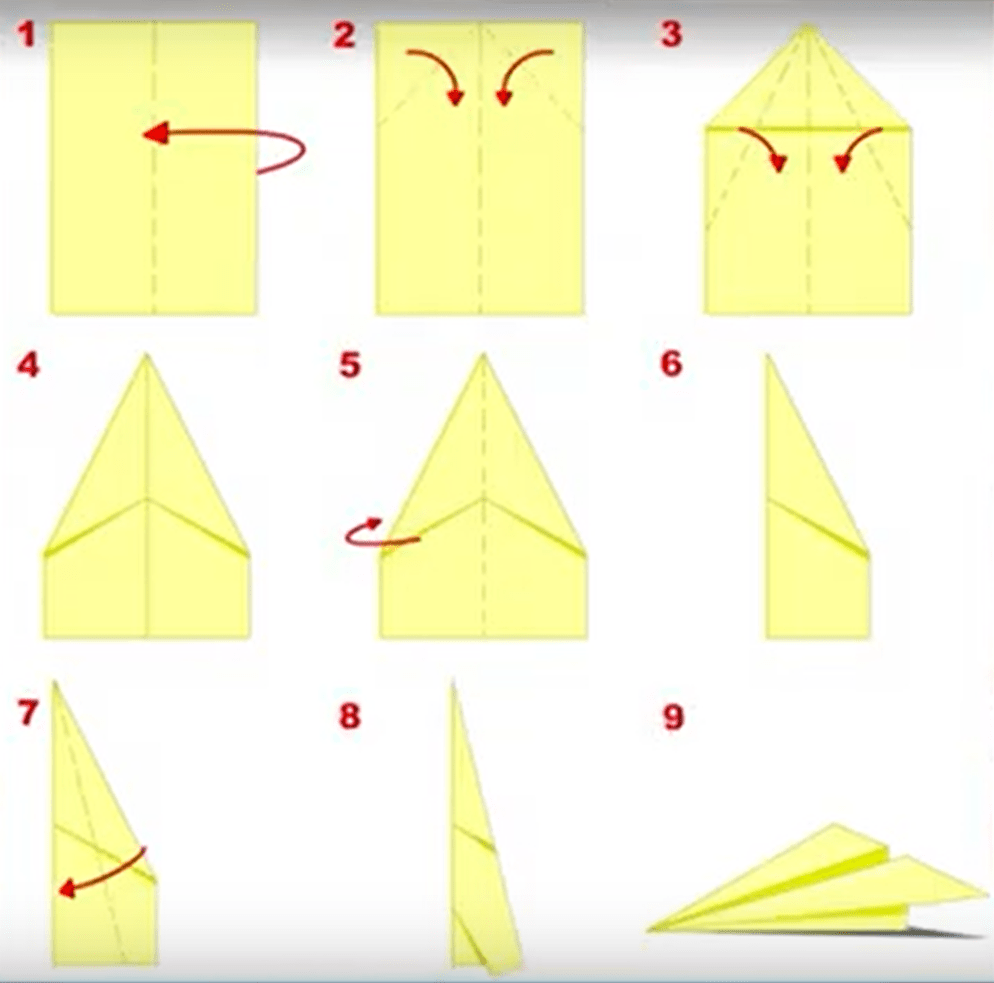
Use the algorithm (in the previous video, at 1:54 minutes)) for making a paper aeroplane!
1) Take an A4 sheet of paper, plus a pen.
2) First write your name all over the paper!
3) Then, follow the steps to fold the aeroplane.
5.
Line up in front of the class and throw your paper planes for fun!
6.
Now you need to follow the algorithm for drawing a computer! Draw while following the instructions in the video below.
(Give each student another peace of A4 paper.)
How To Draw A Computer Step By Step 🖥️ – Easy. (1:54 minutes long)
7.
Do you want to follow a more complicated algorithm? Complete the drawing as instructed in the video below.
Drawing Tutorial | How to Draw a Computer 🖥️. (3:59 minutes long)
8.
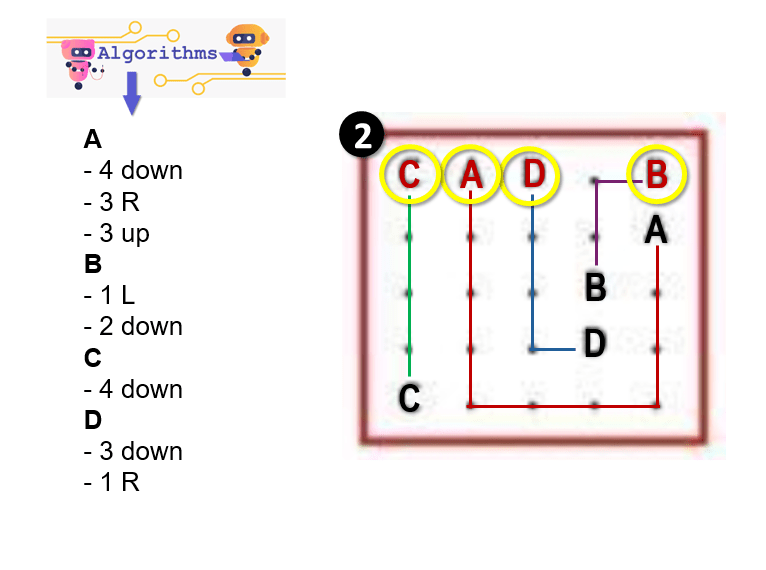
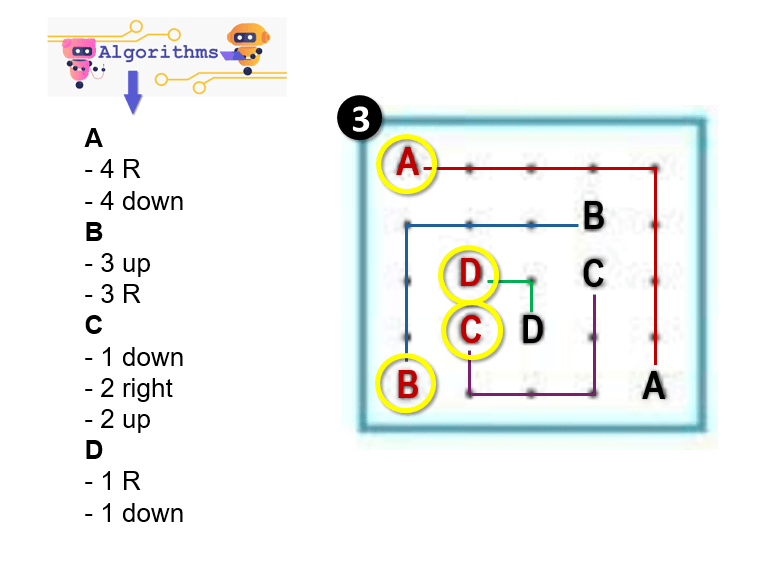
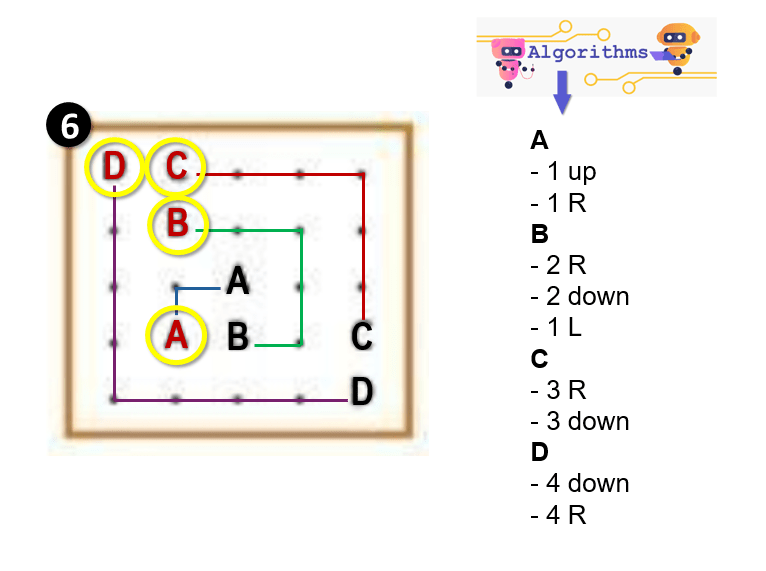
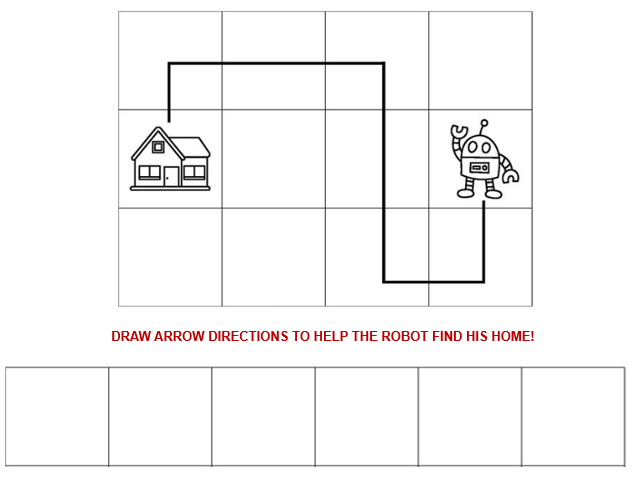
Let’s look at another type of algorithm. Can you write the arrow codes to help the Robot find his home…
9.
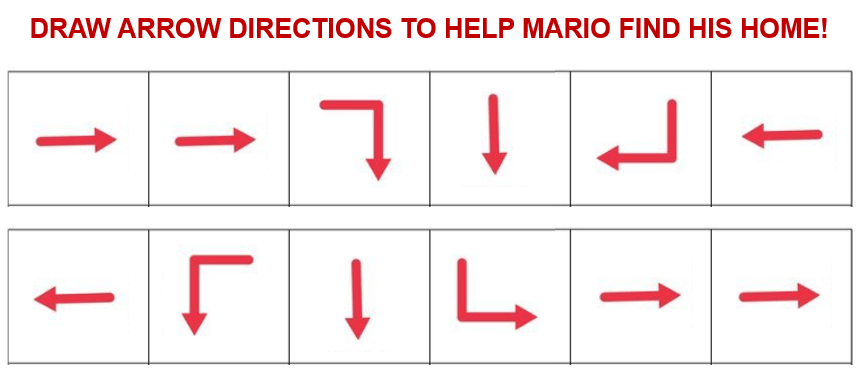
Also write the arrow codes to help Mario find his home…
10.
Building Algorithms | All About Computers | Tynker. (3:56 minutes long)
Create a Christmas Picture in Paint… Task: Use a simple drawing tool like Microsoft Paint or a tablet app to draw a Christmas scene (snowman, tree, presents, etc). Skills Developed: Digital art, mouse control, creativity. Tools: Microsoft Paint, Paint 3D, Procreate.
OR
Create a Christmas Story with Stickers and Animations… Task: Use apps like Toontastic 3D or ChatterPix Kids to create simple Christmas stories by adding stickers, voice recordings, and animations. Skills Developed: Storytelling, basic animation, creativity. Tools: Toontastic 3D, ChatterPix Kids. (These apps need downloading…)
OR
Make a Christmas Collage… Task: Use apps like Pic Collage to make a fun Christmas collage with family photos, stickers, and text. Skills Developed: Creativity, basic digital manipulation. Tools: Pic Collage, Adobe Spark for Kids. (These apps need downloading…)
OR
Build a Christmas Scene in a Block-Based Game… Task: In simple block-based building games like Toca Blocks or Lego Builder, kids can create a Christmas-themed world. Skills Developed: Spatial awareness, creativity, basic problem-solving. Tools: Toca Blocks, Lego Builder. (These apps need downloading…)
Create a Christmas Picture in Paint… Task: Use a simple drawing tool like Microsoft Paint or a tablet app to draw a Christmas scene (snowman, tree, presents, etc). Skills Developed: Digital art, mouse control, creativity. Tools: Microsoft Paint, Paint 3D, Procreate.
OR
Create a Christmas Story with Stickers and Animations… Task: Use apps like Toontastic 3D or ChatterPix Kids to create simple Christmas stories by adding stickers, voice recordings, and animations. Skills Developed: Storytelling, basic animation, creativity. Tools: Toontastic 3D, ChatterPix Kids. (These apps need downloading…)
OR
Make a Christmas Collage… Task: Use apps like Pic Collage to make a fun Christmas collage with family photos, stickers, and text. Skills Developed: Creativity, basic digital manipulation. Tools: Pic Collage, Adobe Spark for Kids. (These apps need downloading…)
OR
Build a Christmas Scene in a Block-Based Game… Task: In simple block-based building games like Toca Blocks or Lego Builder, kids can create a Christmas-themed world. Skills Developed: Spatial awareness, creativity, basic problem-solving. Tools: Toca Blocks, Lego Builder. (These apps need downloading…)
This is Lesson 6 on Computing Systems & Networks – the Internet, taken from teachcomputing.org.
Today, you are going to….
evaluate the reliability of content
consider the consequences of unreliable content
realise that not everything on the internet is true
explain why some information we find online may not be honest, accurate, or legal
explain why I need to think carefully before I share or re-share content online
1.
Revision…
A website is a set of web pages located under a single name, typically produced by a single person or organization. Basically, it is a place you visit on the internet, like a page in a book, with pictures, words, and videos, on specific topics.
2.
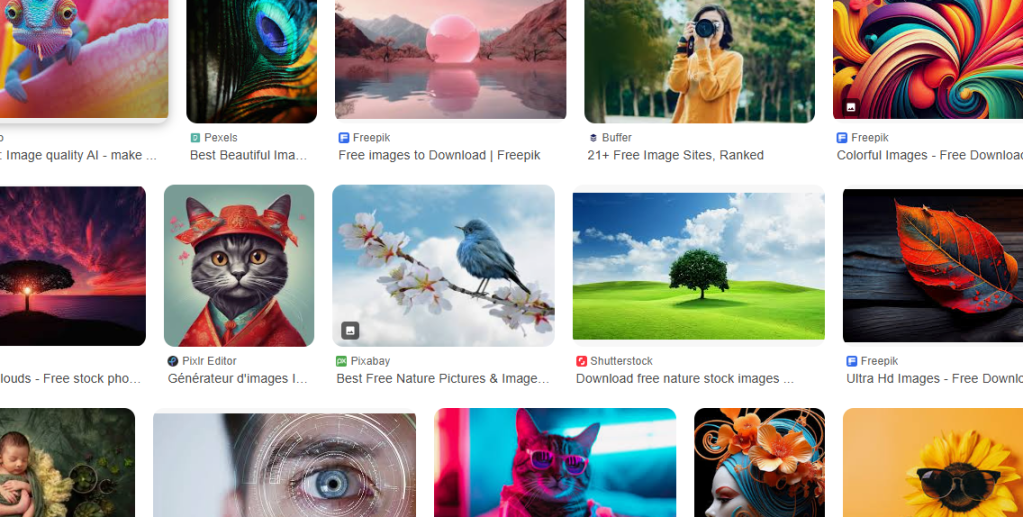
What do you think of these pictures?
Are these pictures real?
Do you think they have anything in common?
How do you think they were created?
Why were they created?
3.
4.
Click on the image to do some research on Google!
“best mobile phone ever”
5.
Are these the best mobile phones?
Did you get the same results?
6.
Not all information on the internet is true…
7.
Why would people create or share false information on the web?
News that is not true is also sometimes called ‘fake news’.
Reasons people might share false information:
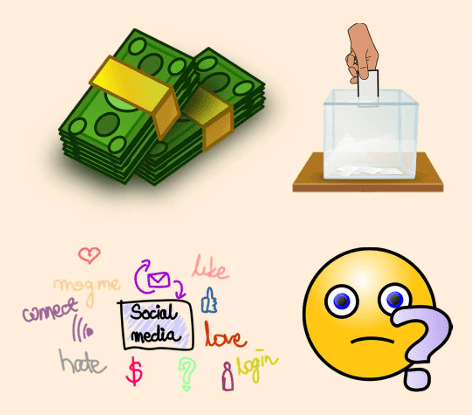
To make money — People might make false claims about products or post false reviews to encourage other people to spend money.
To be popular — Many people seek popularity through social media, so may post false information to gain more shares or likes.
To gain power — People may post false claims in order to gain votes in elections.
By mistake — Sometimes people may not be aware that what they are sharing is not true.
8.
Sharing information
What should I think about before I share information online?
If you are not sure…
9.
not everything on the internet is true
some online information may not be honest, accurate, or legal
we need to think carefully before we share content online
10.
Complete the following task online to test your knowledge on what you have learnt so far about websites on the world wide web. (You have to click on “OK” to start.)
This is Lesson 5 on Computing Systems & Networks – the Internet, taken from teachcomputing.org.
Today, you are going to….
realise that the content of the World Wide Web is created by people
consider who owns the content on websites
discover that there are rules to protect content
1.
Revision…
A website is a set of web pages located under a single name, typically produced by a single person or organization. Basically, it is a place you visit on the internet, like a page in a book, with pictures, words, and videos, on specific topics.
2.
What is “web content”?
What do we mean by “content”?
Content is the stuff on a website.
For example, any text, image, audio, or video that is part of the website is web content.
3.
Click on the logos to display the following websites, to see what they are about:
a YouTube channel
LEGO website
Scratch website
Who owns the content on each of these websites?
The content can belong to:
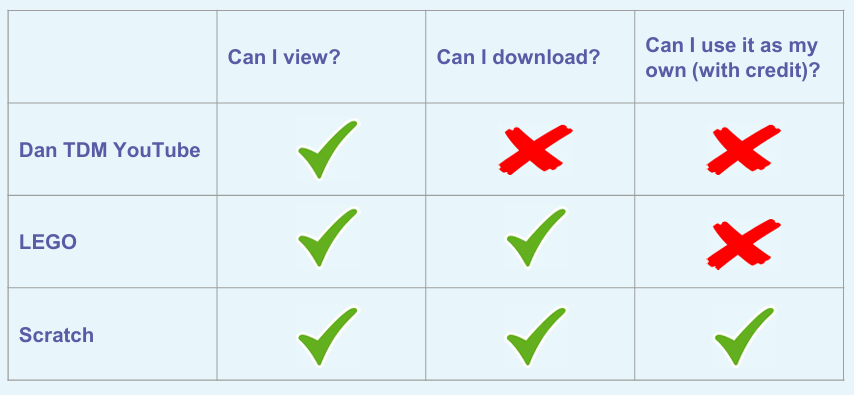
individuals (e.g. Dan TDM)
organisations (e.g. LEGO)
collective groups (e.g. Scratch)
4.
What can we do with content on someone’s websites?
This is Lesson 4 on Computing Systems & Networks – the Internet, taken from teachcomputing.org.
Today, you are going to….
discover how content can be added and accessed on the WWW
explain what media can be found on websites
see how you can add content to the WWW
examine how internet services can be used to create content online
1.
Revision…
The World Wide Web is part of the internet.
The World Wide Web refers to all the websites or pages that users can access on their local computers and other devices through the internet.
2.
A website is a set of web pages located under a single name, typically produced by a single person or organization. Basically, it is a place you visit on the internet, like a page in a book, with pictures, words, and videos, on specific topics.
3.
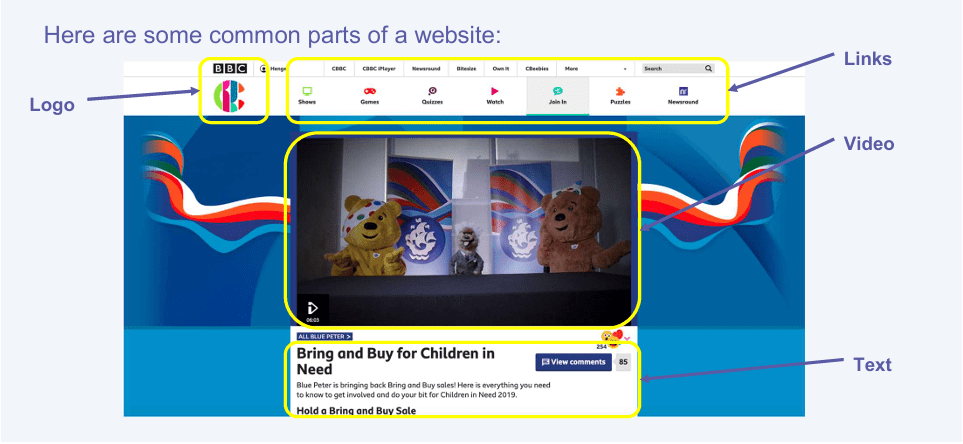
What is on a website?
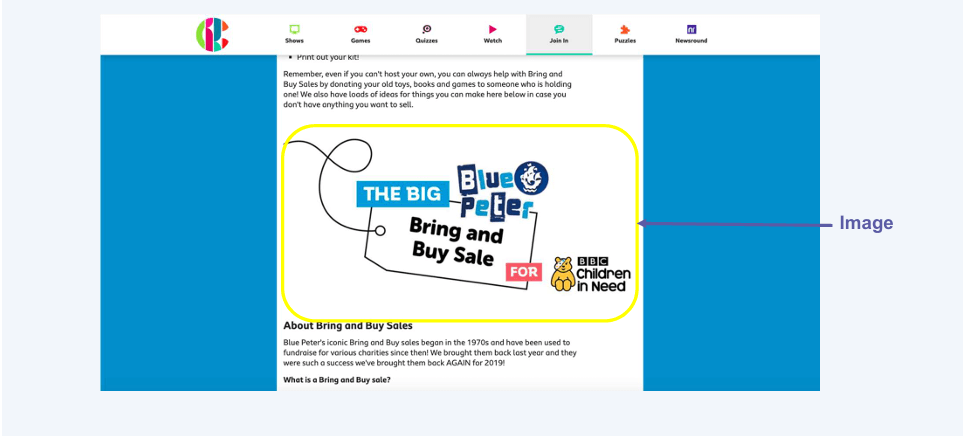
So, on websites we find:
Titles
Pictures
Text
Logos
Links (to other websites / pages)
Videos
Sound
4.
Which of the features above are the most important on:
a shopping website?
an information website?
a news websites?
5.
Videos, sound, images and text are called “media”.
6.
Some websites allow you to make your own creations!
There are also websites where we can create material. We can create new content online and add these to the WWW. We can create media which can be found on websites.
7.
Let’s look at some examples of what we can create.
This is Lesson 3 on Computing Systems & Networks – the Internet, taken from teachcomputing.org.
Today, you are going to….
see how information can be shared via the World Wide Web (WWW)
discover the types of media that can be shared on the WWW
describe where websites are stored when uploaded to the WWW
learn how to access websites on the WWW
1.
Can you remember what the Internet is?
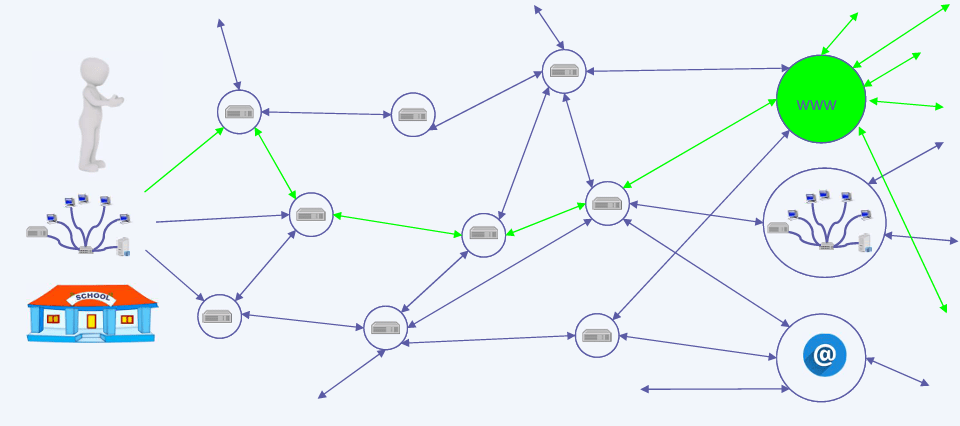
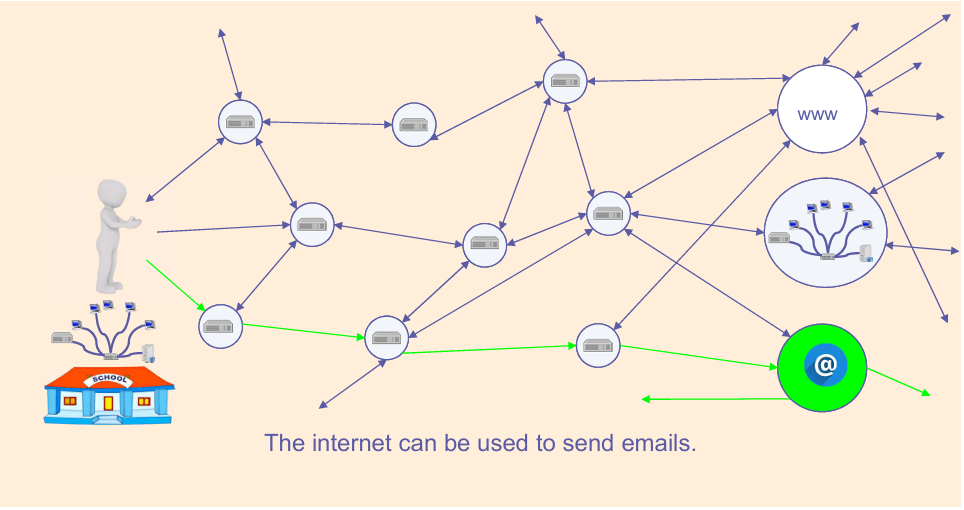
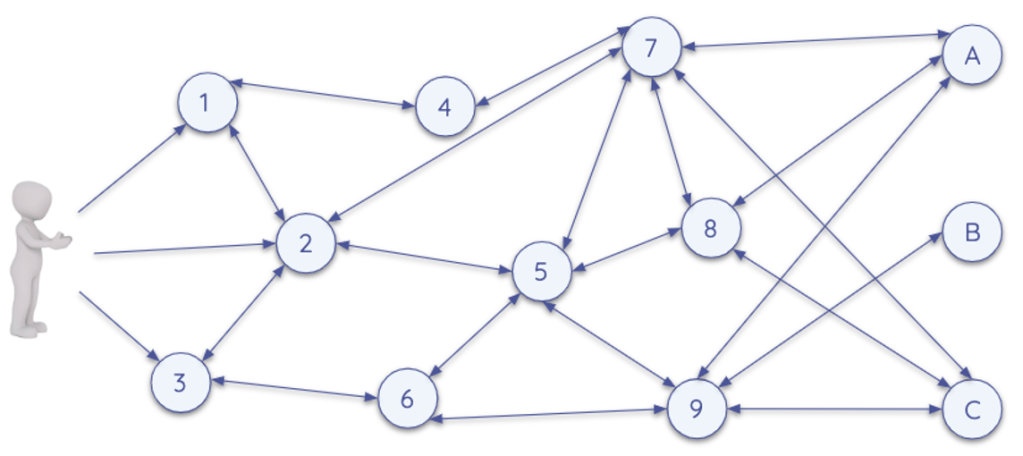
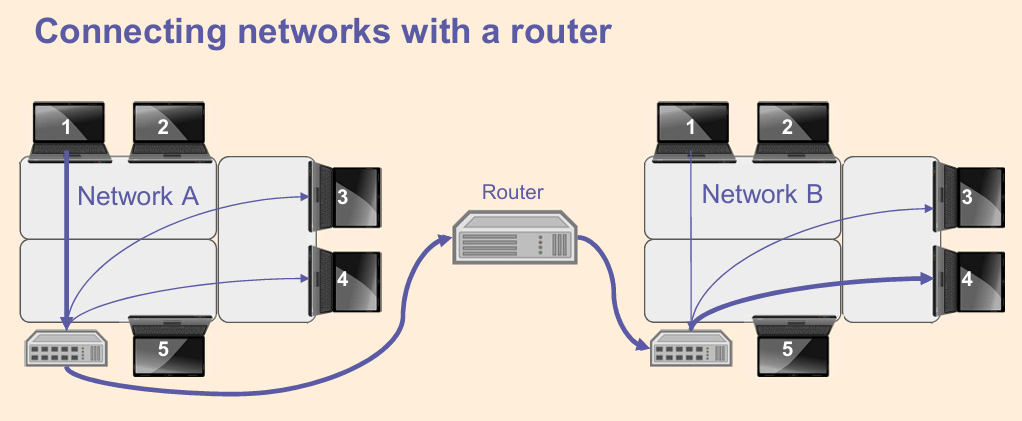
The internet is a network of networks, connected by lots of routers.
The World Wide Web is part of the internet.
On the world wide web we can visit web pages and websites.
2.
The World Wide Web is part of the internet.
The World Wide Web refers to all the websites or pages that users can access on their local computers and other devices through the internet. These pages and documents are interconnected by means of hyperlinks that users click on for information. This information can be in different formats, including text, images, audio and video.
The World Wide Web is also known as the web, WWW or W3.
3.
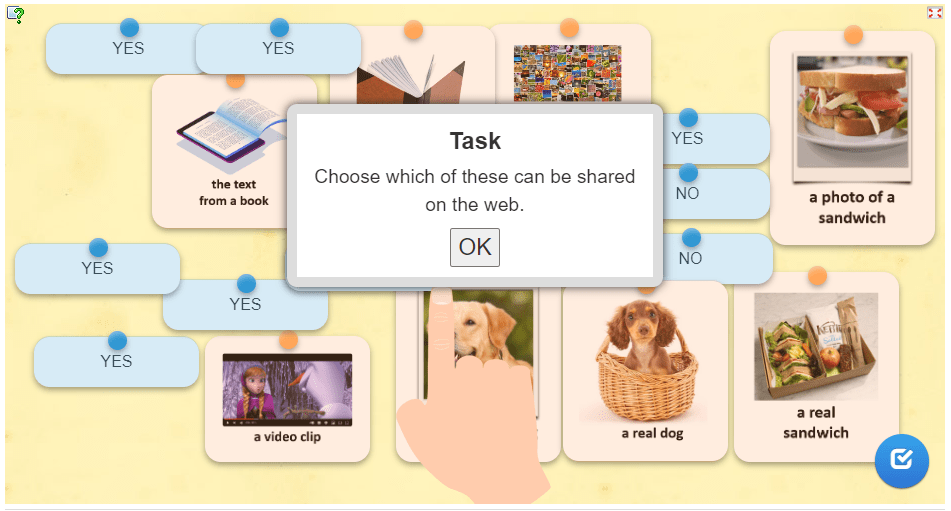
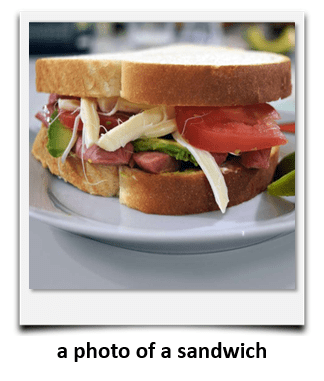
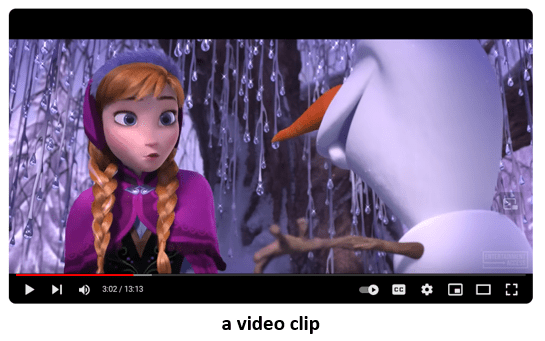
What can we share on the world wide web?
Click on OK to complete the task below:
Let’s recap: (Swipe the slides to see the answers.)
4.
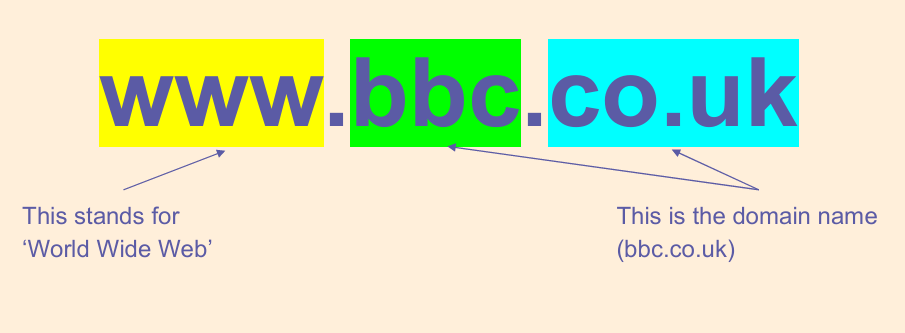
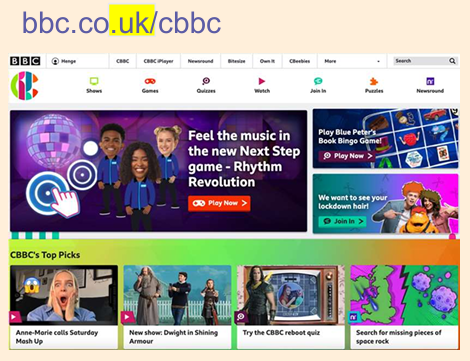
Look at this web address:
The address of the website tells you where it was created.
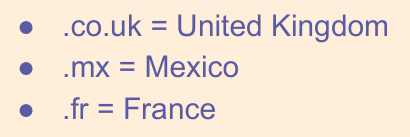
Where were these websites created?
UK
United Kingdom
Fr
France
5.
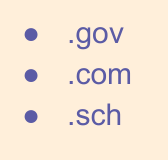
Here are the ends of some web addresses. Some tell you where the website may originate from. Where do you think these are from?
Some tell you more about the content of the website. What do you think these mean?
6.
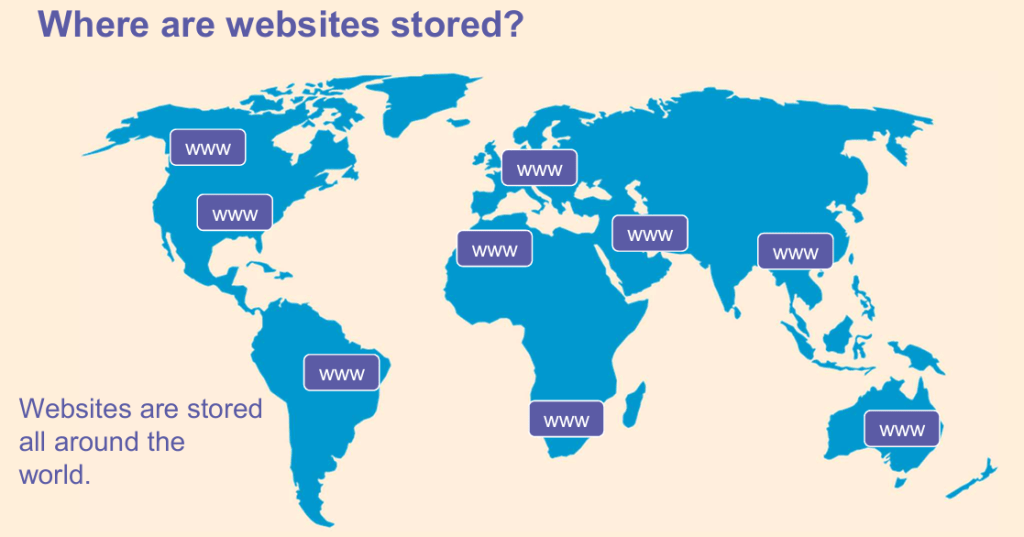
Where are websites kept? (Or “hosted”?)
Most websites are hosted in large data centres.
Data centres are large buildings full of powerful computers.
Data centres distributed around the world. (They can be anywhere in the world!)
Some of the largest data centres are owned by companies such as Google, Amazon, Apple and Microsoft.
7.
How can I access the World Wide Web?
We access the world wide web on devices like these ones below:
8.
So, what is a web browser?
A web browser lets you look at (or “browse”) web pages on the internet. For example, Google Chrome is a web browser.
Chrome can be found on many computers and mobile devices.
Here are examples of other web browsers:
9.
The web is part of the internet.
Web browsers allows us to access (or look at) information on the web.
Web pages are stored in big computers called data centres.
10.
Test yourself!
Complete this short quiz…
What do you know about sharing information on the web?
This is Lesson 1 on Computing Systems & Networks – the Internet, taken from teachcomputing.org.
Today, you are going to….
learn about the internet as a network of networks
demonstrate how information is shared across the internet
discuss why a network needs protecting
1.
The internet is a worldwide system of interconnected computer networks, that communicate with each other.
Sometimes the internet is simply called the net.
2.
What is a network?
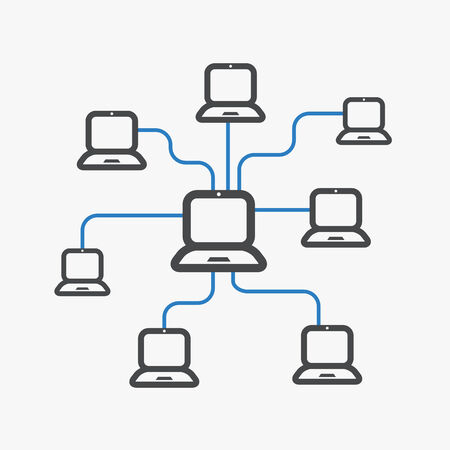
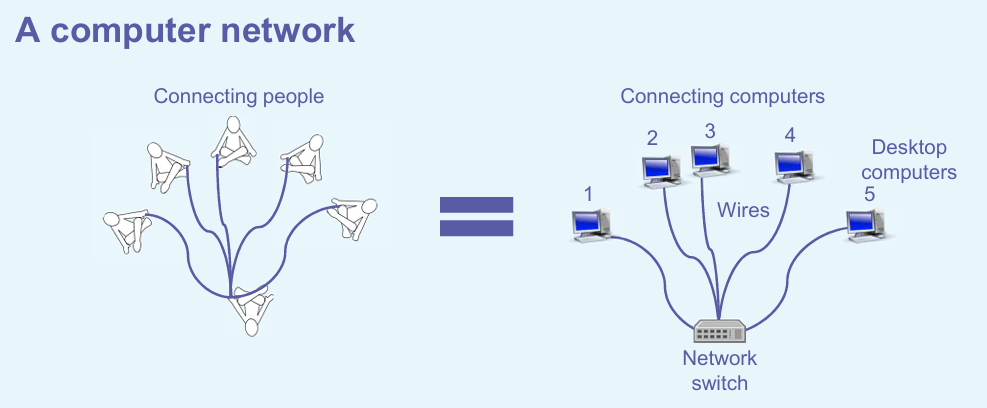
A computer network is a set of computers sharing resources
3.
Messages are sent from one computer to another in a network.
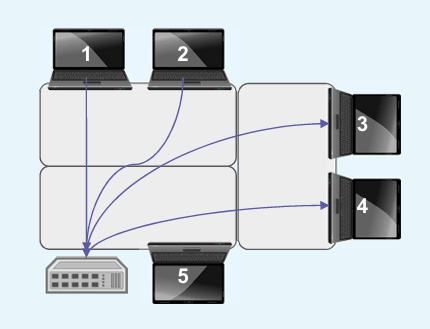
The computers in a network are connected with a switch.
Imagine your table is a network. All the computers will get a message to pass to the switch, who will then pass the message to the computer it is meant for.
All across the world, networks on the internet are joined by physical cables.
6.
It is important to keep a network safe.
Let’s look at network security.
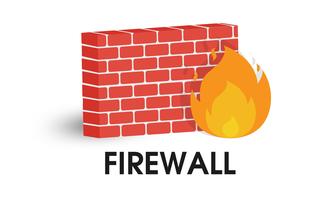
A firewall is a network security device that monitors traffic to or from your network. It allows or blocks requests, based on a set of security rules.
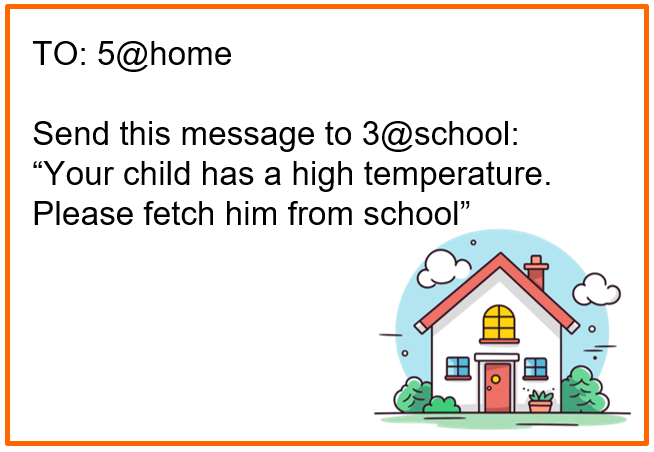
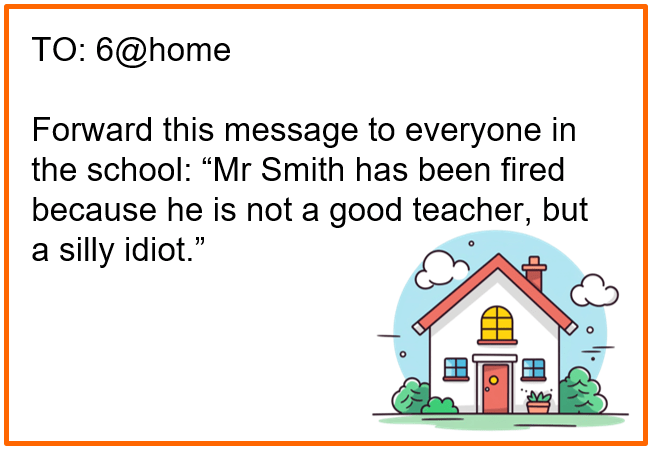
There are different reasons why it may not be a good idea to pass on a message. For example:
Some information is private
Some information is not relevant to others
Some information can be harmful (e.g. a computer virus)
Let’s pretend some of you are ‘routers’. The routers have built in “firewalls”. These accept a message, or block it…
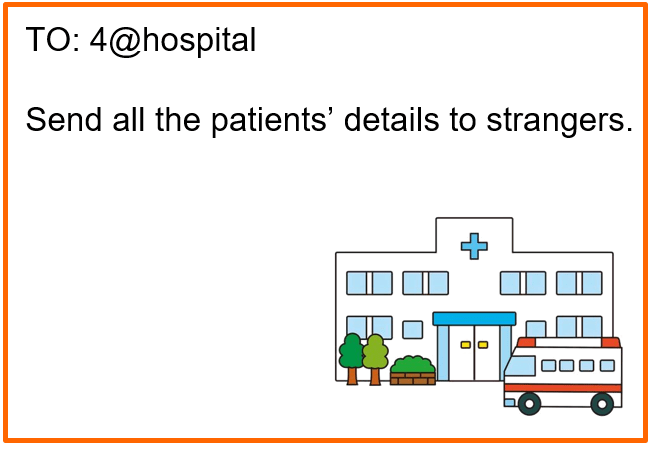
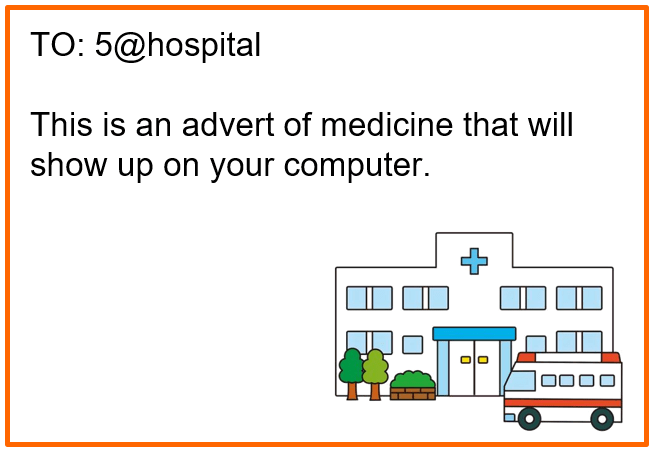
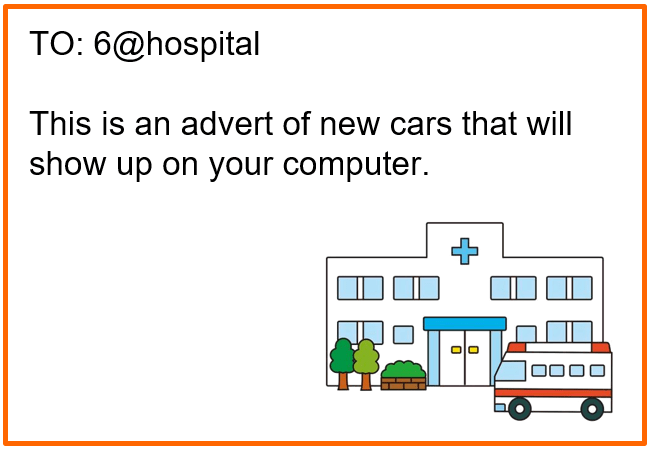
Would you allow the following messages to enter your network, or would you reject some of the messages?
Alternatively, do this task also as a roleplay, with some students being “routers” and others “computers”. The “computers” draw messages out of a hat, and take it to the “routers”, who either allow or block the messages.
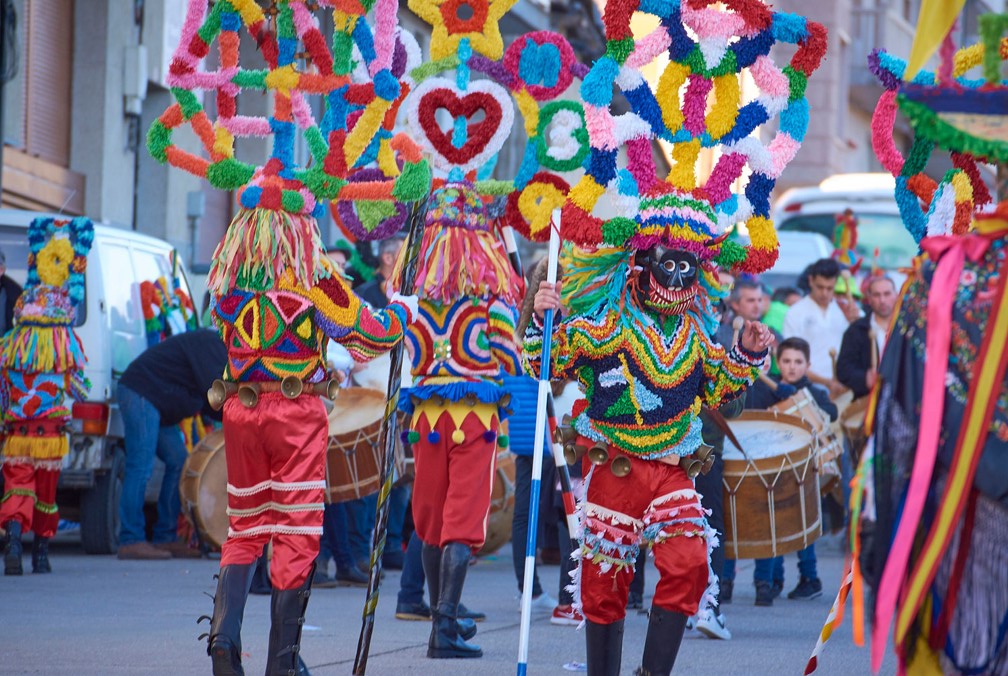
CARNIVALE Celebrations For Kids Around The World! (4:37 minutes long)
(nice intro)
Trinidad and Tobago Kiddies Carnival 2018. (1:00 minutes long)
(just images and music)
-2-
– watch videos of some parades
Sunhills Valley – Around The World: Brazilian Carnival. (2:34 minutes long)
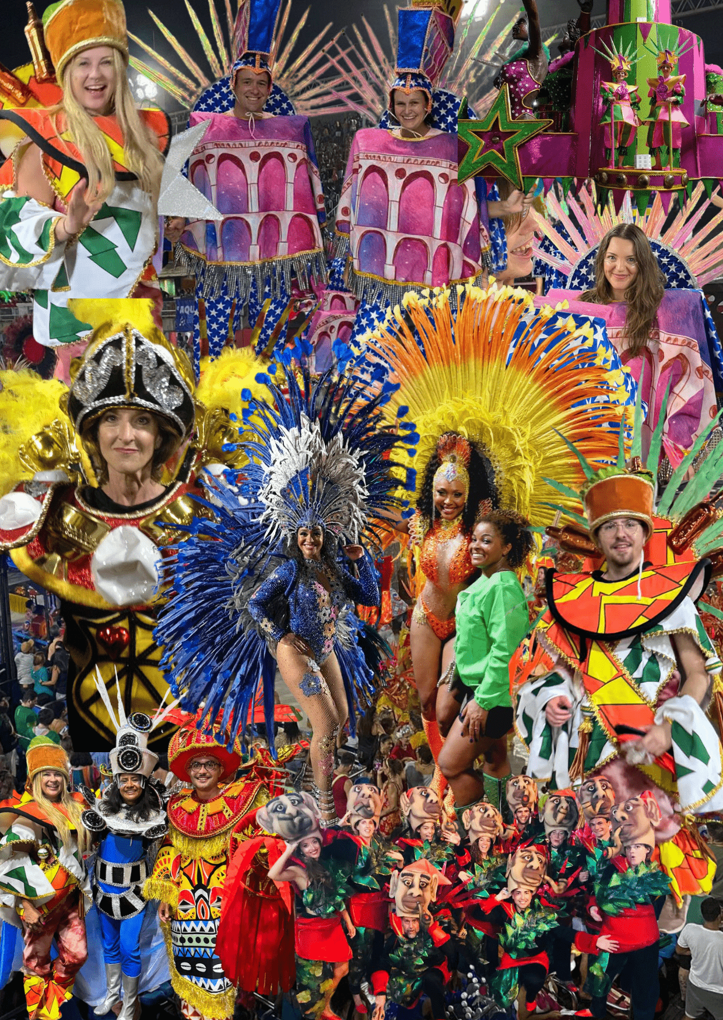
First, we are going to create some images for a poster on carnival.
IT ‘S CARNIVAL! English for kids – English educational video. (2:24 minutes long)
And… !
CARNIVAL SONG 🥁🎭 🎶. (2:35 minutes long)
(maybe for younger kids)
-5-
Carnival Facts
Carnival comes from ancient Roman and Greek festivals, where people would celebrate the arrival of spring with feasts and parties.
Carnival is celebrated in over 50 countries, with each region adding its unique flavour to the festivities.
Many Carnivals, especially in Spain and Portugal, feature spectacular fireworks displays.
Carnival has influenced other festivals worldwide, such as the Notting Hill Carnival in London, which celebrates Caribbean culture.
The Rio Carnival is the largest in the world, with over two million people participating daily in samba parades, street parties, and elaborate costumes.
In Rio, samba dancers wear elaborate, feathered costumes that can take months to create.
In Trinidad, groups called “Mas Bands” design and wear themed costumes, competing for prizes.
During Venice Carnival, people enjoy Frittelle, a type of fried doughnut filled with cream or raisins.
The Venice Carnival is known for its elegant masks and costumes. The tradition dates back to the 12th century.
Venice is famous for its intricate masks, often adorned with gold leaf, feathers, and jewels.
The Mardi Gras Carnival in New Orleans is famous for its parades, bead-throwing, and vibrant street parties.
In New Orleans, King Cake is a popular treat – it is a sweet, circular cake decorated with purple, green, and gold icing.
-6-
-3-
What is carnival: origins of the world’s biggest party. (3:26 minutes long)
(interesting but too higher grade – good background for teacher though)
-4-
And …
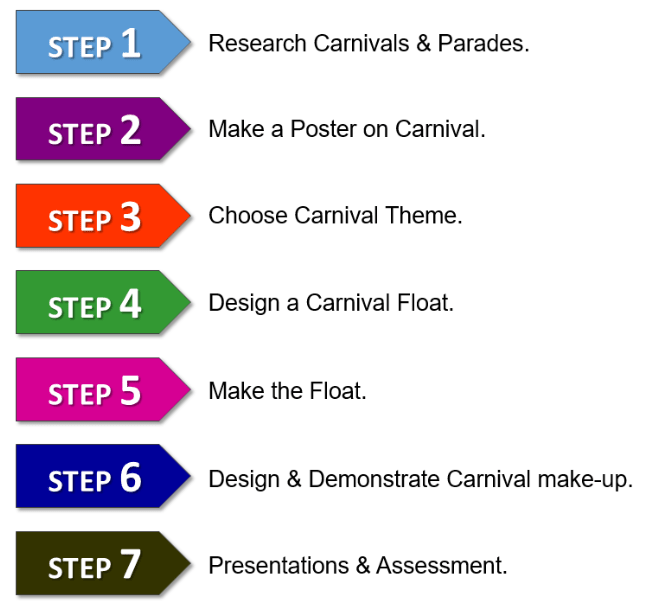
– make a float
– decide on a theme
– plan the float
– build the float
– do make-up for your theme
More about…FLOATS
Rio Carnival Shines With Samba, Spectacle, And Stunning Floats | World News. (1:19 minutes long)
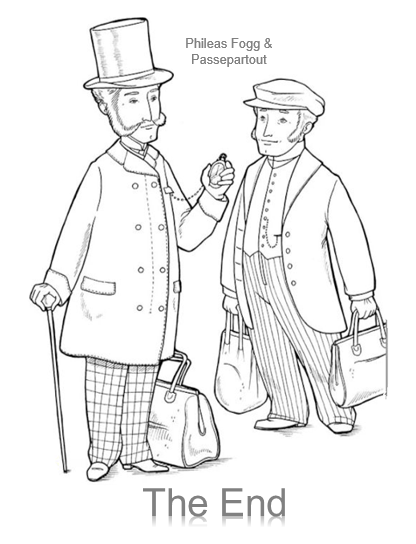
Phileas Fogg bet £50,000 (half his fortune) against five fellow members of London’s Reform Club (Stuart, Fallentin, Sullivan, Flanagan, and Ralph) that he could travel around the world in 80 days or less (1,920 hours). If he missed the deadline, the £50,000 would go to them.
He departed on Wednesday, 2 October 1872, 8:45 p.m.
He had to be back in the Reform Club no later than 8:45 p.m. on Saturday, 21 December 1872.
Fogg hired a French valet called Passepartout, to travel with him.
Here is a animal character version of the story “Around the world in 80 days”
Around the World in 80 Days (1988). (48:51 minutes long)
-3-
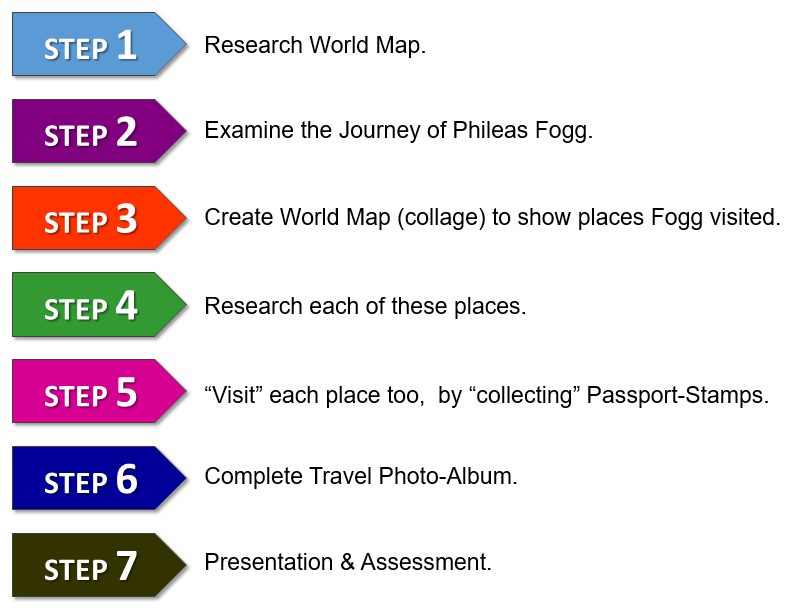
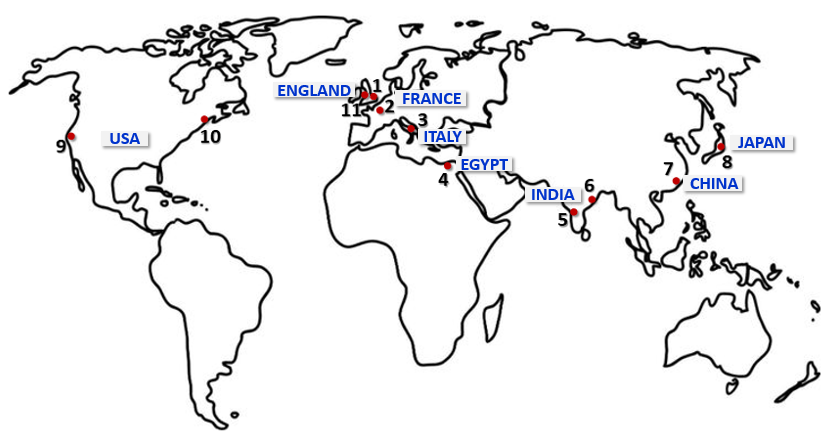
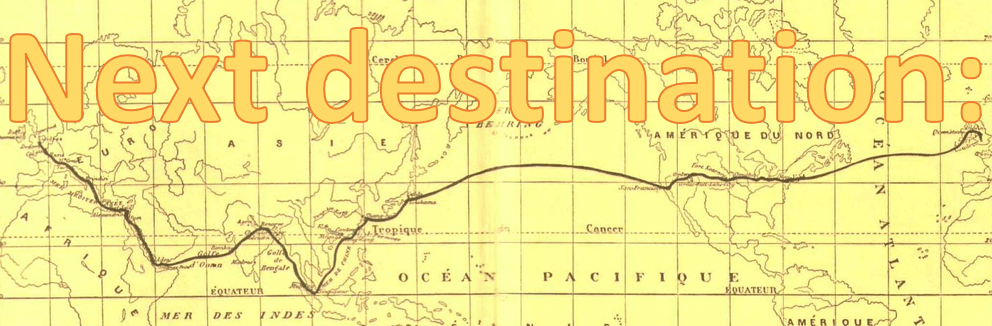
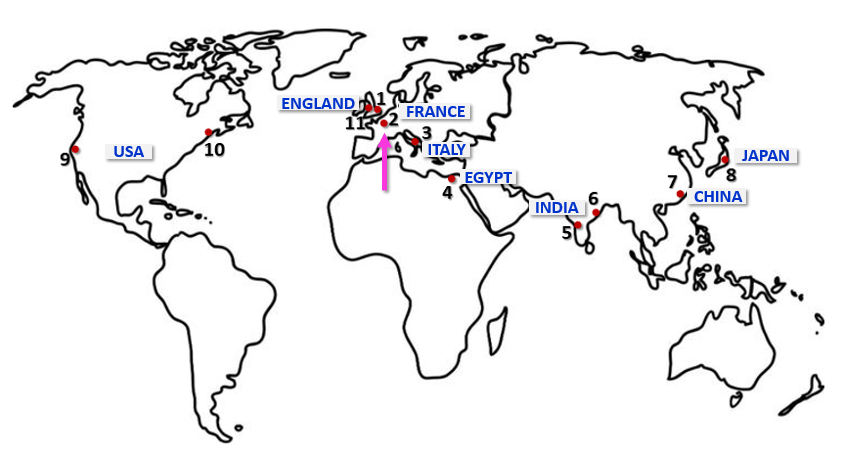
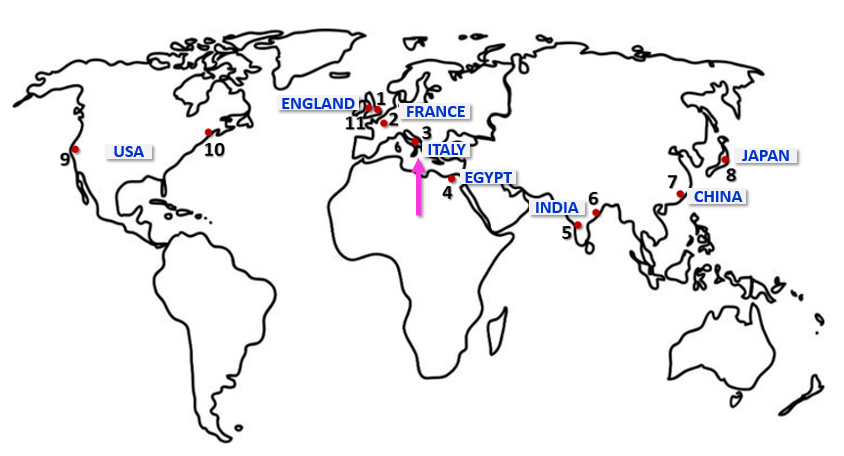
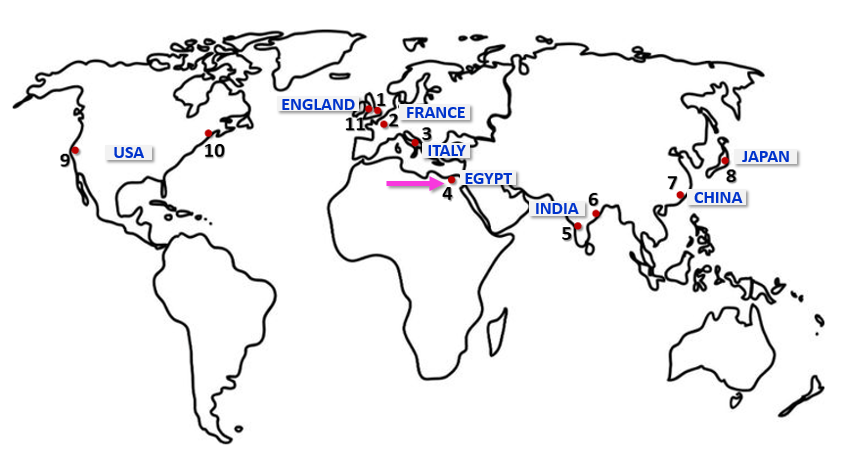
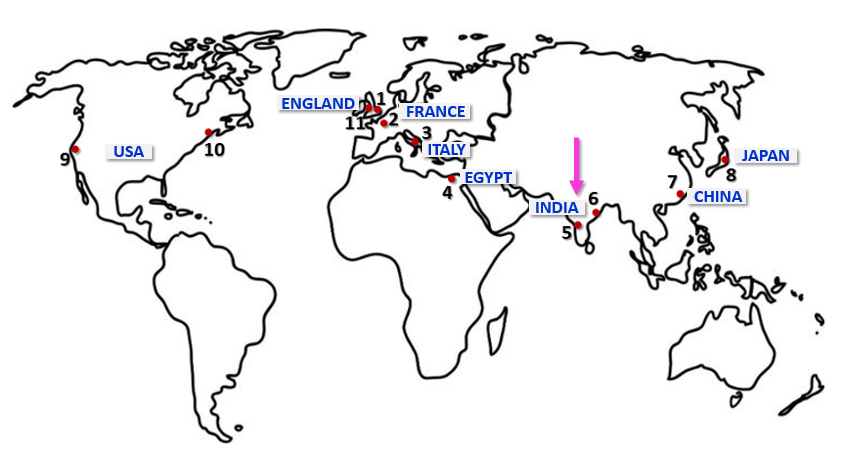
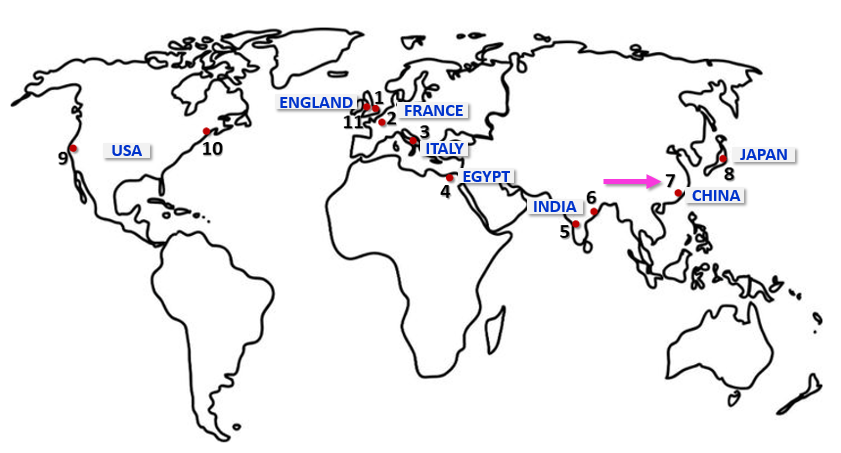
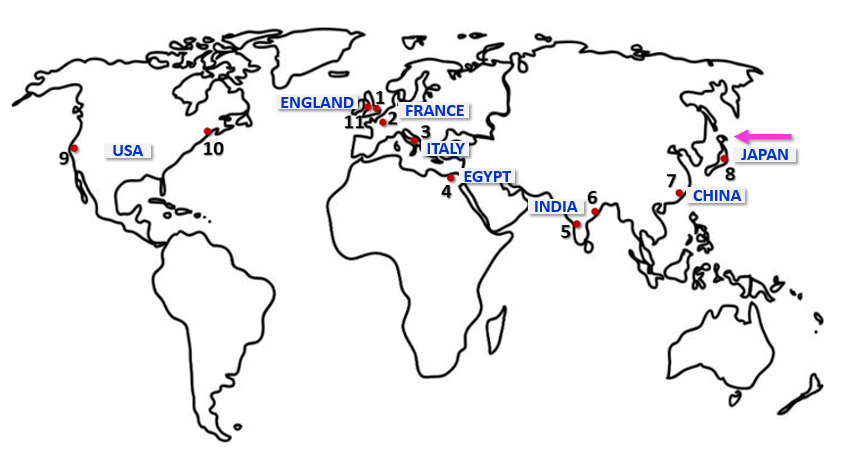
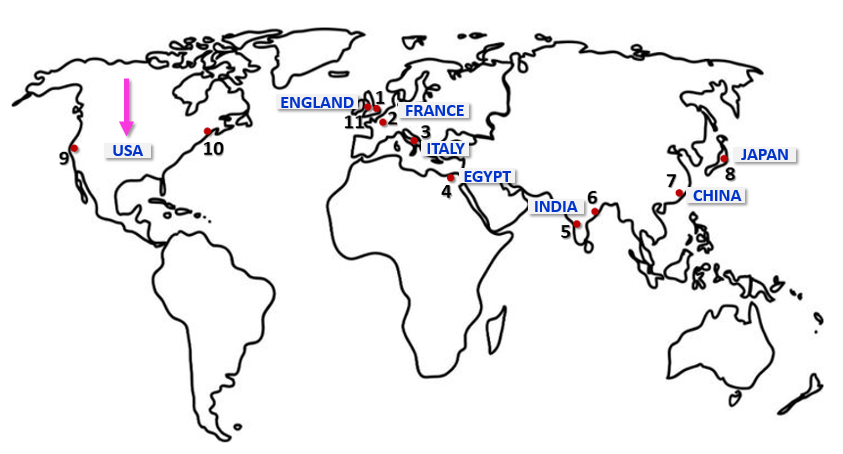
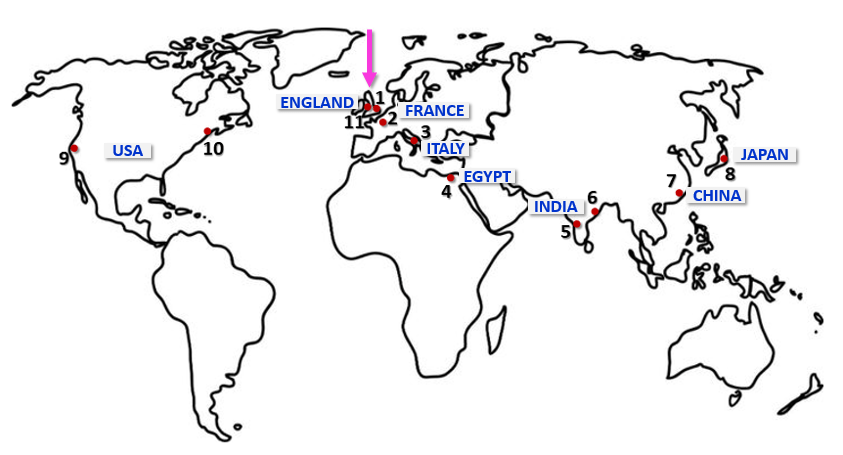
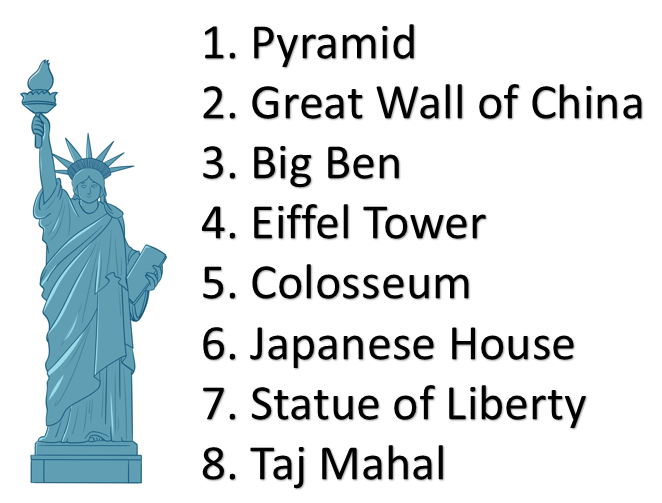
Let’s look at all the places Phileas Fogg visited.
(Will learn more about these places.)
-4-
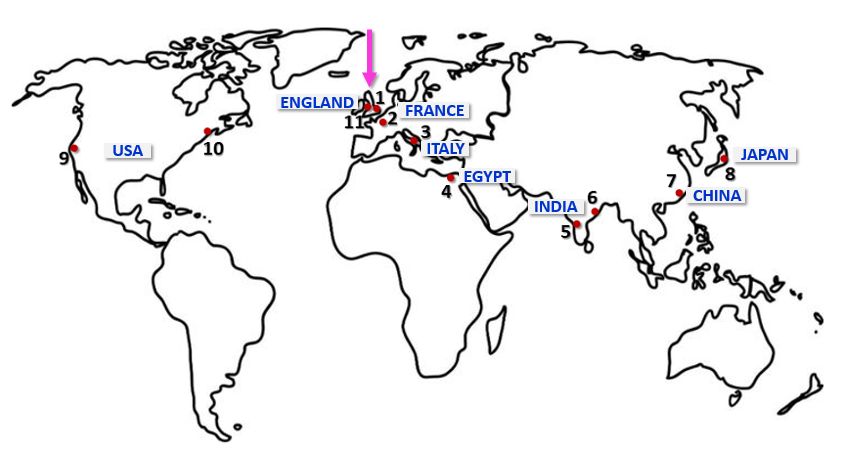
Create a world map collage!
Can you show on the map where the places are that Fogg visited?
(We will learn more about each place Fogg visited.)
-5-
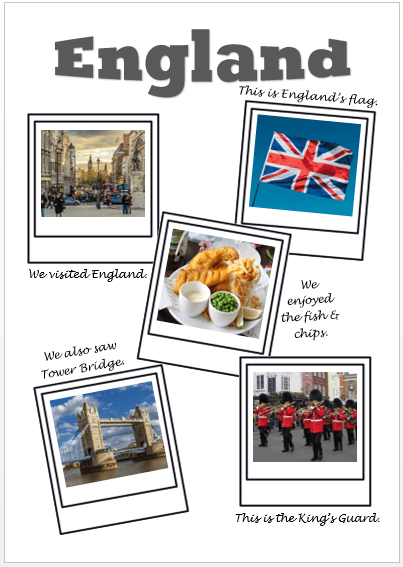
Fogg started his journey in England. Let’s learn more about the places he visited.
England
More about…London
A Guide to London for Kids | Tour of London for Kids. (3:21 minutes long)
-6-
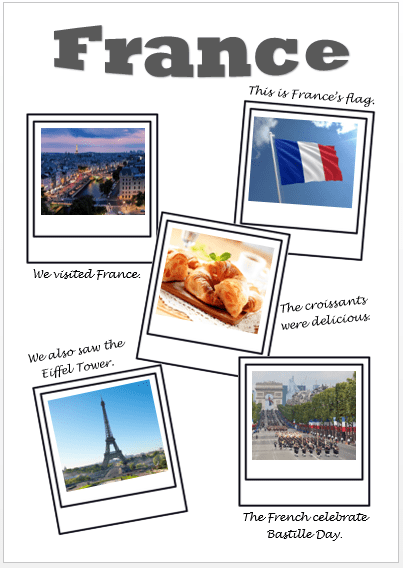
France
More about…Paris
All About Paris for Kids! | Paris Facts for Kids. (2:35 minutes long)
Paris – Educational Trip Around the World. (2:53 minutes long)
-7-
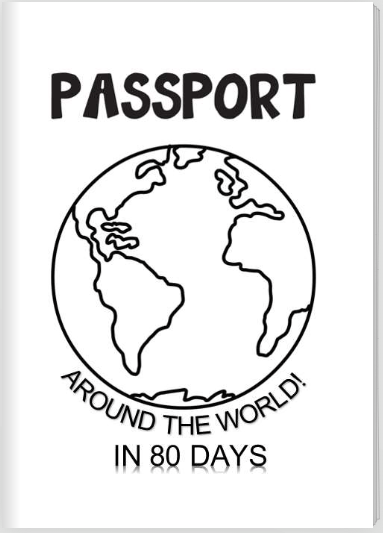
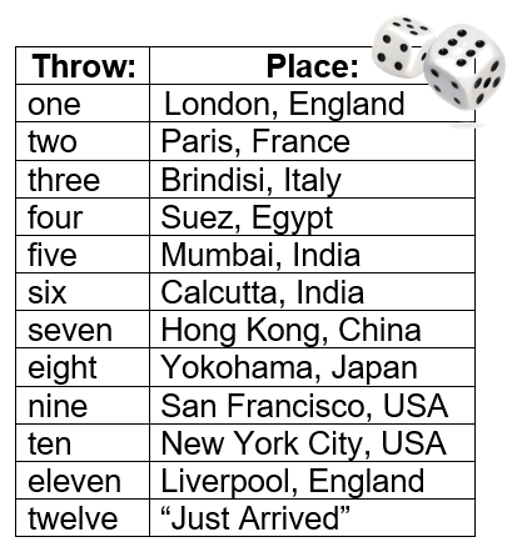
You are going to make the same journey as Phileas Fogg!
Here is your passport:
Click on the passport to page through it!
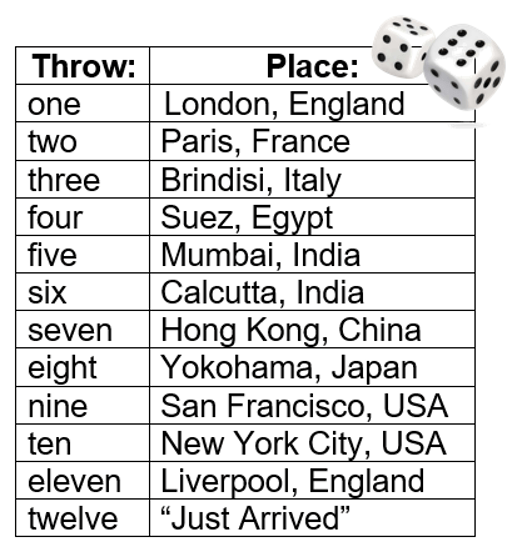
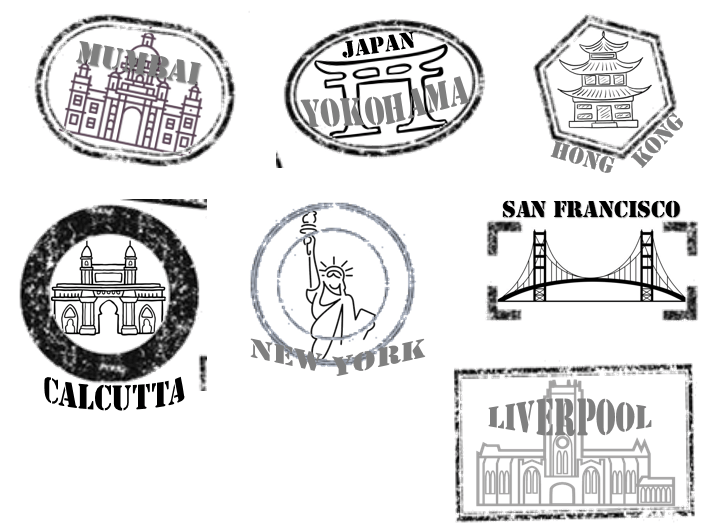
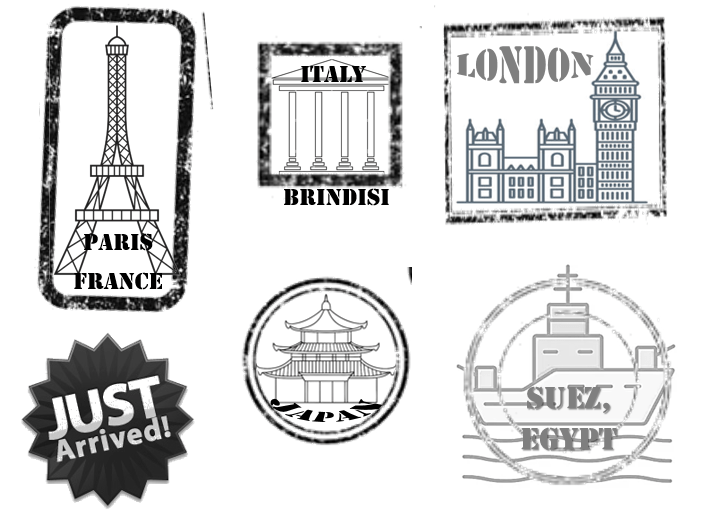
You need to throw the dice to complete your passport with stamps of all the places you visit!
-8-
Let’s learn more about the places Fogg visited.
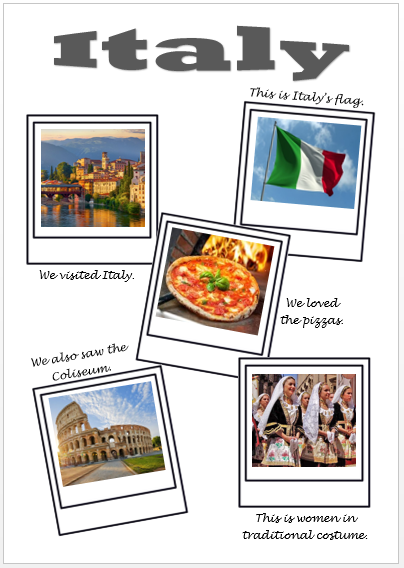
Italy
More about…Turin
Turin in 4K. (2:18 minutes long)
More about…Brindisi
Brindisi, Italy. (1:47 minutes long)
Brindisi Italy. (2:19 minutes long)
-9-
Egypt
More about… Cairo & Suez
Cairo , Egypt 🇪🇬- by drone [4K]. (4:00 minutes long)
Egypt for Kids – Facts from Professor Propeller. (3:32 minutes long)
CAIRO – EGYPT [ HD ]. (3:30 minutes long)
Top 10 Attractions in Cairo, Egypt | Travel Video. (2:13 minutes long)
-10-
Continue on your journey around the world!
Here is your passport. (Click on the passport to page through it!)
-11-
Let’s learn more about the places Fogg visited.
India
More about… Bombay (Mumbai)
Mumbai Madness | A Mickey Mouse Cartoon | Disney Shorts. (3:45 minutes long)
India With Kids | Travel Without Tears. (2:59 minutes long)
More about… Calcutta (Kolkata)
India: Five (5) Fun Facts | Kids cultural education. (3:47 minutes long)
India Facts for Kids. (1:27 minutes long)
-12-
China
More about… Hong Kong
10 Places to visit in Hong Kong. (2:54 minutes long)
-13-
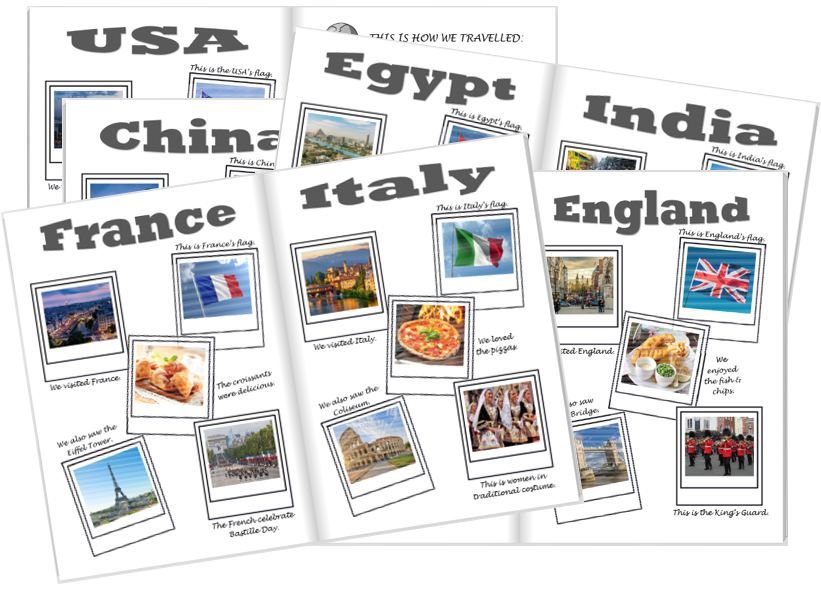
As you travel, complete your Travel Photo Album!
Click on the Travel Album to page through it!
You need to stick the pictures in the correct places in the travel album.


























































































































































































































































































































































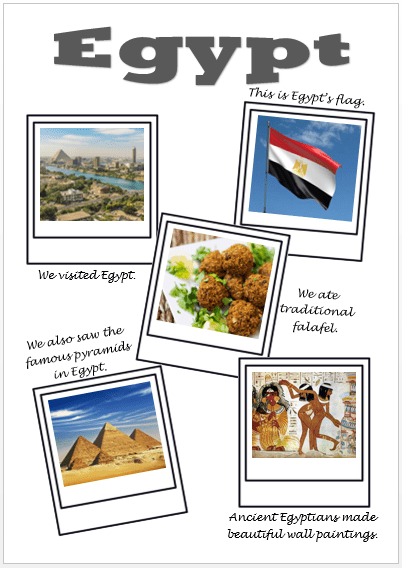
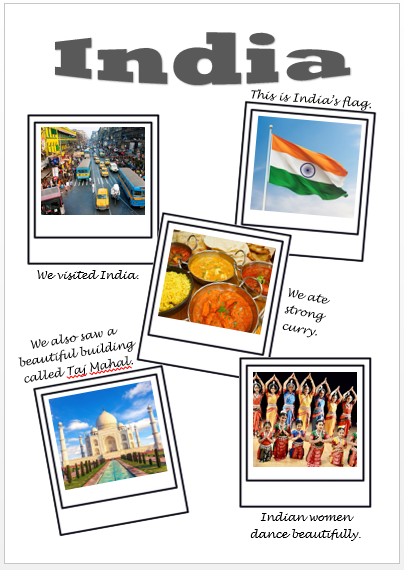
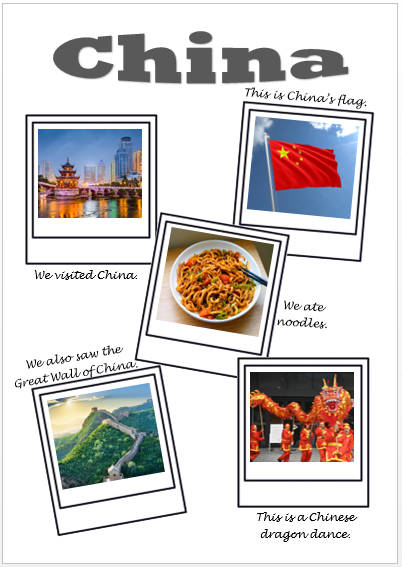
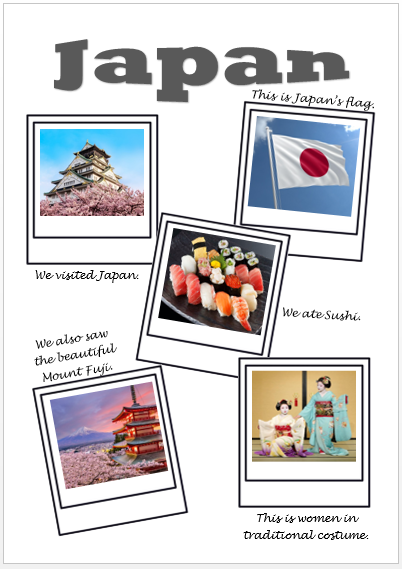
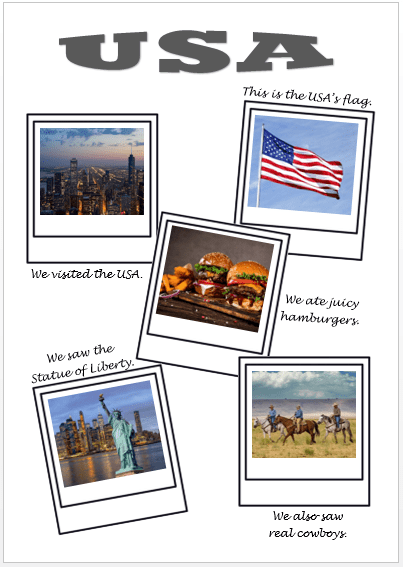
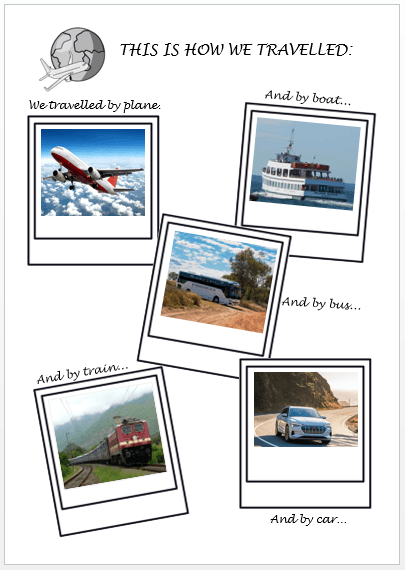


 Best study methods