Protected: Renaissance: HW-9-Feedback
Protected: Renaissance: HW-6-Feedback
Protected: Roman Living: HW-7-Answers
Protected: Roman Living: HW-6-Feedback
Protected: Roman Invasion: HW-10-Feedback
Protected: Roman Living: HW-5-Answers
Protected: Roman Living: HW-4-Answers
Protected: Roman Living: HW-3-Answers
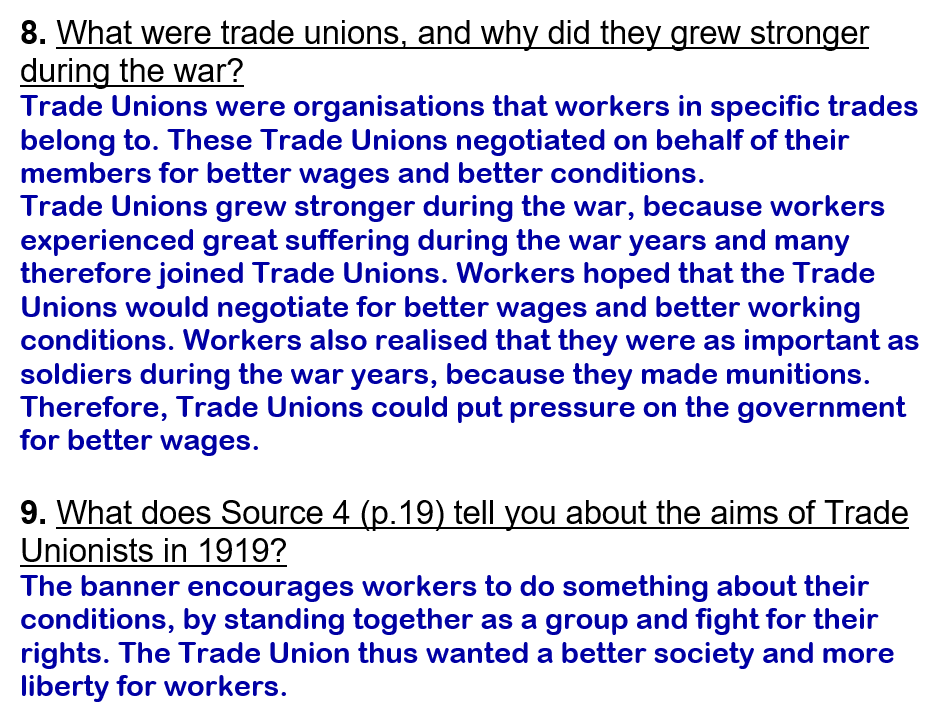
Protected: Roman Living: HW-2-Answers
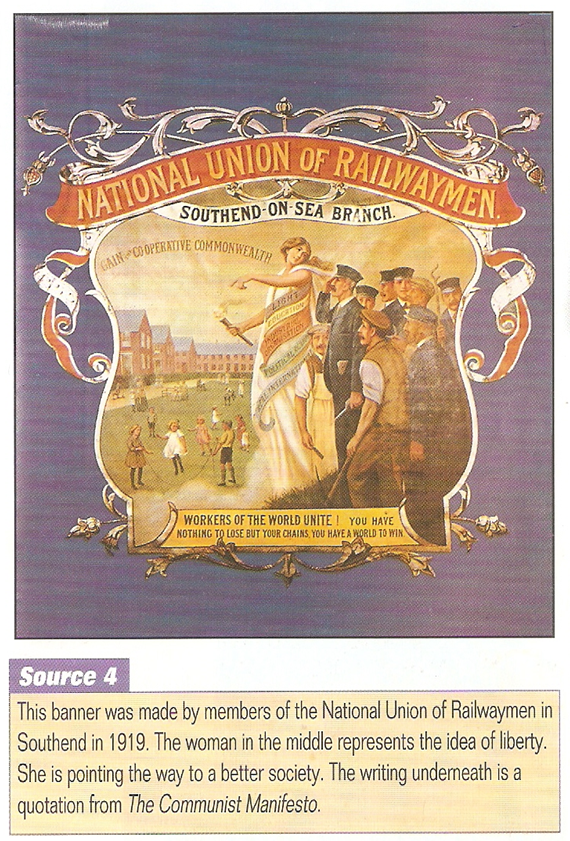
Exploration: HW-6


Homework Task 6 (p.24) is due:
(See Schoology)

This is a Test!!
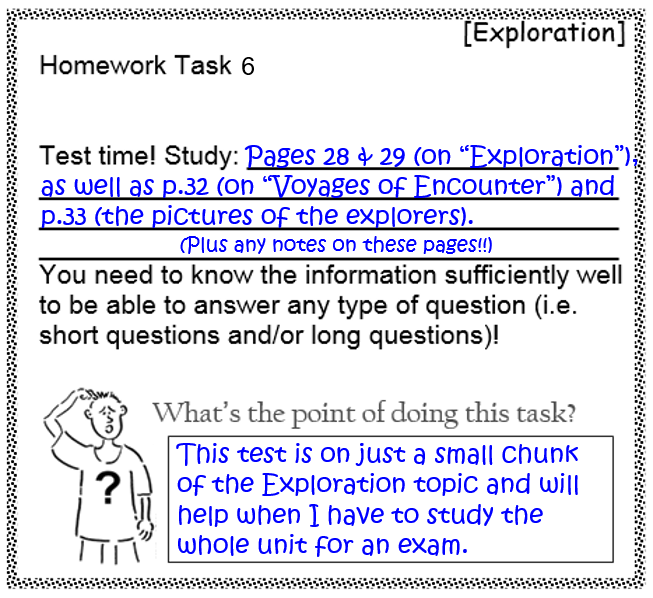

Make good notes on these pages and then study from your notes – go over them again and again till you know the work very well!

(WordPress advertisements may appear below.)
Consequences of WW 1: HW-6

Homework Task 6 (p.40) is due:
(See Schoology)
This is a Test!!
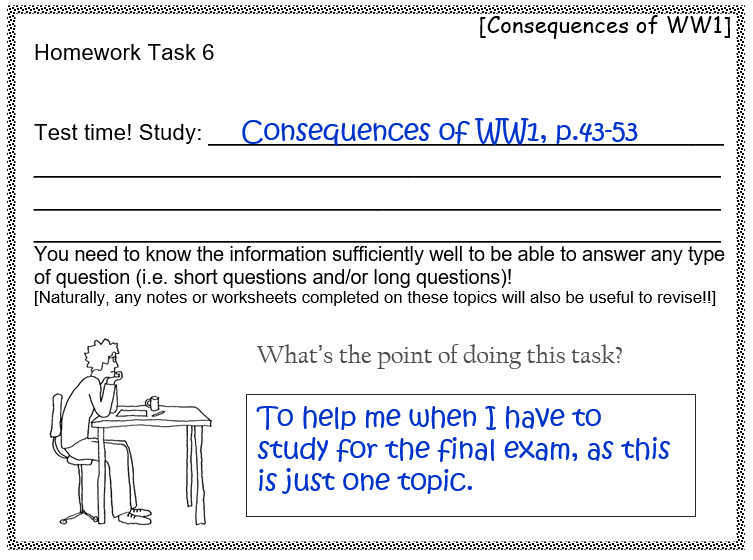
Remember that you already have notes on some of these pages in your purple exercise book!

(WordPress advertisements may appear below.)
Y8: 2-6. Tenochtitlan
Year 8A & Year 8B
Today you are going to examine the Aztec capital from a little closer…
Follow the instructions step by step:
1.
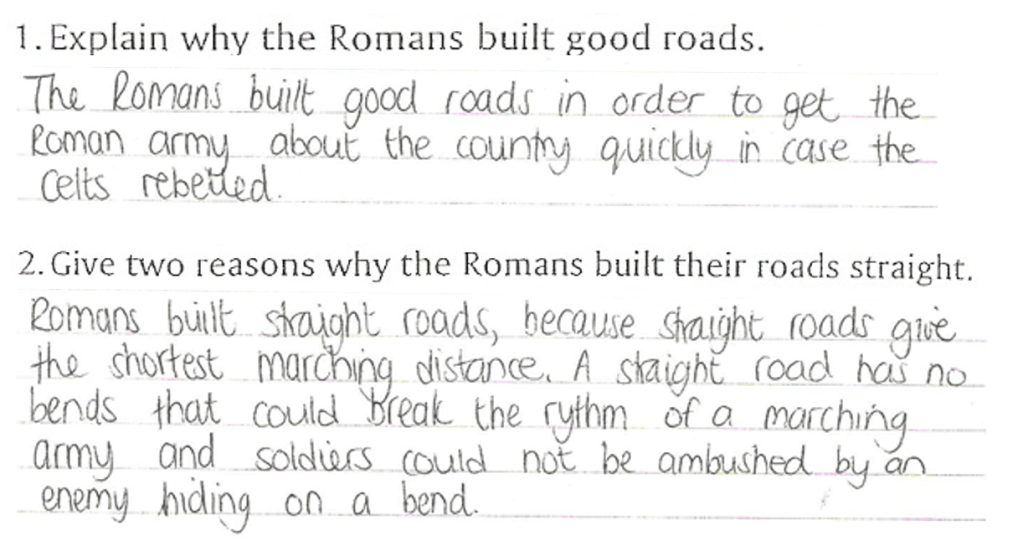
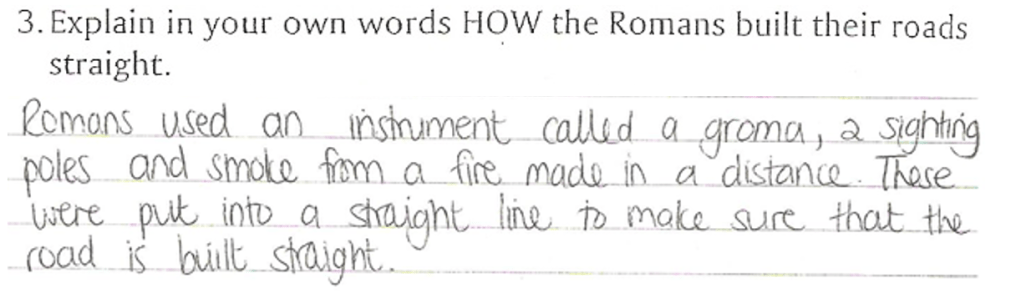
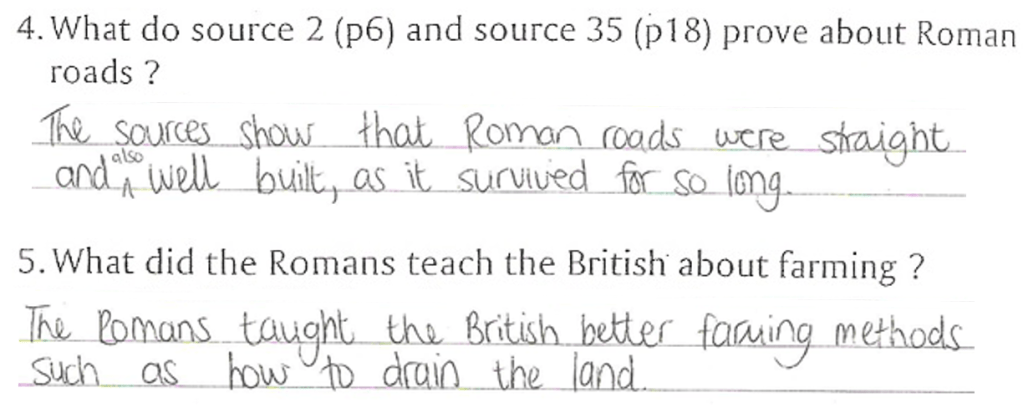
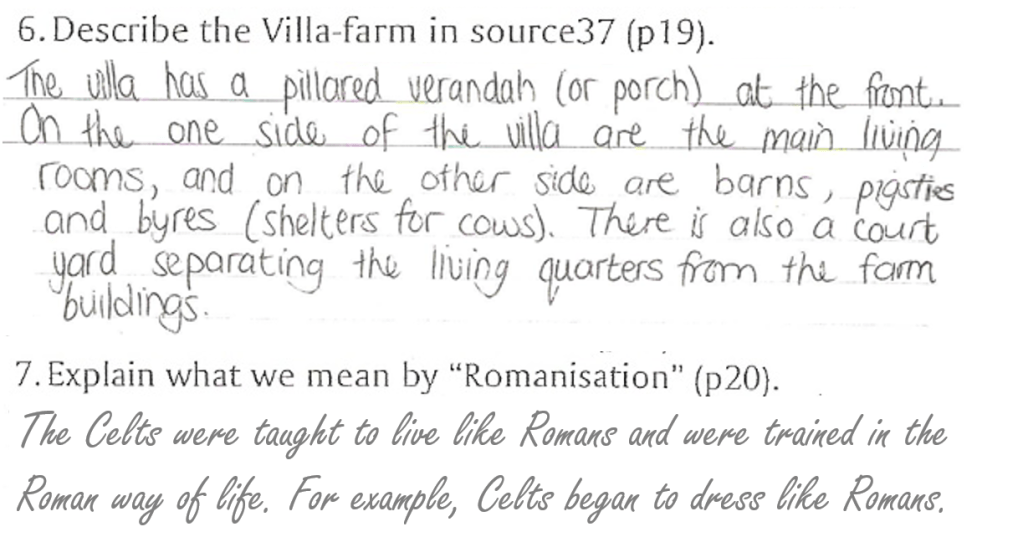
Homework 4 will be assessed as an “Assignment” in Schoology. However, here is an example of what you could have written:
2.
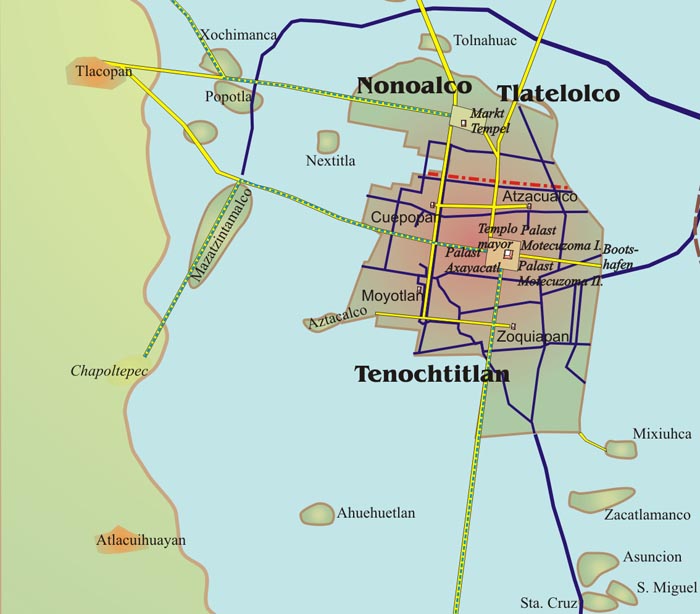
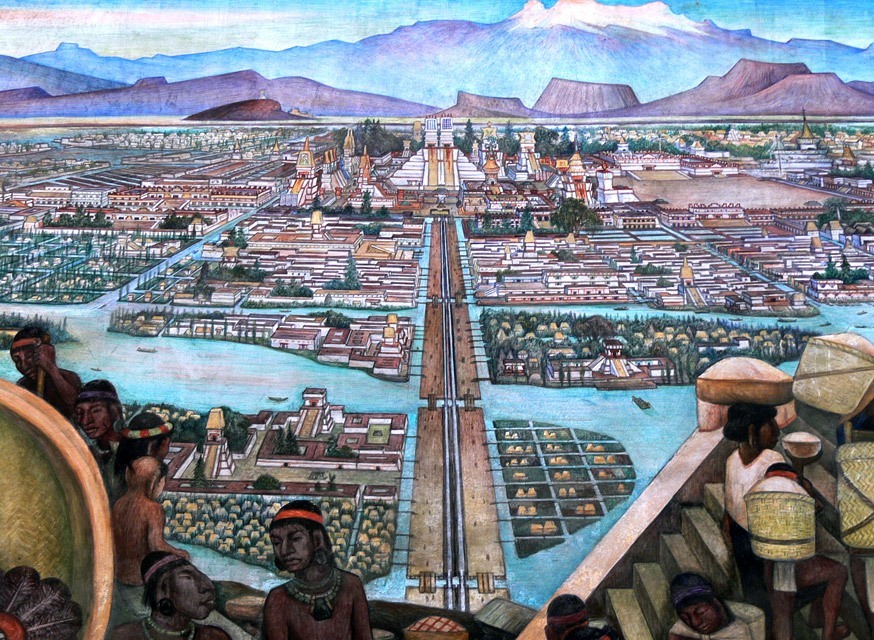
The Aztec capital was Tenochtitlan. Cortes and his Spanish companions were very impressed with the Aztec city!

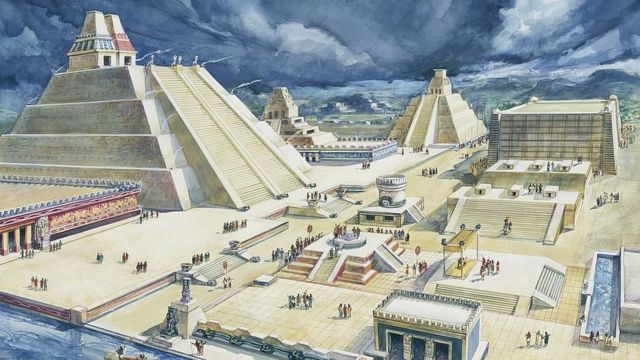
3.
Let’s see if it was as impressive as they reported…

Tenochtitlan -The Venice of Mesoamerica (Aztec History). (8:13 minutes long)
4.
This is what the Spaniards said about Tenochtitlan:
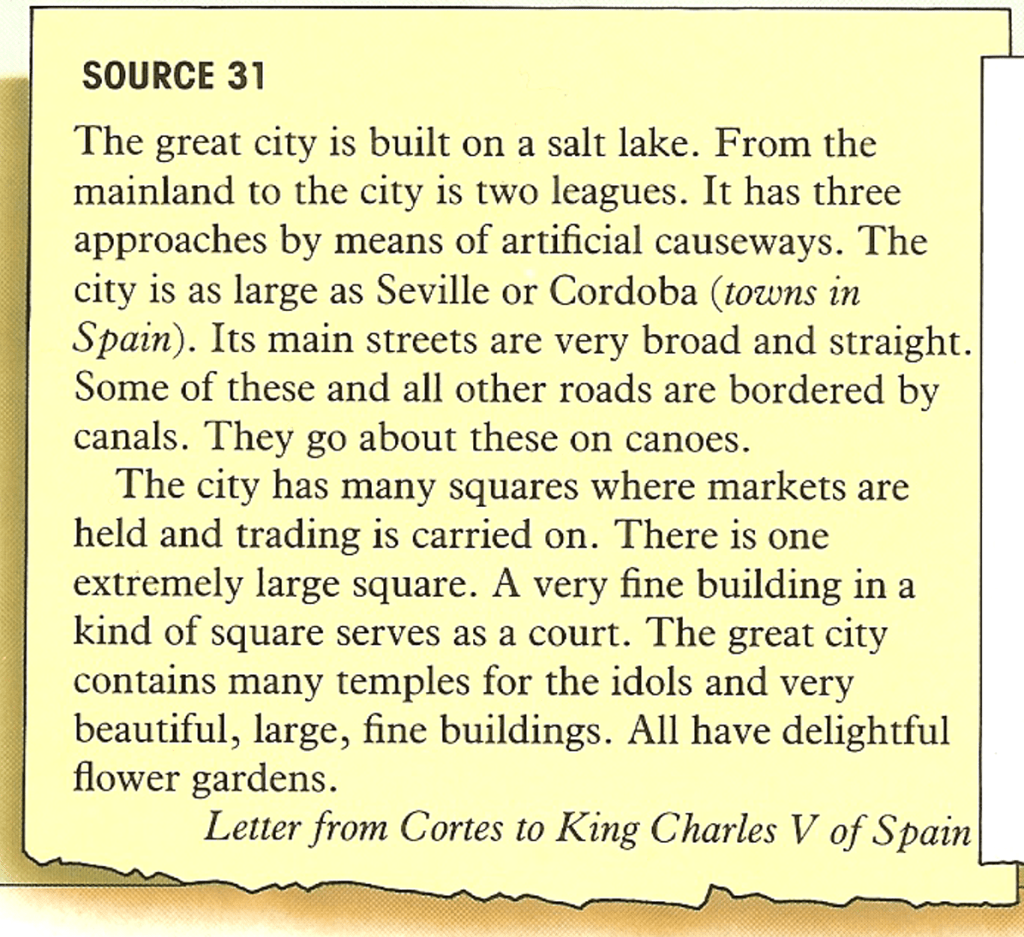


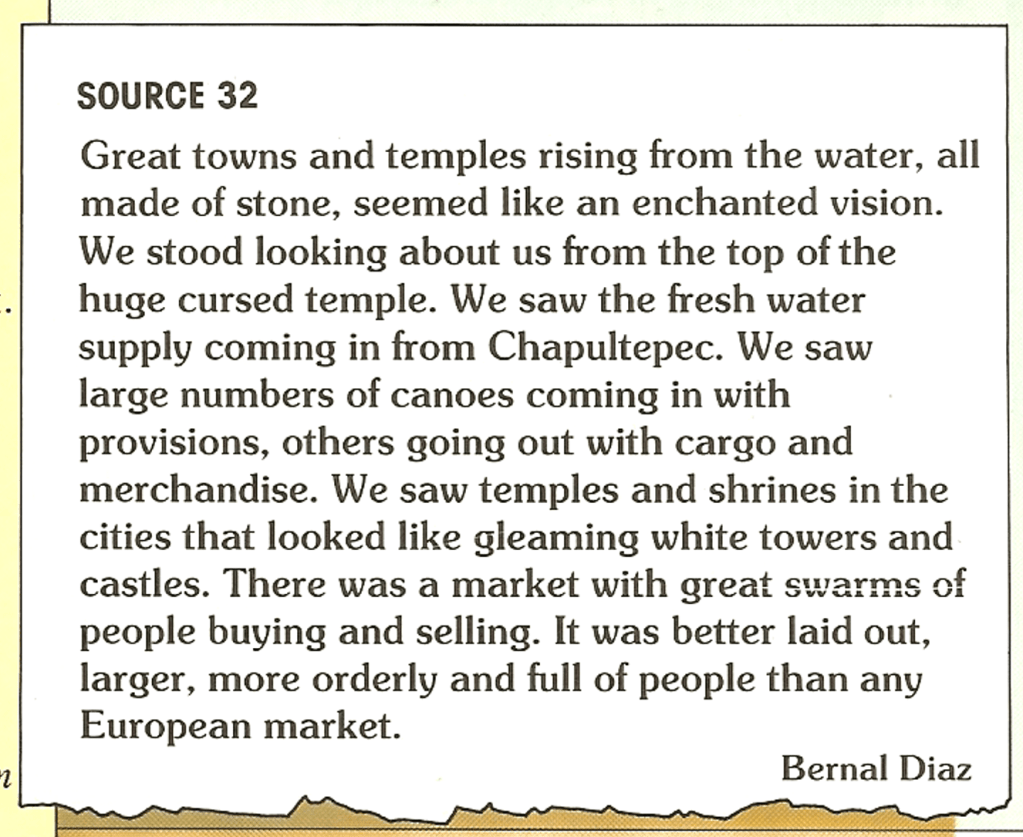
5.
Tenochtitlan is Mexico City today. Read from your workbook a bit more about Mexico City…
Extra Reading, page 41.
6.
Use the self-study booklet (handed out in class) and answer the questions on p.6 – each question is worth 5 marks!! So, make sure that you answer in great detail. Also remember to back up your statements with evidence from the sources!
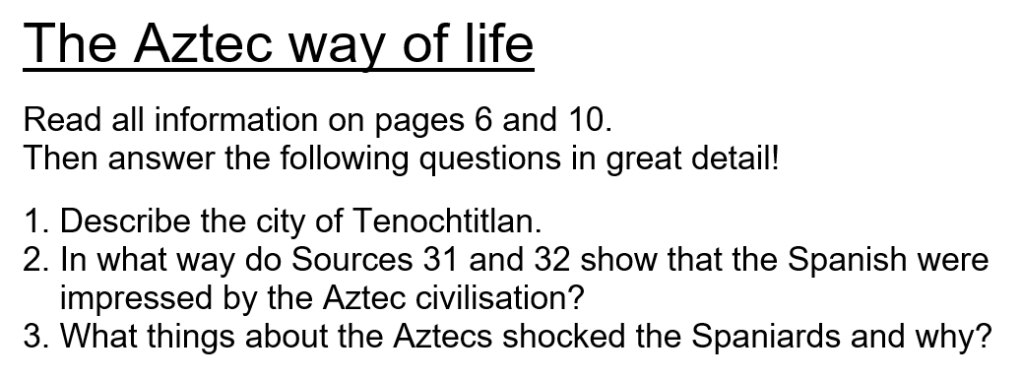

Remember to give evidence from the sources!! (Short quotes are needed to support your statements!!!)

You can access the answers to all the tasks on Cortes & the Aztecs by clicking on the “Answers” button above.
7.
Finally, make sure that all your books are up to date:
(WordPress advertisements may appear below.)
Y7: 2-10. Source Question
Year 7A & Year 7B
Today you are going to complete the Source Question on tombstone inscriptions…
Follow the instructions step by step:
1.
First…

Task 5 on p.30-31.
2.
Now, continue with the task started in the previous lesson:
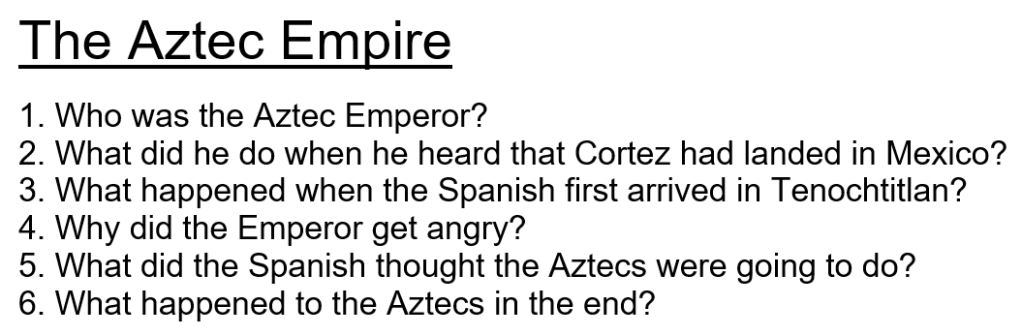
This is what you have to do: Answer the Source Question (Question 8 on tombstone inscriptions), p.36, to see if you can do better than your student!


Remember to follow the advice below…!


So, what does this mean…?
3.
Here is some assistance…

You need to use the translations of the tombstone inscription below…!

4.
If you really struggle you may also look at the following analysis of the inscription on this tombstone…

5.
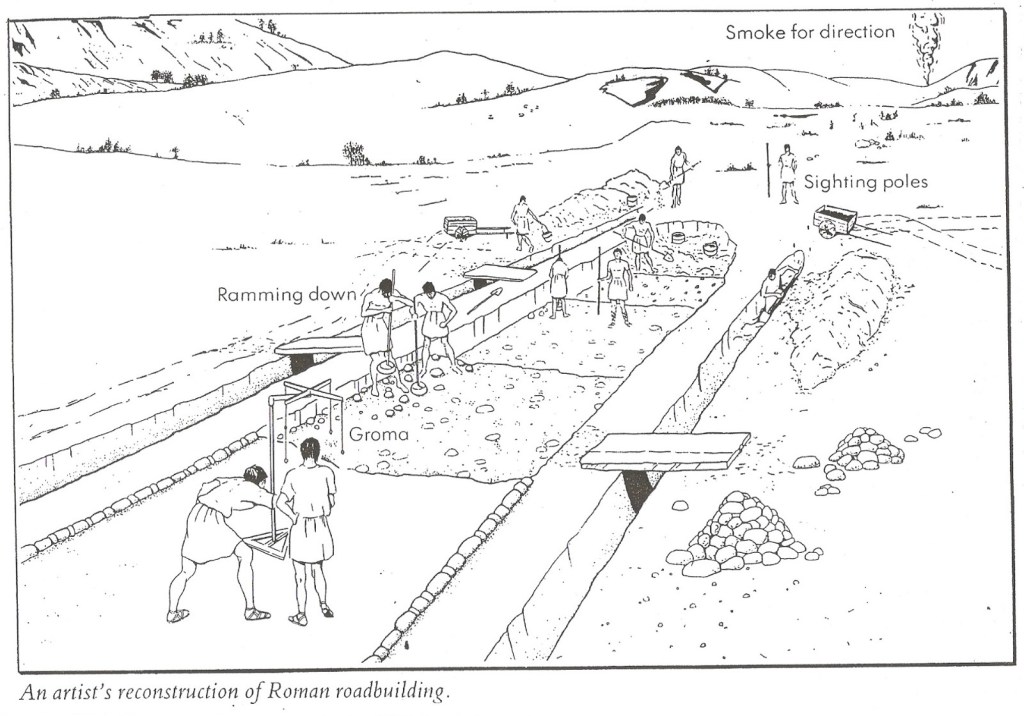
If not completed yet, colour in the Road Building Illustration, (on p.29 of your workbook) to show how the Romans built their roads straight.
6.
Finally, make sure that all your books are up to date.


(WordPress advertisements may appear below.)
Y10: 3-2. Power Struggle
Today you are going to investigate the power struggle that occurred after Lenin’s death in more detail!
1.
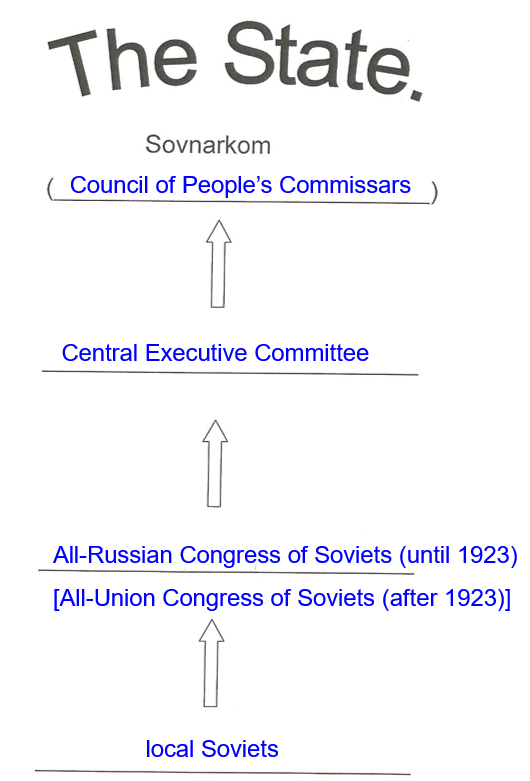
Let’s first do a little bit of revision as it is important that you know the structure of the Politburo and also that of Sovnarkom….
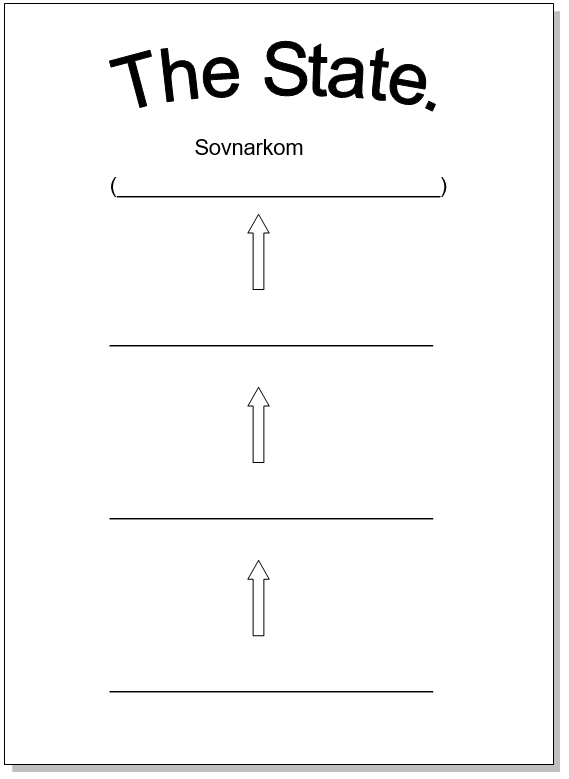
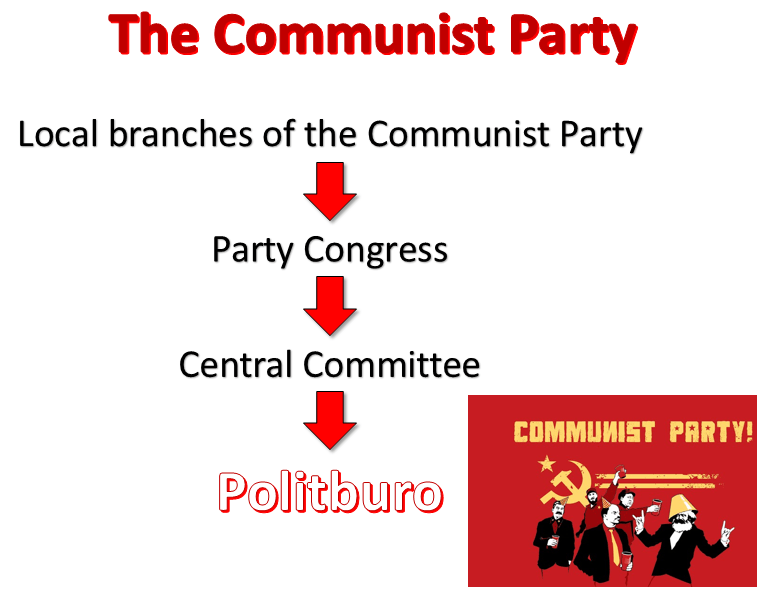
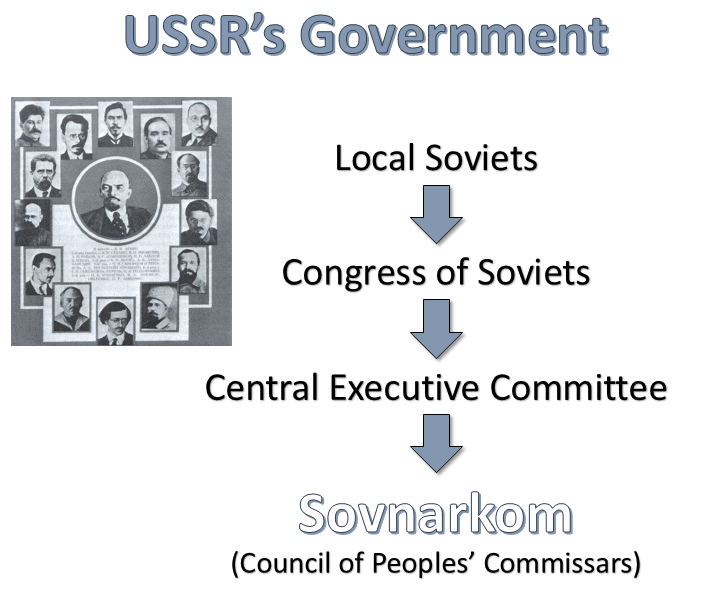
2.

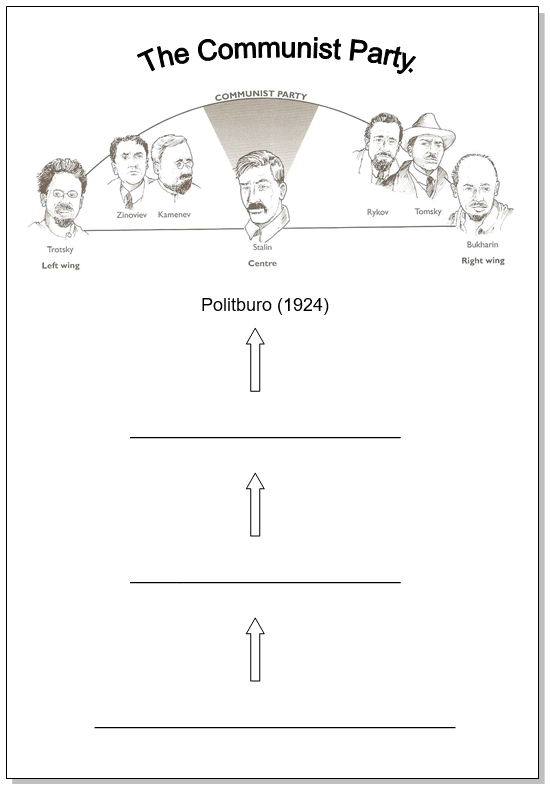
…about “The State” and about “The Communist Party”:
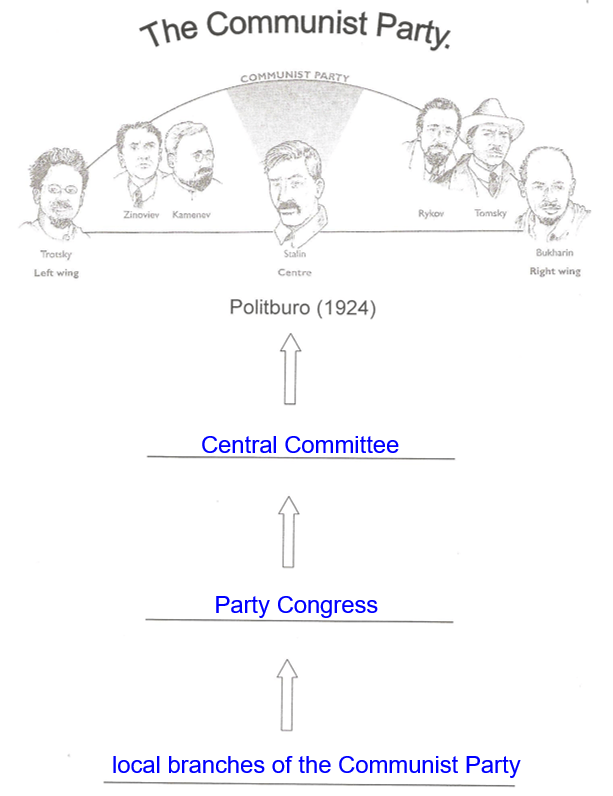
3.
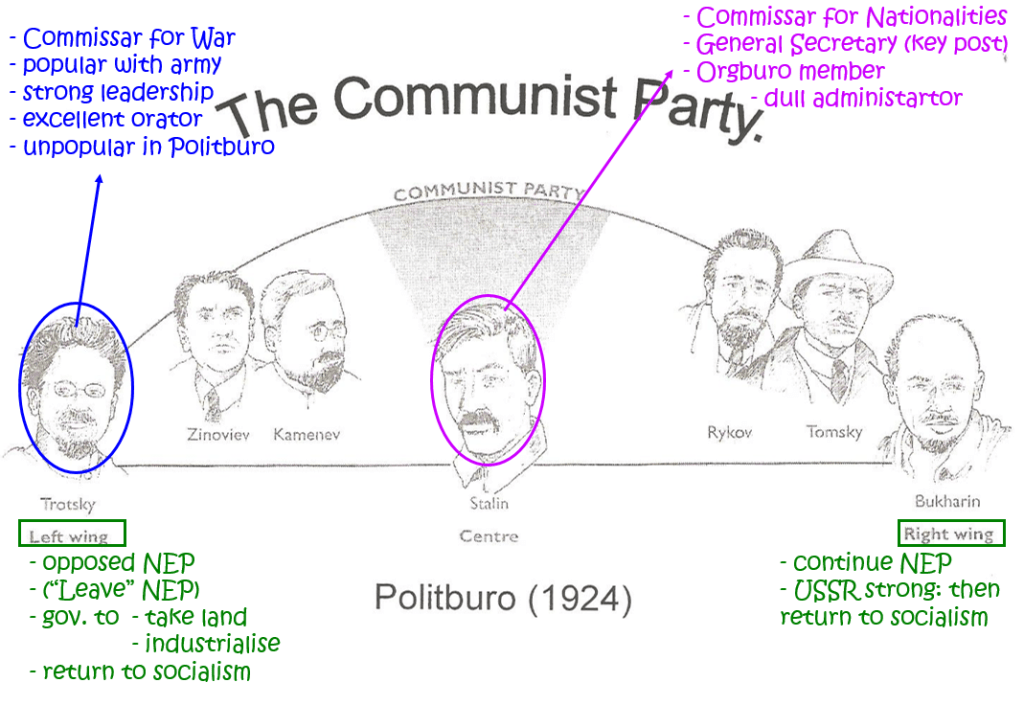
Let’s consider what the Politburo looked like in January 1924.
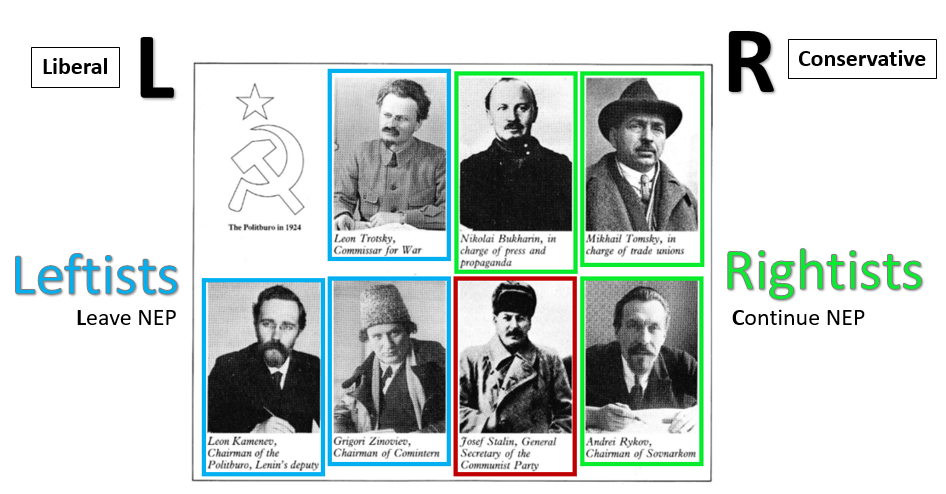
4.
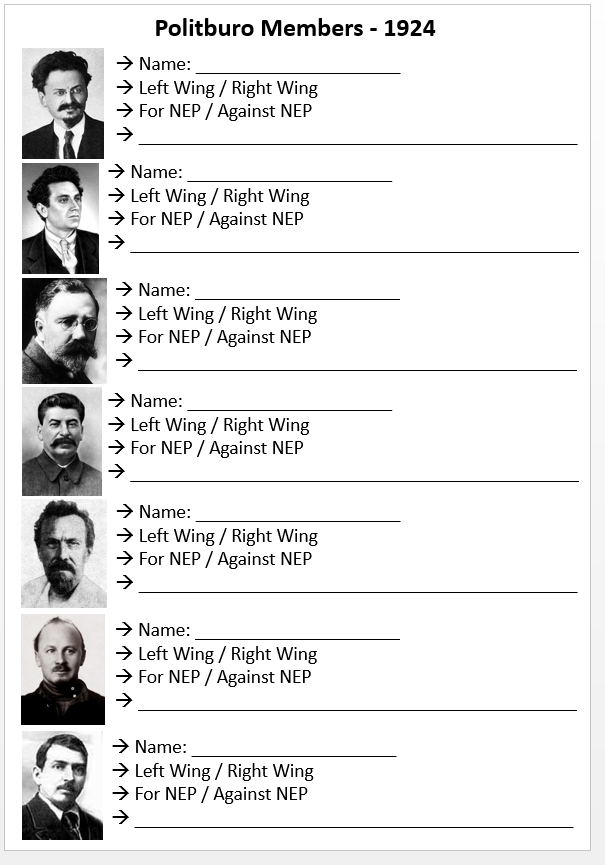
So, let’s find out a bit more about the members of the Politburo at the time of Lenin’s death.

Politburo Members. (2:01 minutes long)
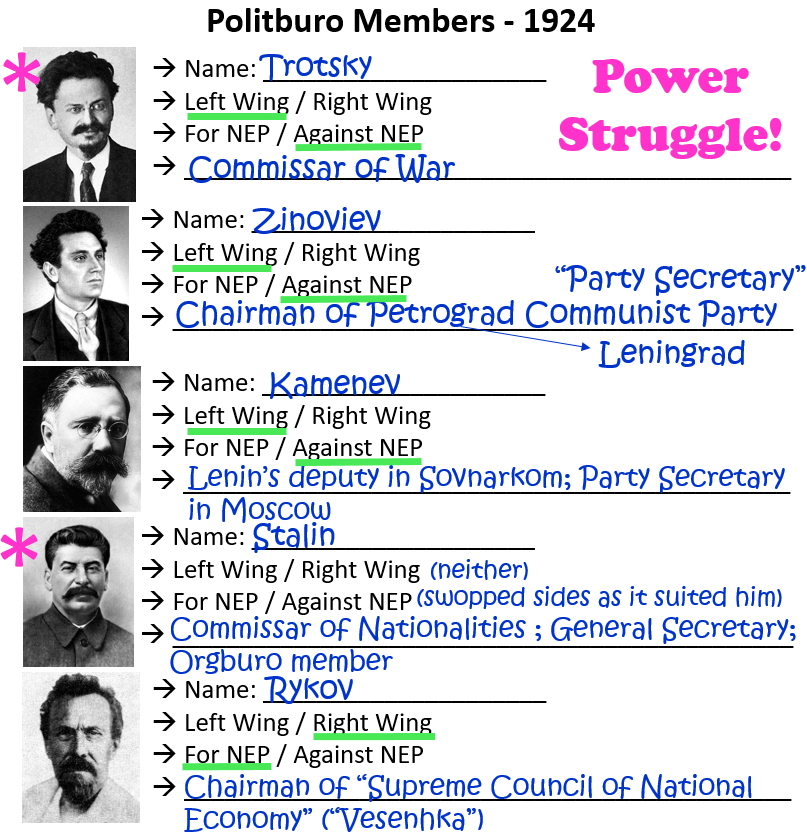
5.
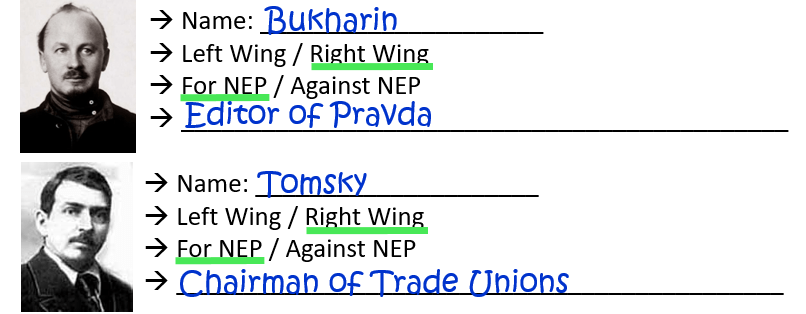
…about “The Politburo Members – 1924”:
6.
Before Lenin died, he wrote a letter, to be read to the Party Congress after his death. This letter is also known as “Lenin’s Testament”. It commented on all the potential leaders in the party.
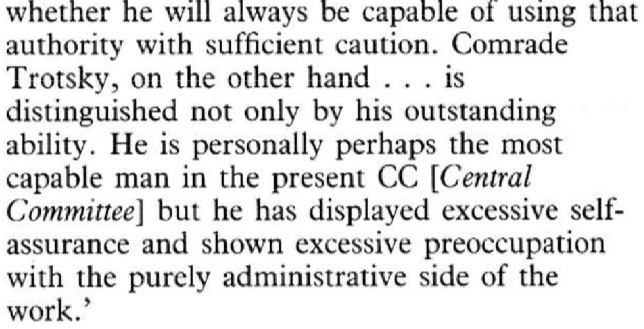
Here is an extract that comments specifically on Trotsky and Stalin:

Ten days later Lenin added a post script to the letter:
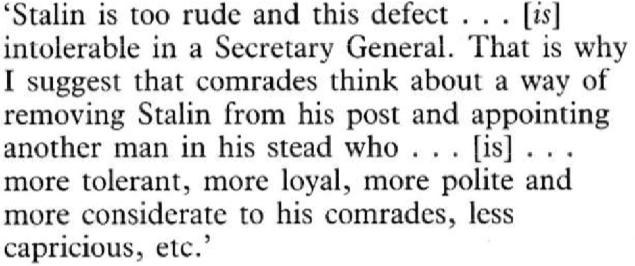
This clearly puts Stalin in a bad light – it was very unlikely that he would be chosen as Lenin’s successor!
7.
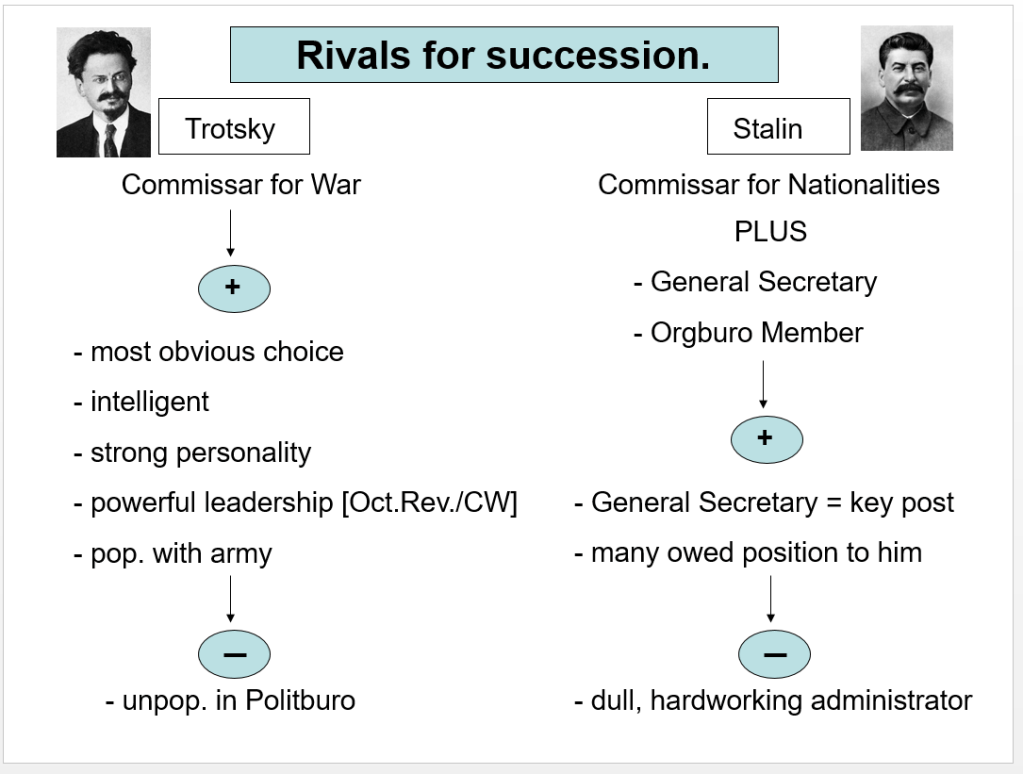
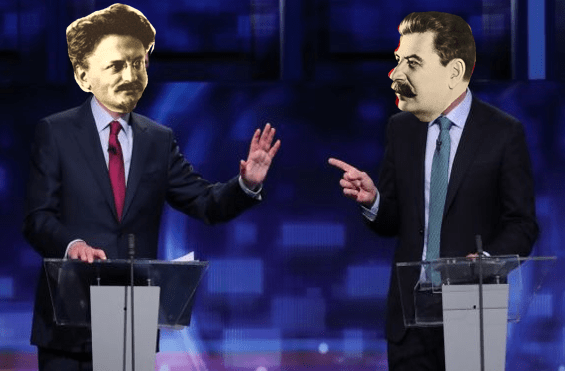
The clear rivals for succession were Trotsky and Stalin…
8.
Below is a video that repeats the information about the structures of the State and the Party, as well as the information about the rivals for succession and the members of the Politburo in 1924. Watch this if you are still unsure about these details.
Politburo in 1924. (2:51 minutes long)
9.
Here is a bit more about the advantages and the disadvantages of the two main rivals for succession:
10.
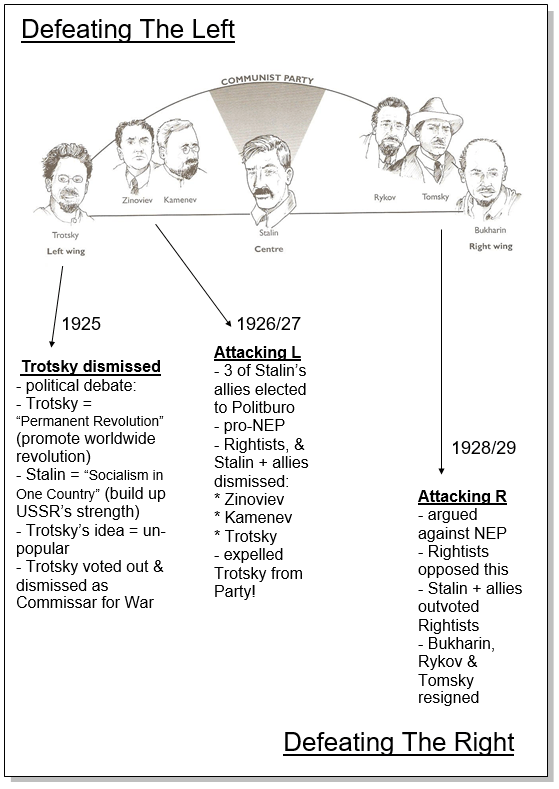
So, how did Stalin emerge as leader of the Soviet Union? Below are the key events that helped Stalin to become leader after Lenin’s death.
Key events in Stalin’s road to power:
Lenin’s Funeral
Stalin cleverly made sure that Trotsky did not attend Lenin’s Funeral, by telling him the wrong date!

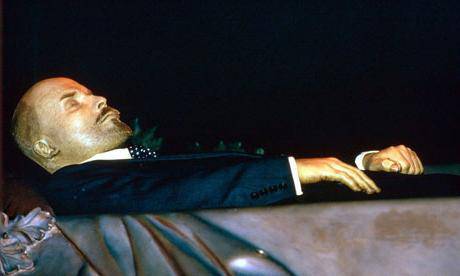
Cult of Lenin
Next, Stalin encouraged the cult (or worship) of Lenin, by (e.g.) putting his body on permanent display.
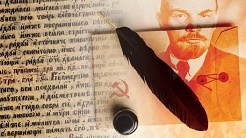
Lenin’s Testament
Lenin’s testament was meant to be read to the Party Congress, but it was decided to keep Lenin’s views on the Politburo members a secret.
Party Debate
During a Party Debate Stalin proved to have a more popular idea regarding worldwide revolution than Trotsky…
Siding with RIGHT
Stalin cleverly sided with the Rightists in order to outvote the Leftists from the Politburo.
Siding with LEFT
Stalin then sided with the Leftists in order to outvote the Rightists from the Politburo.
11.
Now, let’s look at the steps Stalin took to succeed Lenin as Soviet leader…
Steps to Power. (3:21 minutes long)
12.
Finally, here is a short summary of the video. Carefully go over the information in the diagrams below:

13.

A crucial factor was the survival of Lenin’s Testament. Read the Testament to see what Lenin thought of Trotsky and of Stalin. (The sections in red are relevant to your study.)
Lenin’s Testament – 1922
“By the stability of the Central Committee, of which I spoke above, I mean measures against a split, as far as such measures can at all be taken. For, of course, the whiteguard in Russkaya Mys (it seems to have been S. S. Oldenburg) was right when, first, in the whiteguards’ game against Soviet Russia he banked on a split in our Party, and when, secondly, he banked on grave differences in our Party to cause that split.
Our Party relies on two classes and therefore its instability would be possible and its downfall inevitable if there were no agreement between those two classes. In that event, this or that measure, and generally all talk about the stability of our C.C., would be futile. No measures of any kind could prevent a split in such a case. But I hope that this is too remote a future and too improbable an event to talk about.
I have in mind stability as a guarantee against a split in the immediate future, and I intend to deal here with a few ideas concerning personal qualities.
I think that from this standpoint, the prime factors in the question of stability are such members of the C.C. as Stalin and Trotsky. I think relations between them make up the greater part of the danger of a split, which could be avoided, and this purpose, in my opinion, would be served, among other things, by increasing the number of C.C. members to 50 or 100.
Comrade Stalin, having become Secretary-General, has unlimited authority concentrated in his hands, and I am not sure whether he will always be capable of using that authority with sufficient caution. Comrade Trotsky*, on the other hand, as his struggles against the C.C. on the question of the People’s Commissariat for Communications has already proved, is distinguished not only by outstanding ability. He is personally perhaps the most capable man in the present C.C., but he has displayed excessive self-assurance and shown excessive preoccupation with the purely administrative side of the work.
These two qualities of the two outstanding leaders of the present C.C. can inadvertently lead to a split, and if our Party does not take steps to avert this, the split may come unexpectedly.
I shall not give any further appraisals of the personal qualities of other members of the C.C. I shall just recall that the October episode with Zinoviev and Kamenev was, of course, no accident, but neither can the blame for it be laid upon them personally, any more than non-Bolshevism can upon Trotsky.
Speaking of the young C.C. members, I wish to say a few words about Bukharin and Pyatakov. They are, in my opinion, the most outstanding figures (among the younger ones), and the following must be borne in mind about them: Bukharin is not only a most valuable and major theorist of the Party; he is also rightly considered the favorite of the whole Party, but his theoretical views can be classified as fully Marxist only with the great reserve, for there is something scholastic about him (he has never made a study of dialectics, and, I think, never fully appreciated it).
December 25. As for Pyatakov, he is unquestionably a man of outstanding will and outstanding ability, but shows far too much zeal for administrating and the administrative side of the work to be relied upon in a serious political matter.
Both of these remarks, of course, are made only for the present, on the assumption that both these outstanding and devoted Party workers fail to find an occasion to enhance their knowledge and amend their one-sidedness.”
– Lenin, December 1922 –
* * * * *
“Stalin is too rude and this defect, although quite tolerable in our midst and in dealing among us Communists, becomes intolerable in a Secretary-General. That is why I suggest the comrades think about a way of removing Staling from that post and appointing another man in his stead who in all other respects differs from Comrade Stalin in having only one advantage, namely, that of being more tolerant, more loyal, more polite, and more considerate to the comrades, less capricious, etc. This circumstance may appear to be a negligible detail. But I think that from the standpoint of safeguards against a split, and from the standpoint of what I wrote above about the relationship between Stalin and Trotsky, it is not a detail, or it is a detail which can assume decisive importance.”
– Lenin, January 1923 –
[Source: Lenin, Collected Works, vol. 36 (Moscow: Progress Publishers, 1966), pp. 594-596.]
http://www.historyguide.org/europe/testament.html
(WordPress advertisements may appear below.)
Y10: 3-1. Stalin – an Introduction
Today we are going to start our topic on Stalin’s Russia!
(2:22 minutes long)
1.
Let’s first consider what sort of a leader Lenin was. Was he a good leader?
History vs. Vladimir Lenin. (6:42 minutes long)
(It was actually more Stalin’s efforts that made the USSR into a modern industrialized Super Power. However, Lenin put measures in place to start the process, whereas Stalin completed the process.)
2.
So, Lenin died in January 1924…
Russia: 100 Years on from Revolution. (3:06 minutes long)
3.
Lenin did not appoint a leader in his place – so it was not sure who should take over the leadership of Russia after his death.
In the diagram below we can see the members of the Politburo in 1924. The two main rivals for power were Stalin and Trotsky.
4.
Let’s get to know them a little better:

Leon Trotsky…Mini Bio. (6:77 minutes long)
Joseph Stalin… Mini Bio. (8:22 minutes long)
5.
So, Stalin emerged as leader of the USSR after Lenin’s death. He set out to rapidly modernize the Soviet Union. Over the next few weeks we will:
- learn how Stalin emerged as leader of the USSR
- see how Stalin modernize the USSR
- examine Stalin’s reign of terror
- see what it was like to live in Stalin’s Russia
As part of your assessment for this topic on “Stalin’s Russia” you will each do a short presentation….
Your presentations will be on one of the following topics:
- Collectives & Kulaks (p.8-9)
- The Five-Year Plans (p.10-11)
- Workers and Their Work (p.12-13)
- Slave Labour & the Labour Camps (p.14-15)
IMPORTANT: Check on Schoology which topic has been assigned to you. You will also find all the details for this presentation task on Schoology, in the Assignments folder.
Due Date: exactly one week from now…!
Your presentation will be assessed according to the following criteria:
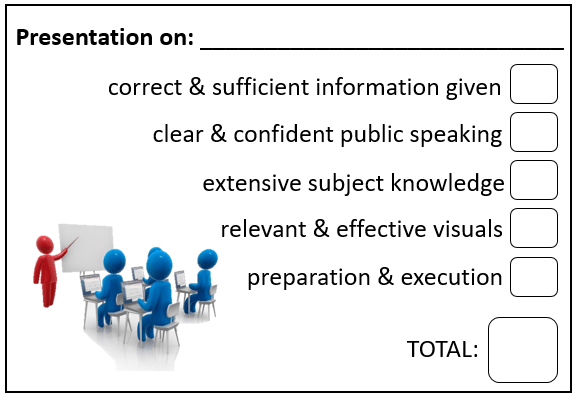
6.
In preparation for this task, we will start with an overview of Stalin’s reign…
Stalin & the Five Year Plans. (10:35 minutes long)
7.
Finally, this chart of how Stalin modernized Russia (or, more accurately, the Soviet Union) may also be useful to you:
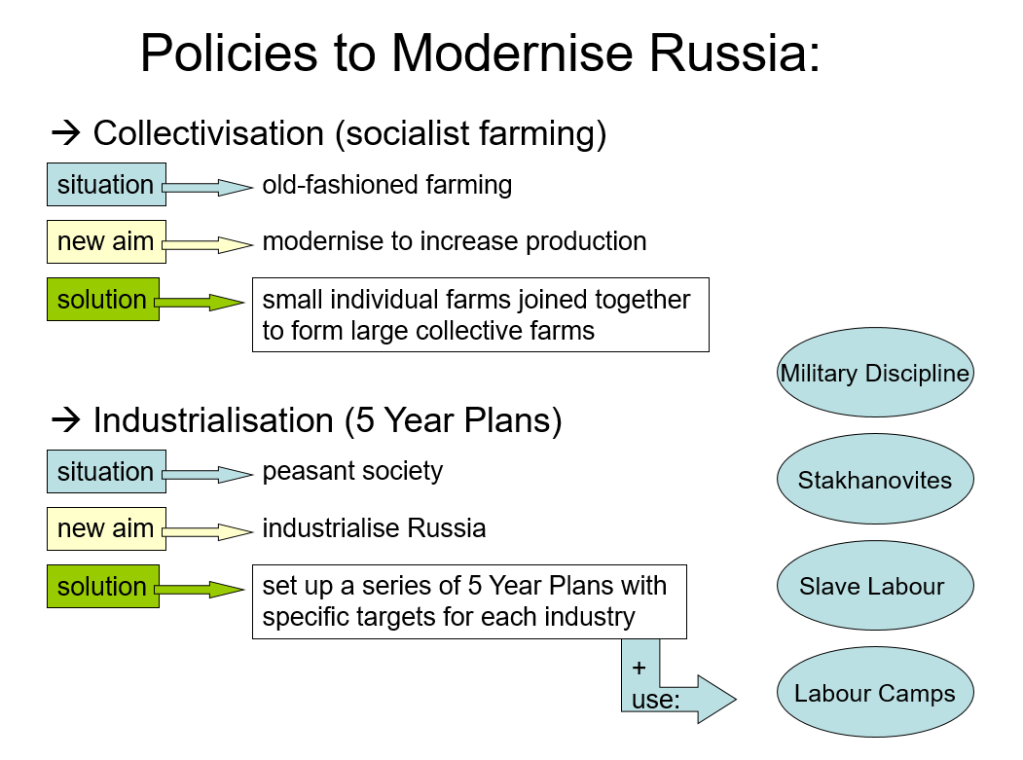
8.
Here is a final short summary of Stalin’s reign…
Stalin – Overview. (2:55 minutes long)
9.
In the next lesson we will look at the power struggle between Trotsky and Stalin in more detail. In preparation for the next lesson, read the following information…
The information about “The struggle to succeed Lenin, 1924-1929” , p.24.
10.
Here is a final video on Stalin’s life…
Joseph Stalin Explained In 25 Minutes. (28:00 minutes long)
(WordPress advertisements may appear below.)
Y8: 2-5. Aztec Life
Year 8A & Year 8B
Today you are going to:
- watch videos to see how the Aztecs lived
- answer some questions about the Aztecs
Follow the instructions step by step:
1.
What Everyday Life Was Like for the Aztecs. (12:02 minutes long)
Aztec Sacrifice. (5:56 minutes long)
2.
To refresh your memory…
The Aztec Empire and Cortes, p.38.
3.
For the next few lessons you will use the following self-study booklet on “Cortes and the Aztec Empire”.
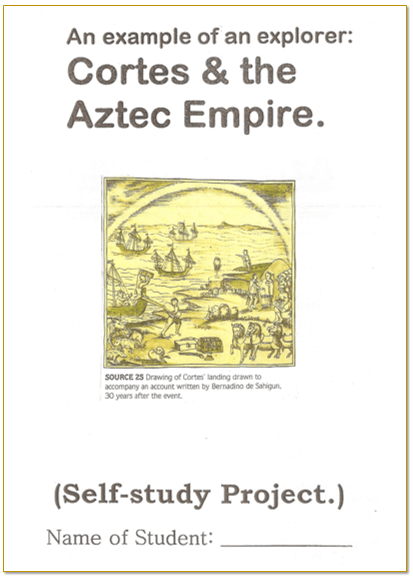
Click on the booklet to access it online.
Now, use the self-study booklet (handed out in class) and answer the questions on p.4 of the booklet.
For each answer write TWO sentences… In this way you are “forced” to write a detailed answer to questions that seem to have very short answers!
You can access the answers to all the tasks on Cortes & the Aztecs by clicking on the “Answers” button above.
(WordPress advertisements may appear below.)
Y7: 2-9. Playing Teacher
Year 7A & Year 7B
Today you are going to … pretend that you are the teacher!

To learn how a History teacher would assess your answers and how marks are awarded in History.
Follow the instructions step by step:
1.
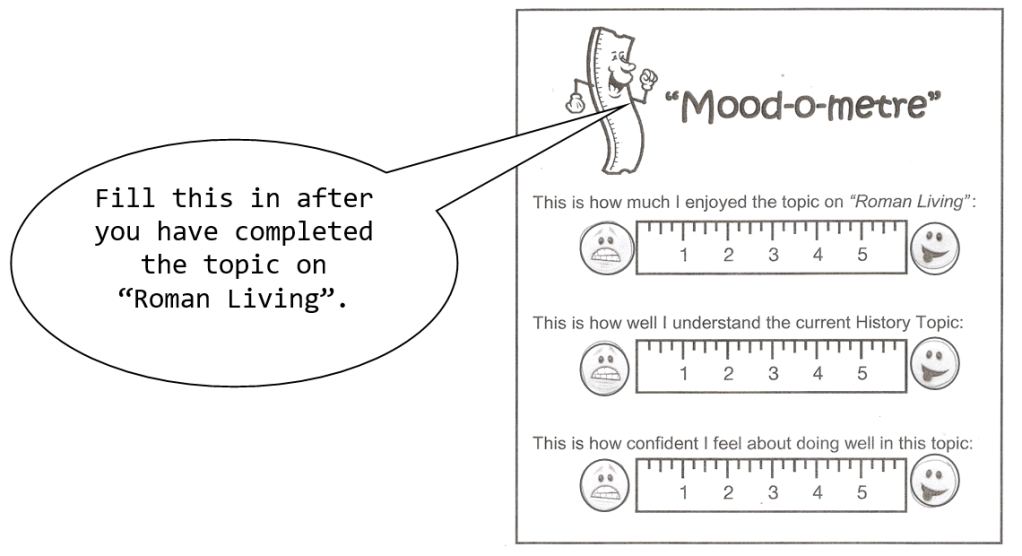
First, complete the “mood-o-metre” (on p.20) to show how you feel about the topic on “Roman Living” …!
2.
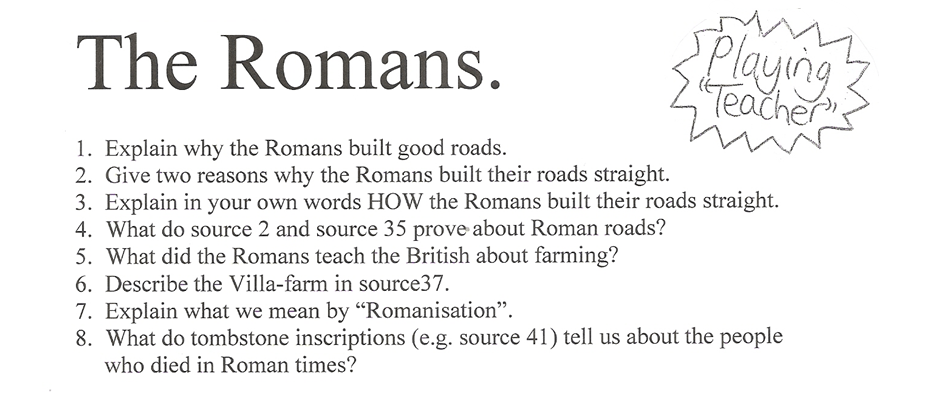
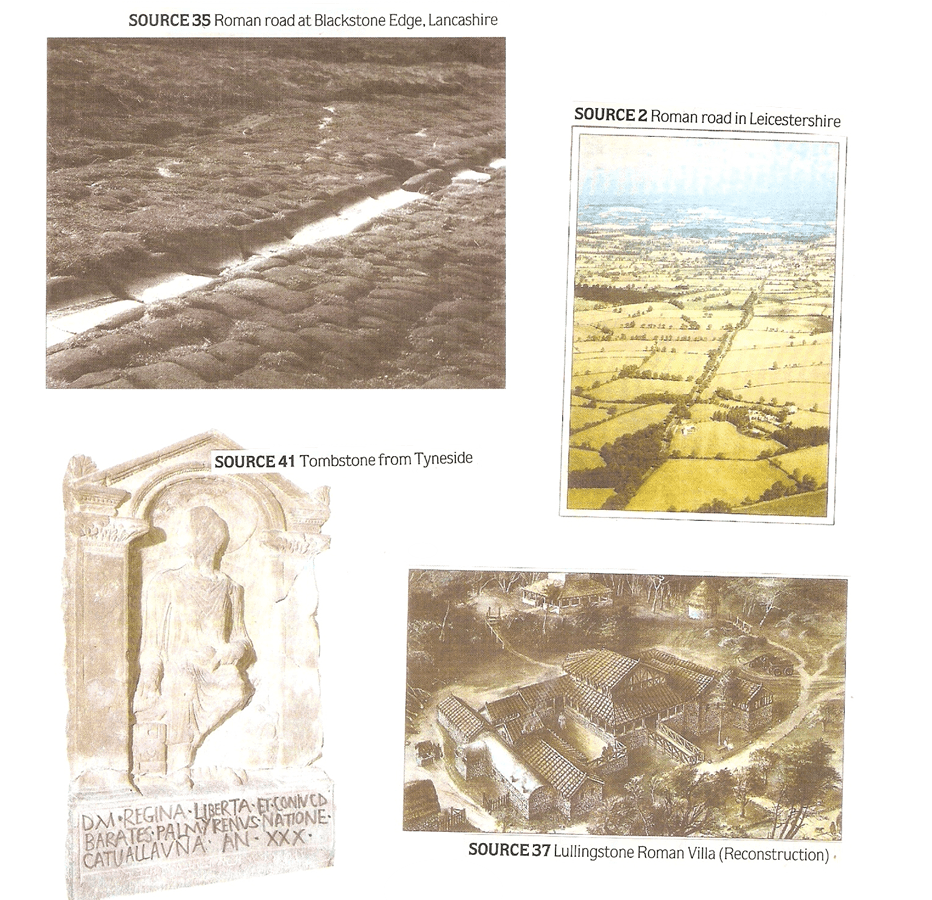
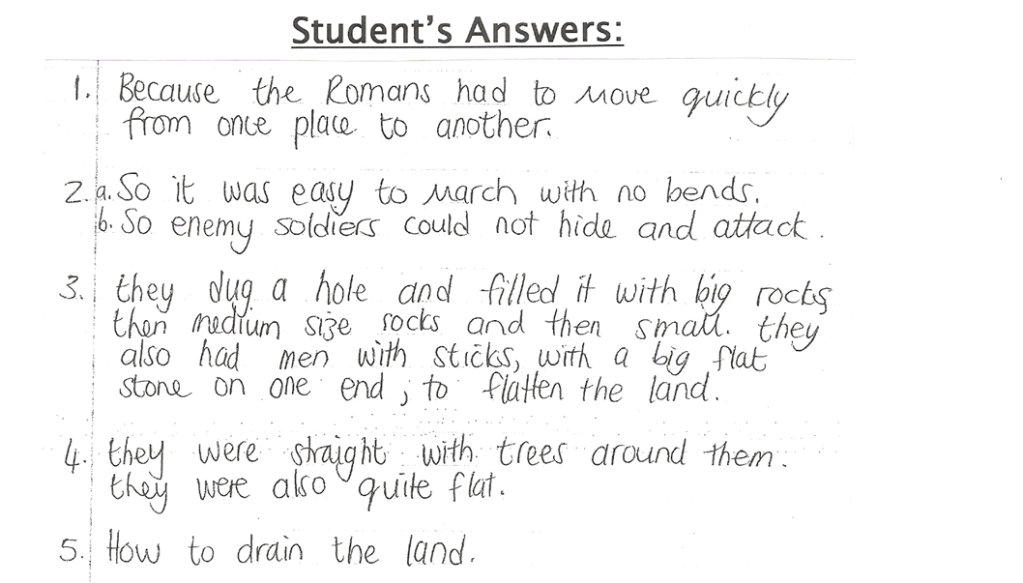
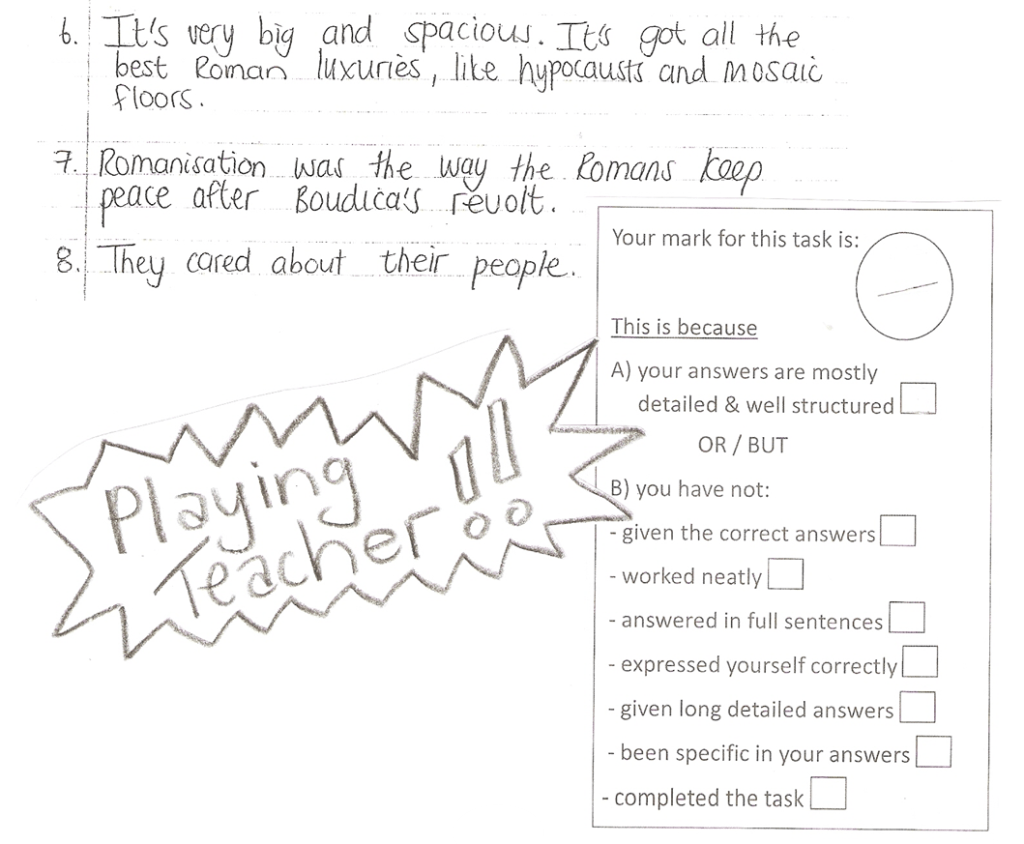
Go to the “Playing Teacher” Task on p.34-35 in your Workbook. There is a worksheet with questions on page 34. And on page 35 is “your student’s answers”…
Your task is to:
- mark the student’s answers
- give the student a mark out of 10 (fill in the mark on the form below the answers)
- also fill in the rest of the mark form to give the student feedback
Page 34
Page 35
3.
Now, let’s see:
- what mark your History teacher gave to this student…
- and how your History teacher would have assessed these answers…
(5:49 minutes long)
4.
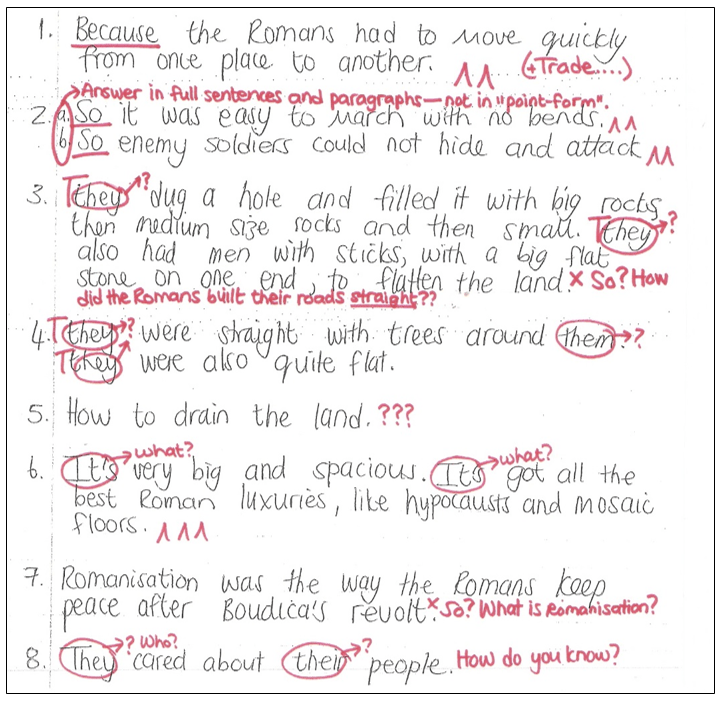
Here is the marked version of the task, in case you want to / need to review the marking again:
5.
A marking feedback form, like the one below, may also be used when your work is marked by your teacher. This is how it works:
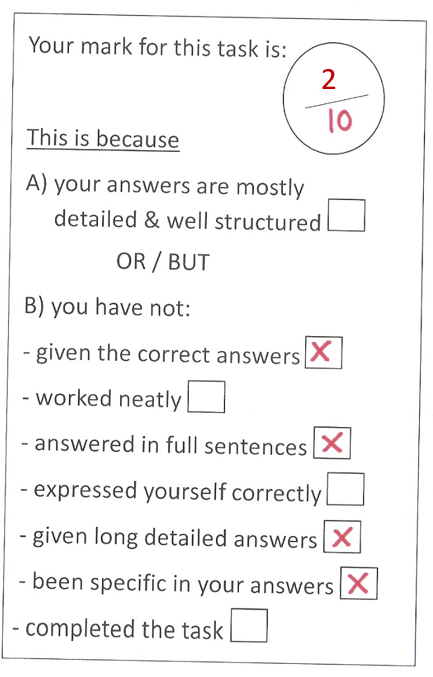
The marking feedback form shows the mark and also shows briefly why a student received a particular mark.
This student only received 2 out of 10 because he / she:
- did not give the correct answers
- did not answer in full sentences
- did not give long detailed answers
- have not been specific, but used vague terms like “they” and “it” and “them”
6.
Here are the correct answers, in case you want to / need to review them again:
7.

Use the answers to questions 1-4 (above) to mark your own answers to the questions on “Roman Roads, p.32” with a pencil.
8.
Answer the Source Question (Question 8, on tombstone inscriptions), p.36, to see if you can do better than your student!
Remember to follow the advice below…!
So, what does this mean?
9.
You need to use the translations of the tombstone inscription below…!
(WordPress advertisements may appear below.)
Consequences of WW 1: HW-5

Homework Task 5 (p.37-39) is due:
(See Schoology.)
PLUS:

Imagine you have to design a flowchart / diagram for a revision guide. The chart must explain the theory of Communism in a way that is easy to understand – it must be brief but clear.
(WordPress advertisements may appear below.)
Y9: 2-4. Theory of Communism
Year 9A & Year 9B
Today you are going to learn what Communism is…
Follow the instructions step by step:
1.

Task 2 on p.29-31.
ANSWERS:
2.
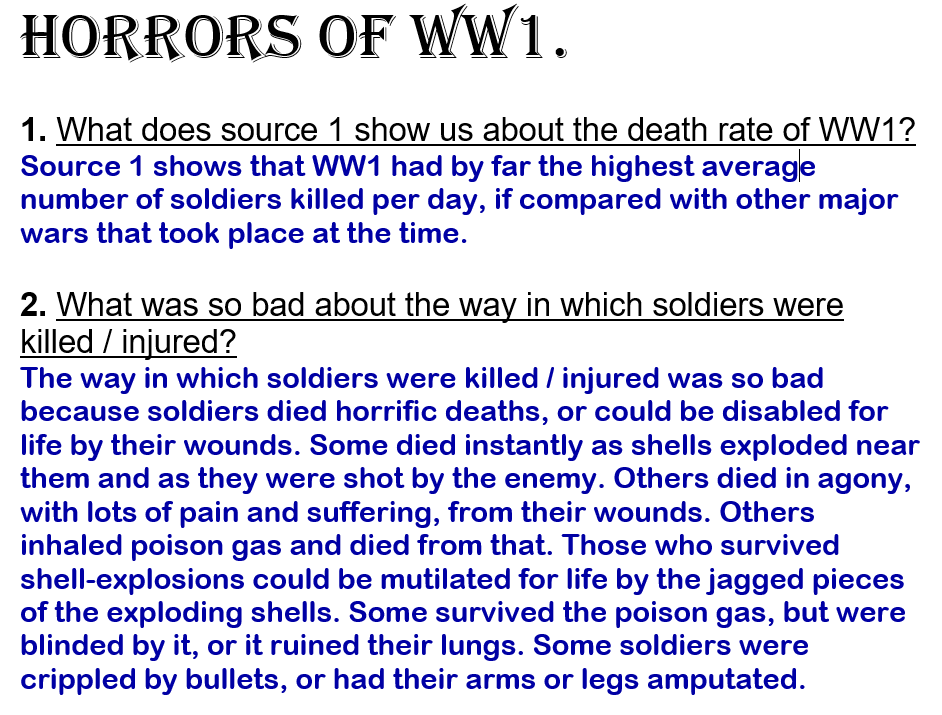
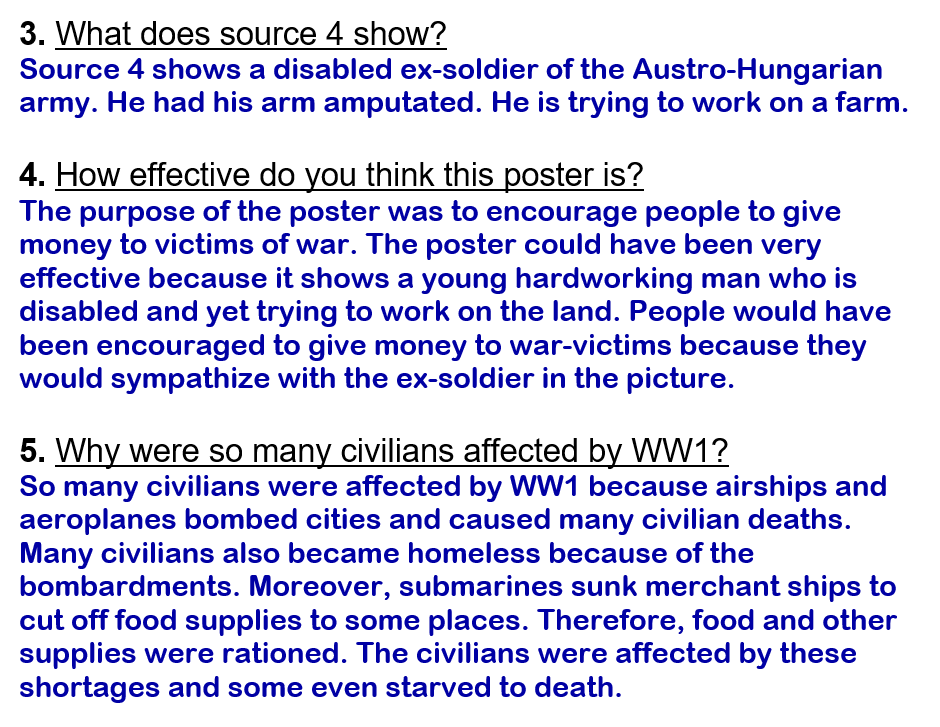
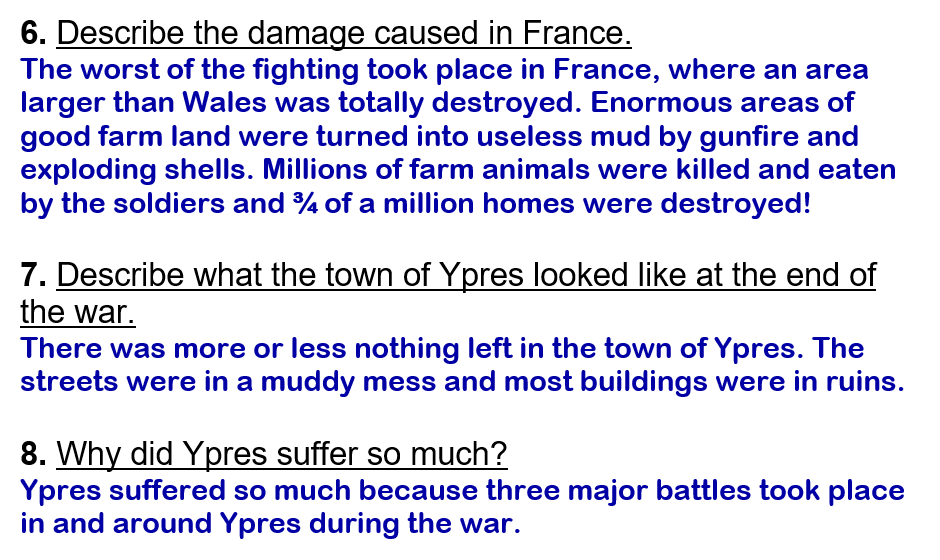
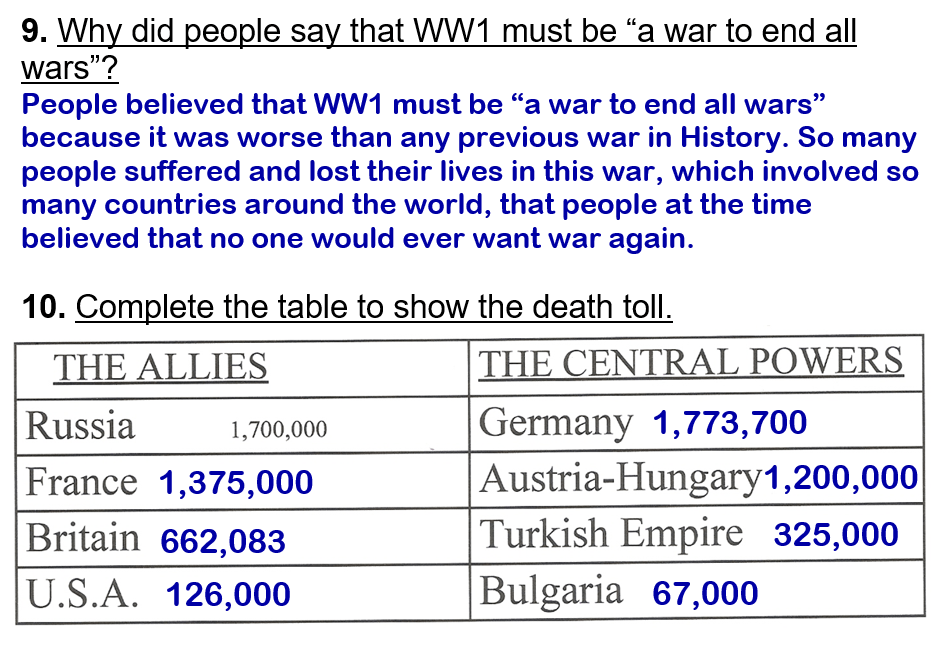
“The Horrors of War, p.38”
ANSWERS:
3.
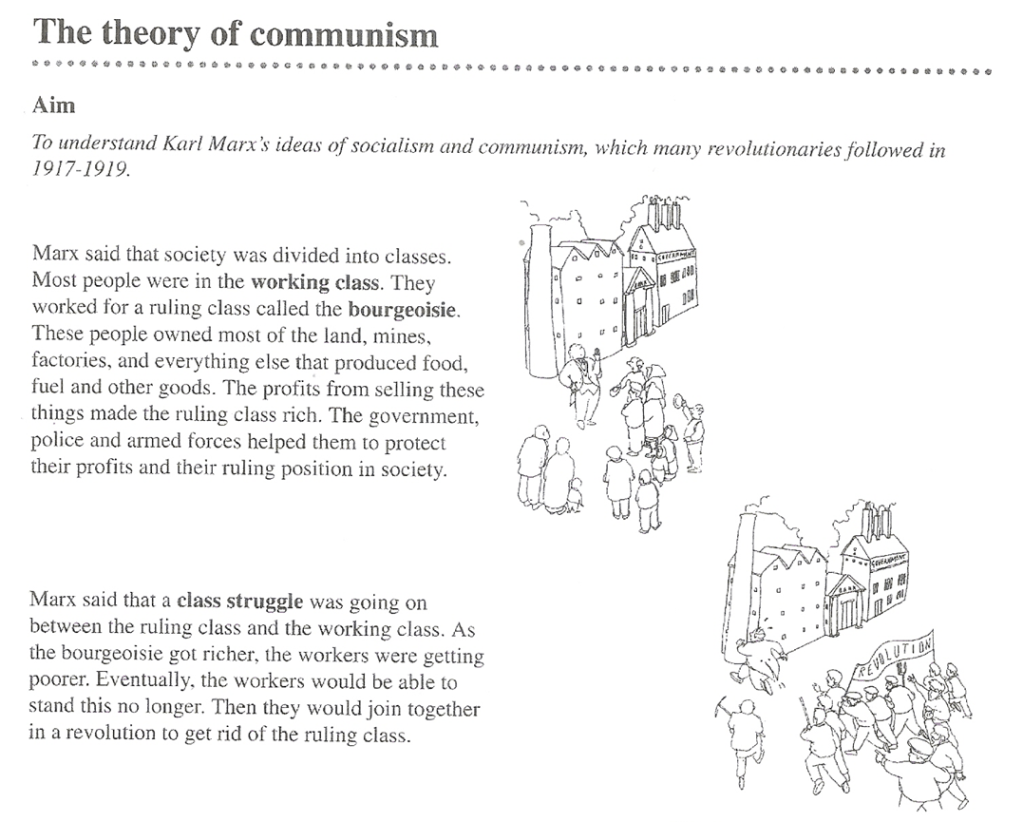
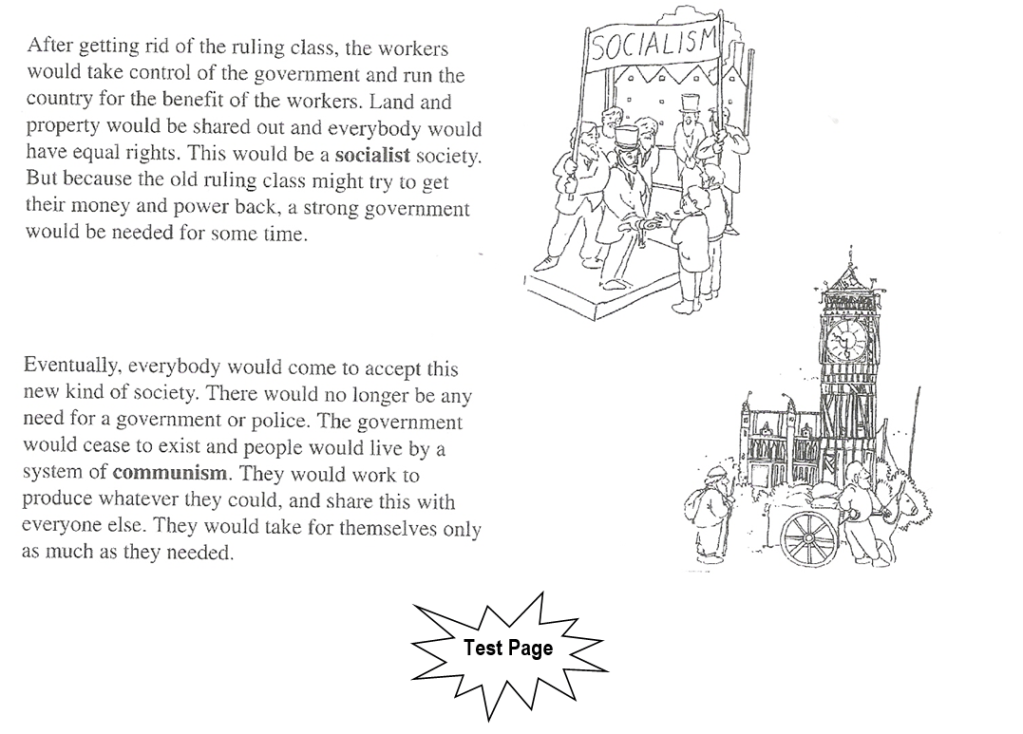
You learnt that one of the consequences of WW1 was the outbreak of revolutions. You also learnt that workers began to like the ideas of Karl Marx. He came up with the ideas of socialism and communism. It is important that you know what these concepts mean. (You are expected to explain them perfectly!)
The Theory of Communism explained. (2:03 minutes long)
4.
Now, let’s read the same information about the Theory of Communism from your workbook…
The Theory of Communism, p.52.
5.
If you are still unsure, revise the Theory of Communism by watching the explanation again.
The Theory of Communism – (text only). (1:50 minutes long)
6.

(WordPress advertisements may appear below.)
Exploration: HW-5
Homework Task 5 (p.22-23) is due:
(See Schoology.)
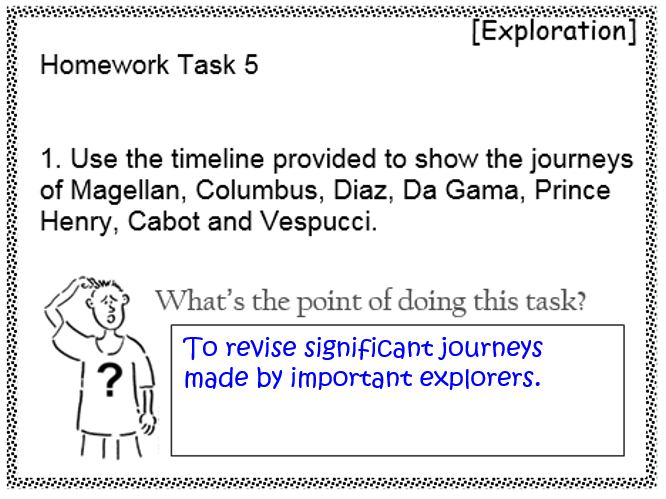
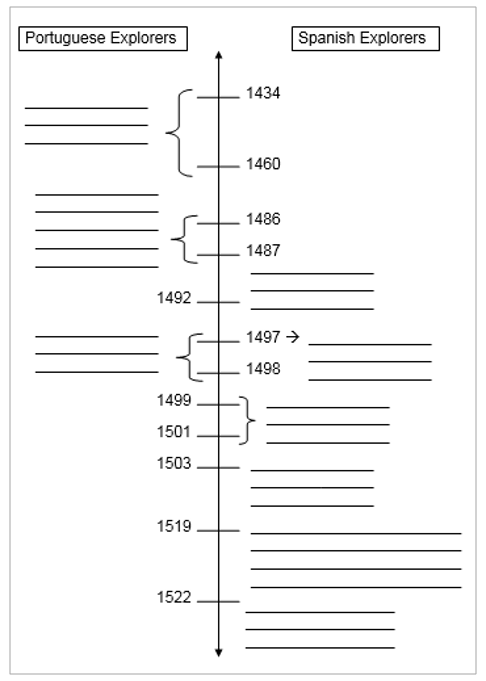
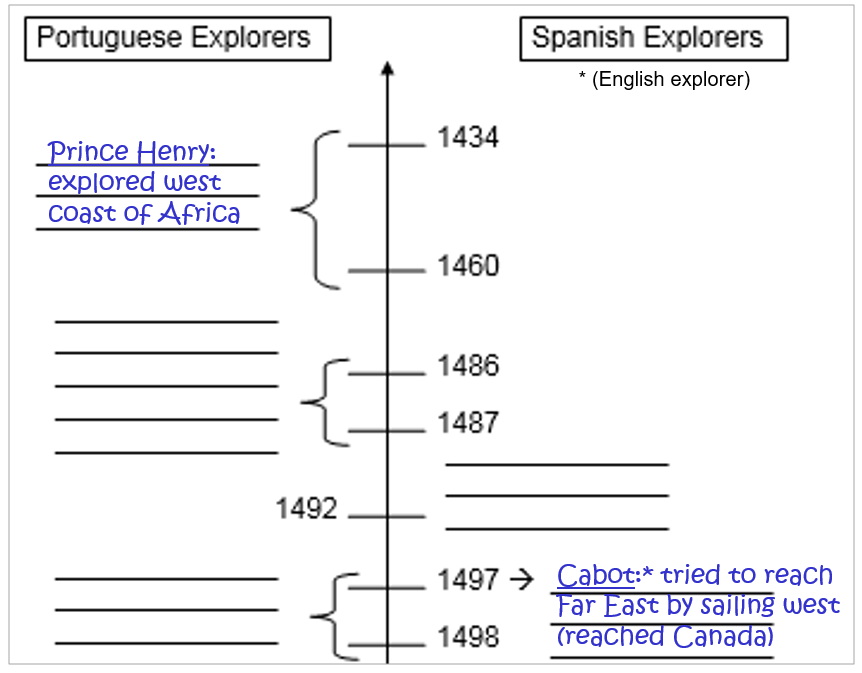
You need to give very brief information about the explorers: You need to decide what is the most significant information about each explorer and then record it on the timeline. Below is an example of what is required:
(WordPress advertisements may appear below.)
Y8: 2-4. Cortes & the Aztecs
Year 8A & Year 8B
Today you are going to learn about Cortes and how he defeated the Aztecs and took Mexico for Spain.
Follow the instructions step by step:
1.
But first…

Task 3 on p.18-19.
2.
Now, let’s see who Cortes was, and who the Aztecs were…
Cortes & the Aztecs. (4:31 minutes long)
3.
Aztec Living were really different from what Europeans were used to. Here are a few more video clips that tell you what the Aztecs were like…
(About Aztec Life…)
Aztecs’ living… (4:49 minutes long)
Aztec Hi-Tec Products. (2:51 minutes long)
Angry Aztecs Historical Masterchef. (2:34 minutes long)
4.
(About the Aztec Religion…)
Sacrifice scene. (1:11 minutes long)
Aztec Gardeners’ World & Aztecs Who Dunnit. (2:47 minutes long)
Aztec Priests’ Song. (2:33 minutes long)
History Specials: Coroner’s Report – Aztec Sacrifice. (3:11 minutes long)
5.
Now, let’s see how Cortes defeated Montezuma & the Aztecs, and conquered Mexico for Spain.
Defeat of Montezuma. (4:05 minutes long)
6.
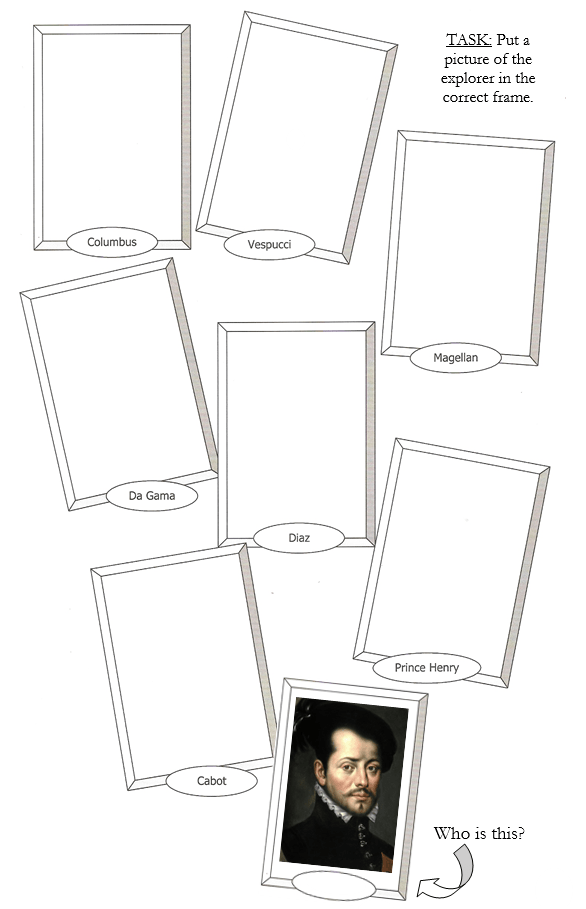
Who is this?

This is a decendant of Cortés and a descendant of Motezuma!!
On the left is “Federico Acosta, a Mexican who traces his lineage back 16 generations to the daughter of Moctezuma”, and on the right is “Ascanio Pignatelli, an Italian whose ancestry goes back the same number of generations to Cortés’ daughter”!
They met in Mexico City on November 8, 2019 to mark the 500th anniversary of their ancestors’ first meeting. The two men greeted each other with a hug at the exact same spot where their ancestors met on November 8, 1519 in the Aztec city of Tenochtitlán!
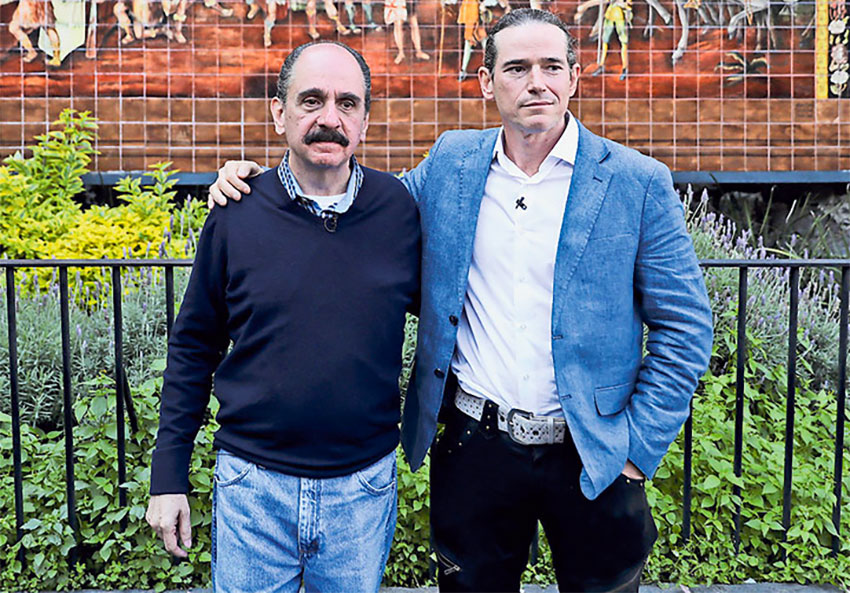
“Acosta, left, and Pignatelli: ‘we are all family now.’”
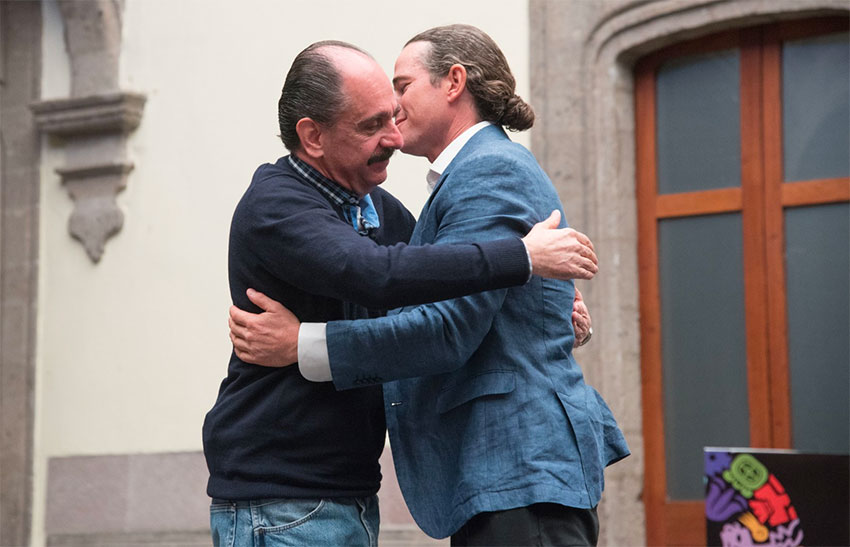
“Five hundred years on, a hug between conqueror and conquered. Acosta, left, a descendant of Moctezuma, and Pignatelli, whose ancestor was Cortés.”
(You can read the full article here.)
7.
Go to page 37 in your Workbook and…

8.
Finally…
The Aztec Empire and Cortes, p.38.
9.

Conquistador Hernán Cortés : Fall of the Aztecs. (55:55 minutes long)
(WordPress advertisements may appear below.)
Y7: 2-8. Roman Roads
Year 7A & Year 7B
Today you are going to:
- mark some work
- learn about Roman Roads
Follow the instructions step by step:
1.
If not marked in the previous lesson…
Your answers on “Roman Aqueducts, p.33”.
ANSWERS:
2.
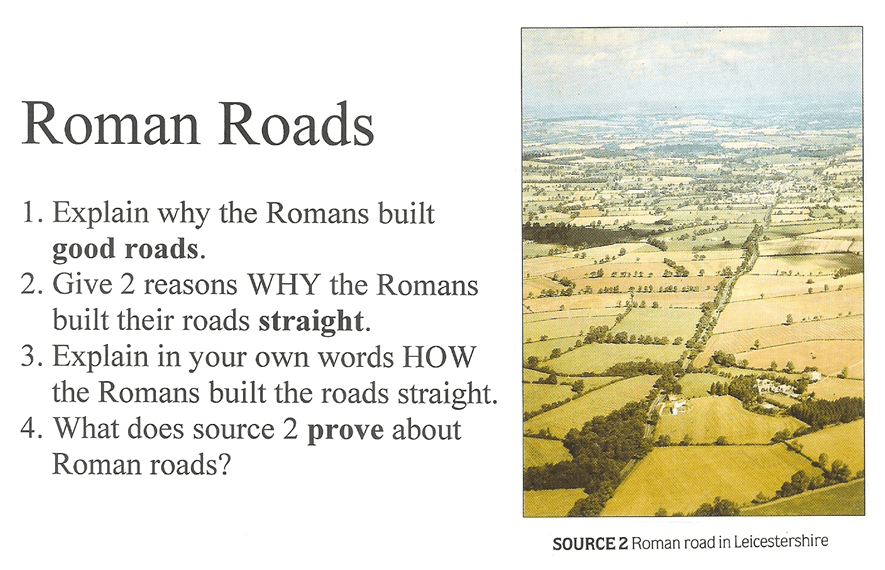
Now you are going to learn a little more about Roman Roads…
p.28-29
3.
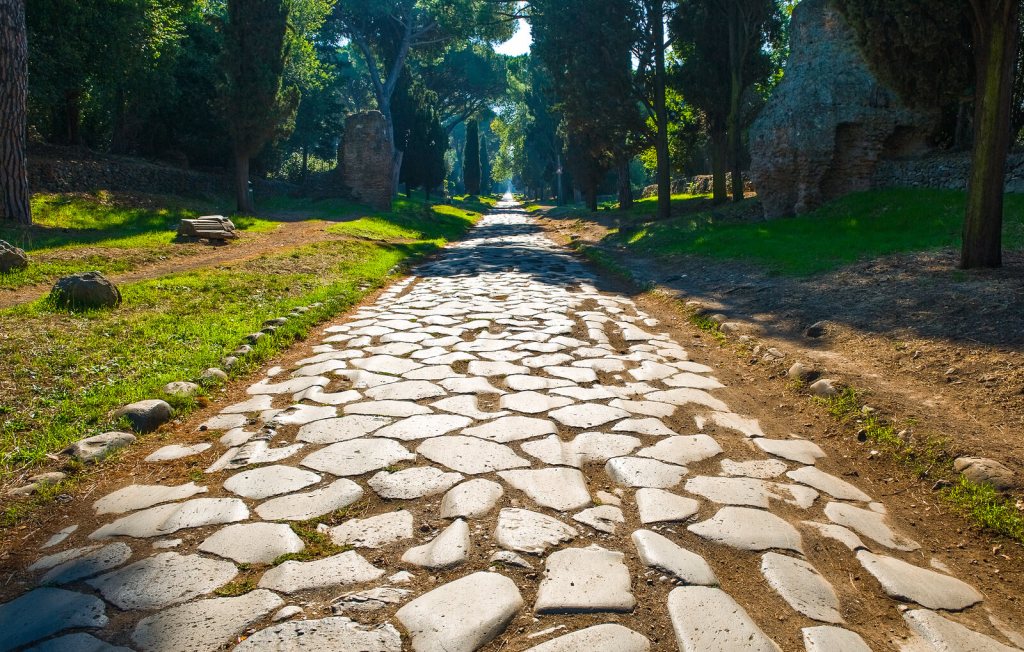
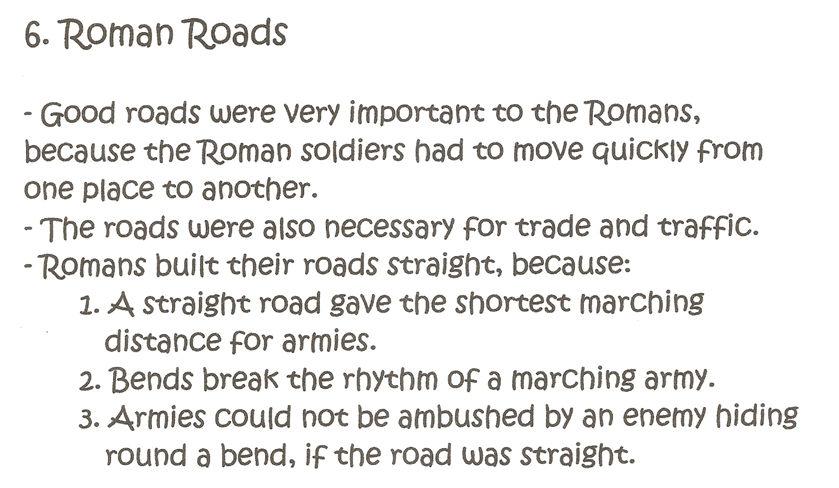
You should have realized that Roman roads were:
- very well built (and therefore lasted very long)
- usually very straight
4.
Let’s see how the Romans managed to build their roads so straight!
Groma Explained. (1:18 minutes long)
You are expected to explain clearly:
- why the Romans built straight roads
- how the Romans built straight roads
5.

Watch this film about Roman Roads, made by a young student!
Roman Roads. (2:09 minutes long)
6.
Now, let’s test your knowledge and understanding of the topic on Roman Roads, by answering a few questions…
“Roman Roads, p.32”
7.
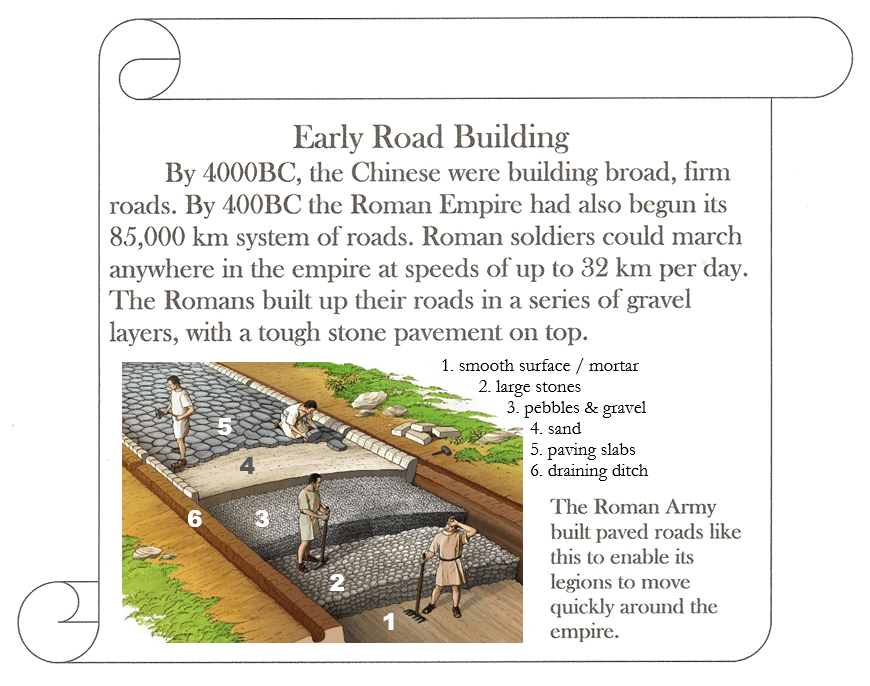
Finally, colour in the Road Building Illustration, (on p.29 of your workbook) to show how the Romans built their roads straight.
8.

Here is an extension task that you can do at home…build your own Roman Road Ice-cream dessert…!
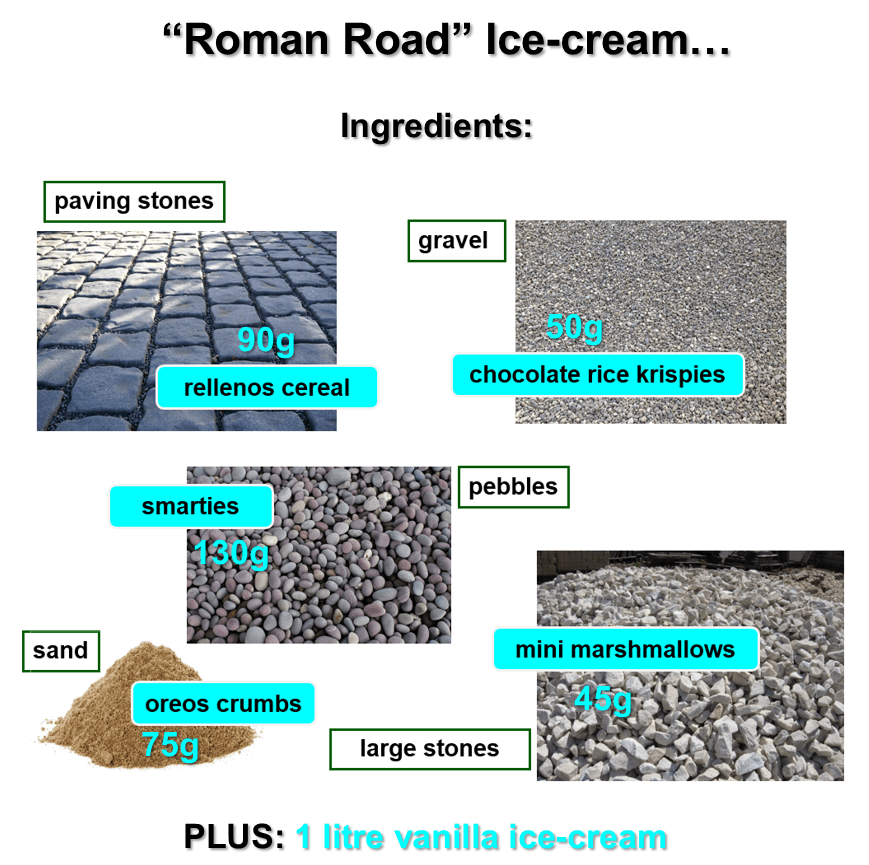

Enjoy!
(WordPress advertisements may appear below.)
Y8: 2-3. Reasons for Exploration
Year 8A & Year 8B
Today you are going to:
- mark some work
- learn why Europeans became interested in exploration
Follow the instructions step by step:
1.
Task 1 on p.16-17.
2.

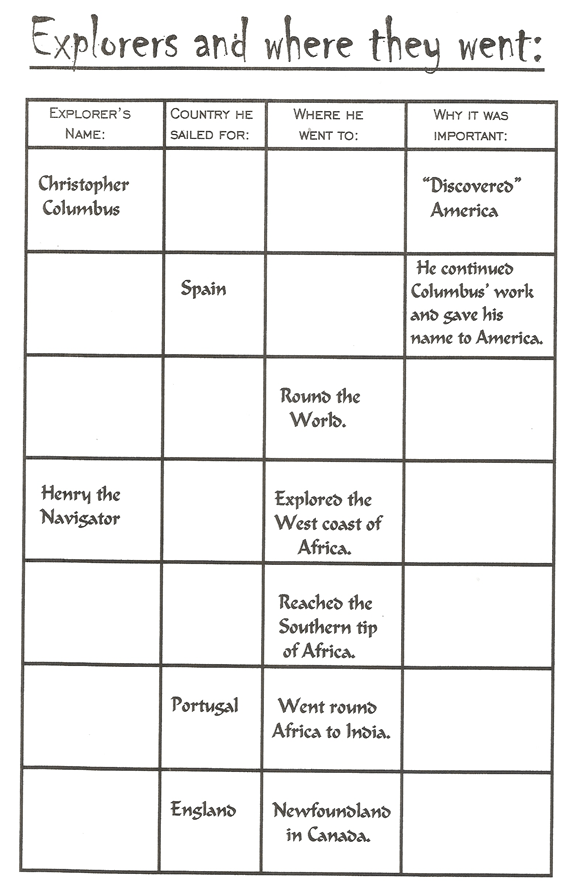
Mark the table on “Explorers and where they went” (p.34)
3.
Now, let’s see why Europeans went exploring. You already know that they wanted trading goods and that advances in technology made exploration possible. However, there are more reasons as to why explorers went exploring!
Exploration Reasons. (3:43 minutes long)
4.
p.28-29
5.
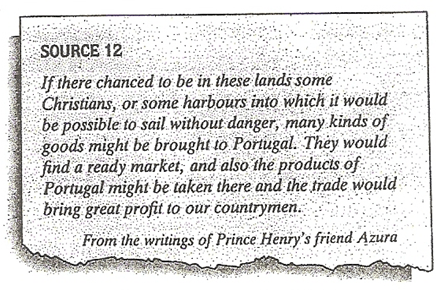
Let’s talk about the following sources:
Source 12
In Source 12 Azura, a friend of Prince Henry, emphasized how friendly places to trade with can bring Portugal great profits.
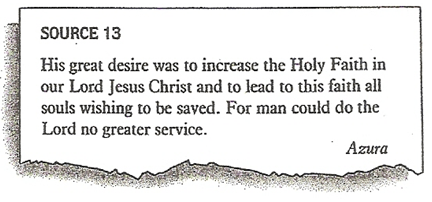
Source 13
In Source 13 Azura also gives evidence that Prince Henry wanted to spread his Christian faith.
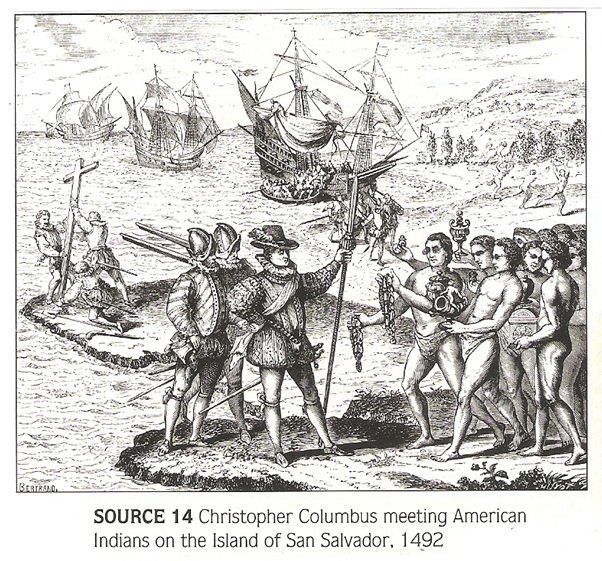
Source 14
Source 14 shows trading goods in the foreground of the picture, as well as a Christian cross in the background. It seems that Columbus had similar motives, to Prince Henry, for exploration:
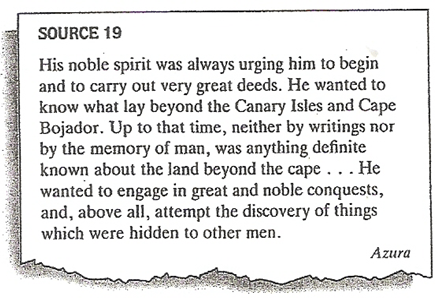
Source 19
Aruza gives further evidence that Prince Henry was very curious about the land that were further down south, “beyond the Canary Isles” and beyond Cape Bojador. Prince Henry really wanted to discover new places!
6.
Now it is time to test your knowledge and understanding of this section on “why Europeans went exploring”…
“What made Europeans go exploring? (p.36)”

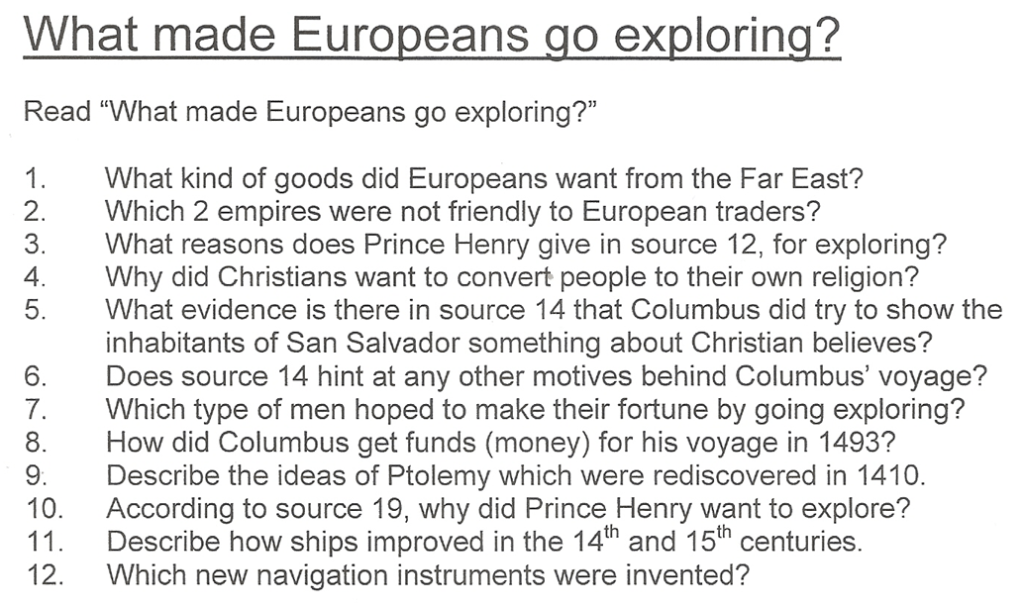


There are convenient notes on p.35…!
(WordPress advertisements may appear below.)
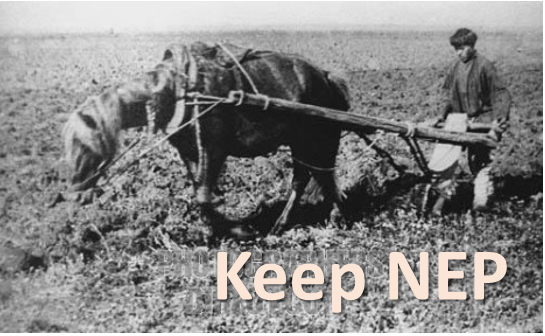
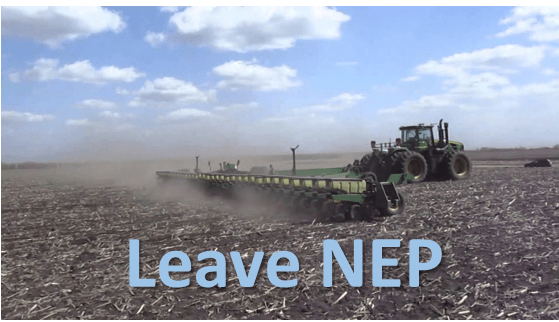
Y10: 2-14. War Communism & NEP Essay
Today you are going to practise more Essay Writing!
You are going to look at a typical 10-mark exam questions on Lenin’s Russia!
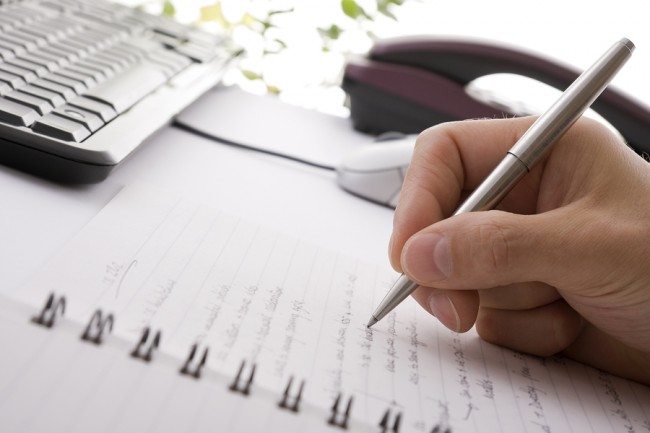
Essays!!
1.
- Write the following heading on a new page in your exercise book: “The Russian Civil War”.
- Then, draw a table with 2 columns, with the following headings: Positive Effects and Negative Effects.
- Make a list of positive effects and a list with negative effects that the civil war had on Russia. (You may do this in pairs.)
2.
Copy the question below, in the middle of a new page, in your Essay Writing book.
“The Civil War had devastating effects on Russia.” How far do you agree with this statement? (10)
3.
Now, analyse and plan the question. (Then, once you have completed your analysis, look at the example analysis below.)
ANALYSIS
Here is an analysis of what is required in this question:

PLAN
Here you can access a plan of what should be included in your answer, if permitted by your teacher.
4.

Finally, carefully read the essay writing advice below.

5.
Finally, access the relevant document in Google Classroom and co-write the essay answer with a partner (as set out by your teacher).
(WordPress advertisements may appear below.)
Y10: 2-13. Civil War Essays
Today you are going to practise some Essay Writing!
You are going to look at 6-mark exam questions on Lenin’s Russia!
Essays!!
1.
The last 6-mark essay that you wrote was this one on Rasputin:
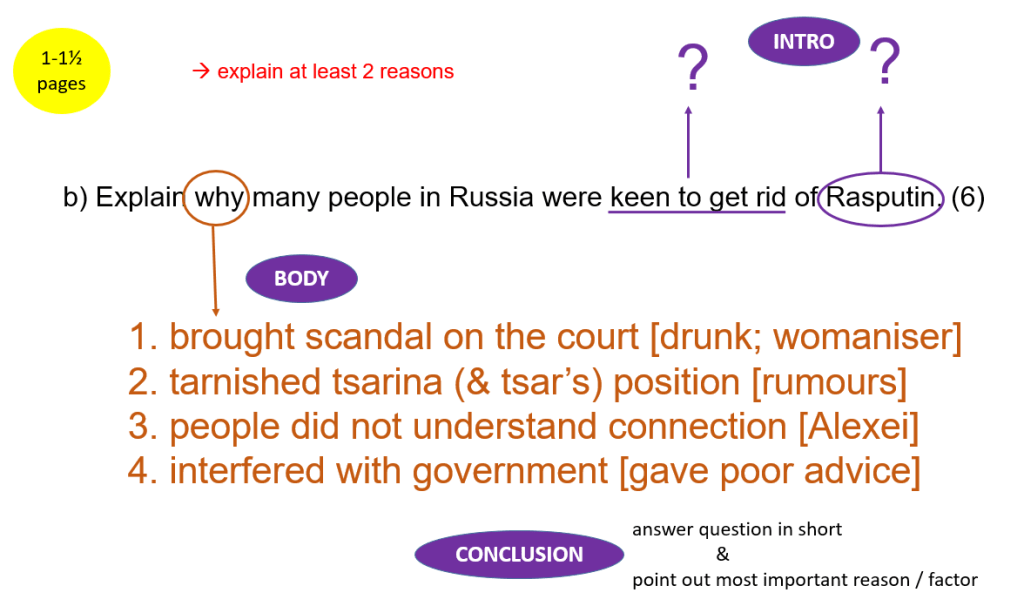
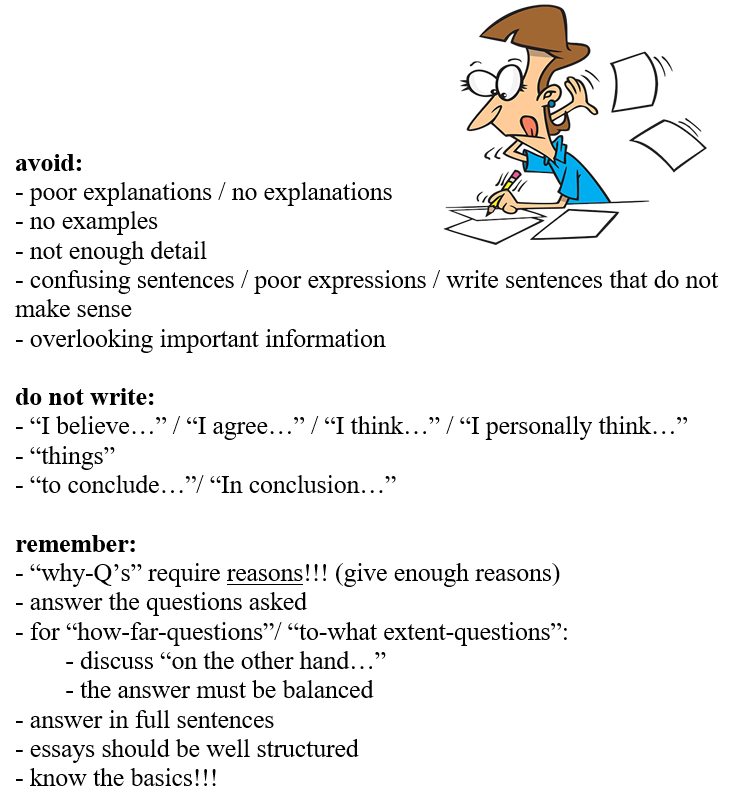
Read the advice given to you when this essay was marked. Also look at the following tips:

2.
Analyse and plan the following question:
Why did Civil War break out in Russia in 1918? (6)
ANALYSIS
Here is an analysis of what is required in this question:

PLAN
Here is a plan of what should be included in your answer:

3.
Analyse and plan the following question:
Why did the Bolsheviks win the Civil War? (6)
ANALYSIS
Here is an analysis of what is required in this question:
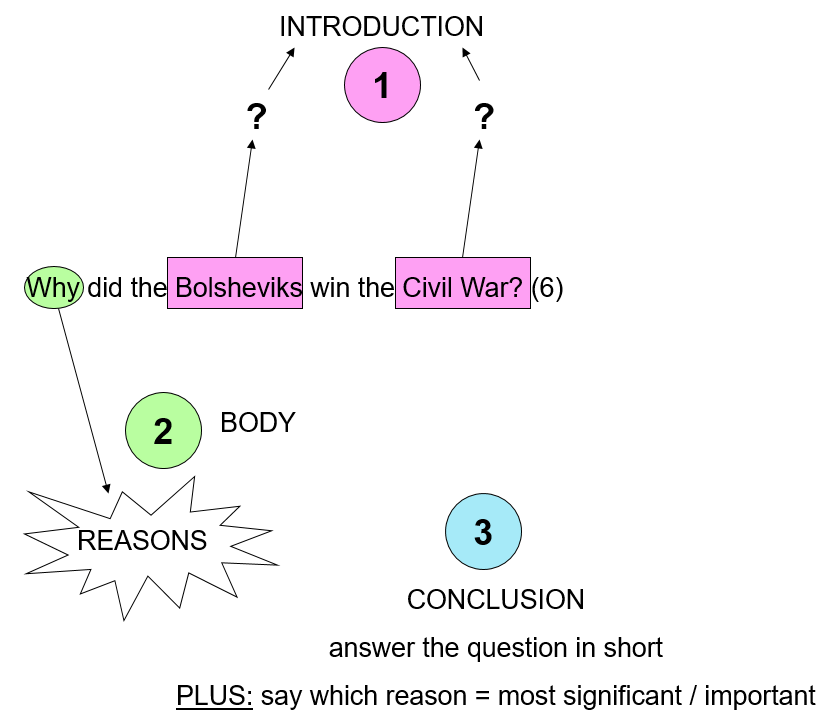
PLAN
Here is a plan of what should be included in your answer:

4.
Now, answer one of the 2 questions, as an assessment task, in your essay writing book.
(WordPress advertisements may appear below.)
Y8: 2-2. Explorers
Year 8A & Year 8B
Today you are going to learn about some important Renaissance explorers.
Follow the instructions step by step:
1.
page 32
“Voyages of Encounter – Explorers and where they went.”
2.
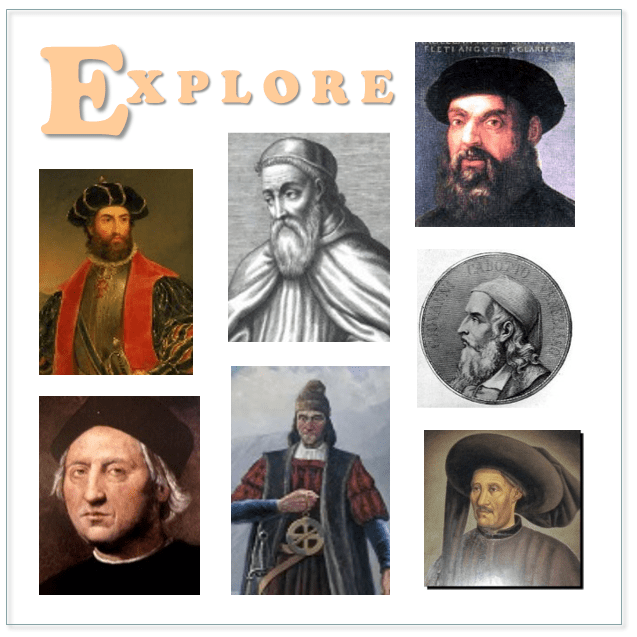
Watch the following slides on who the explorers were and where they went…
Explorers. (3:00 minutes long)
3.
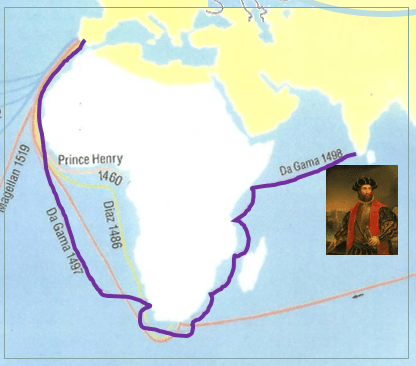
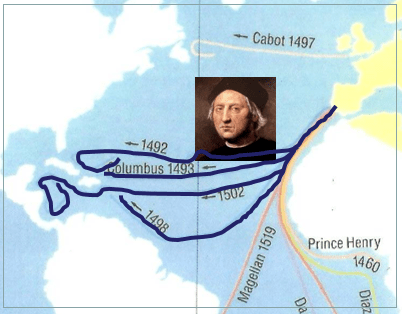
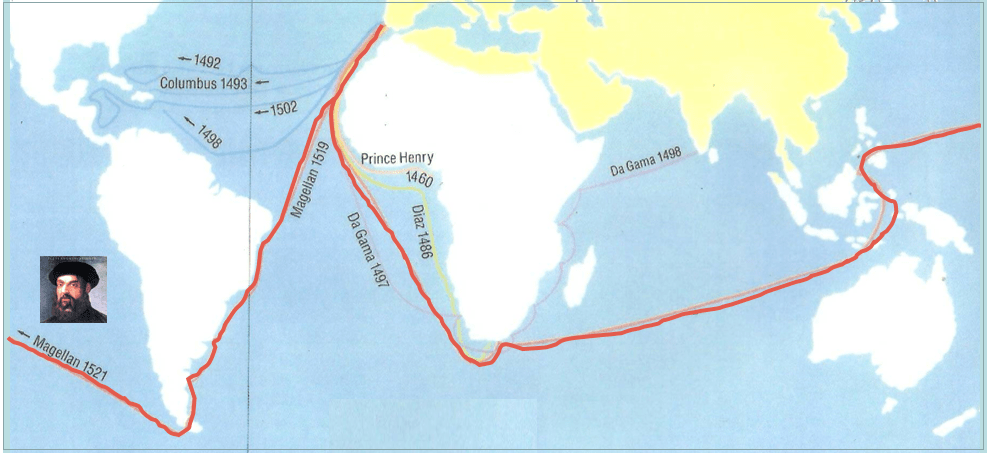
Stick the blank map into your book and then copy the explorers’ routes onto your map…
SOLUTION:

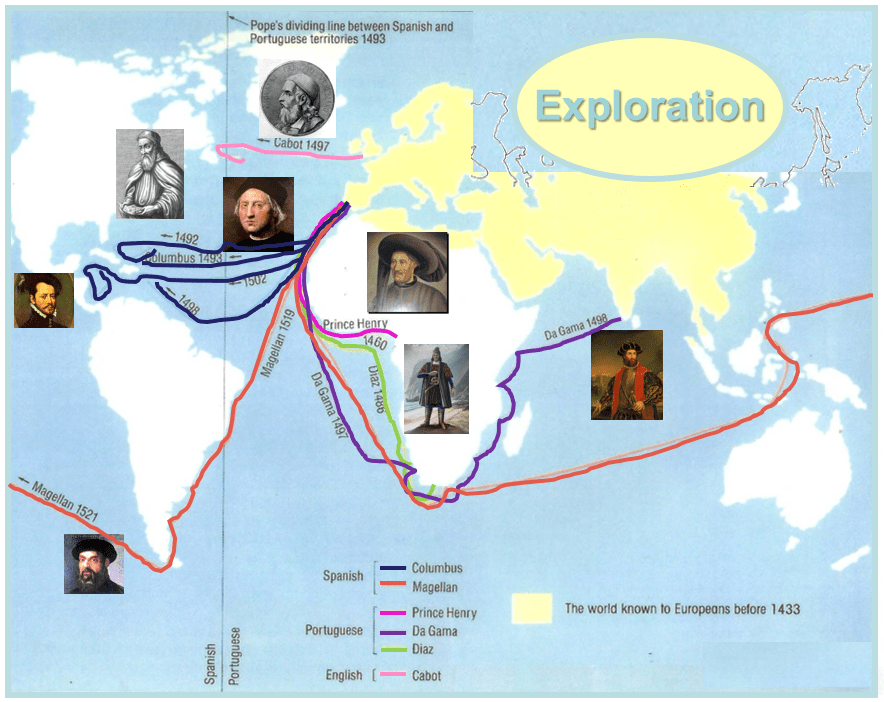
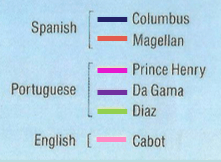
If you find it difficult to distinguish between the routes, look at the individual routes below:
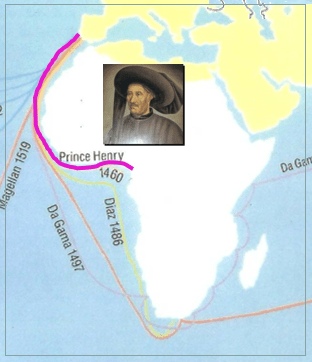
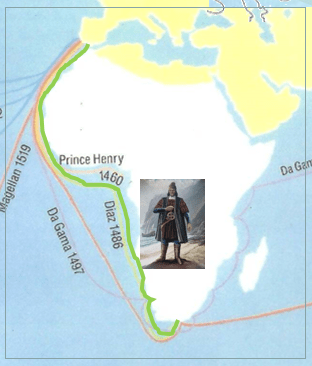
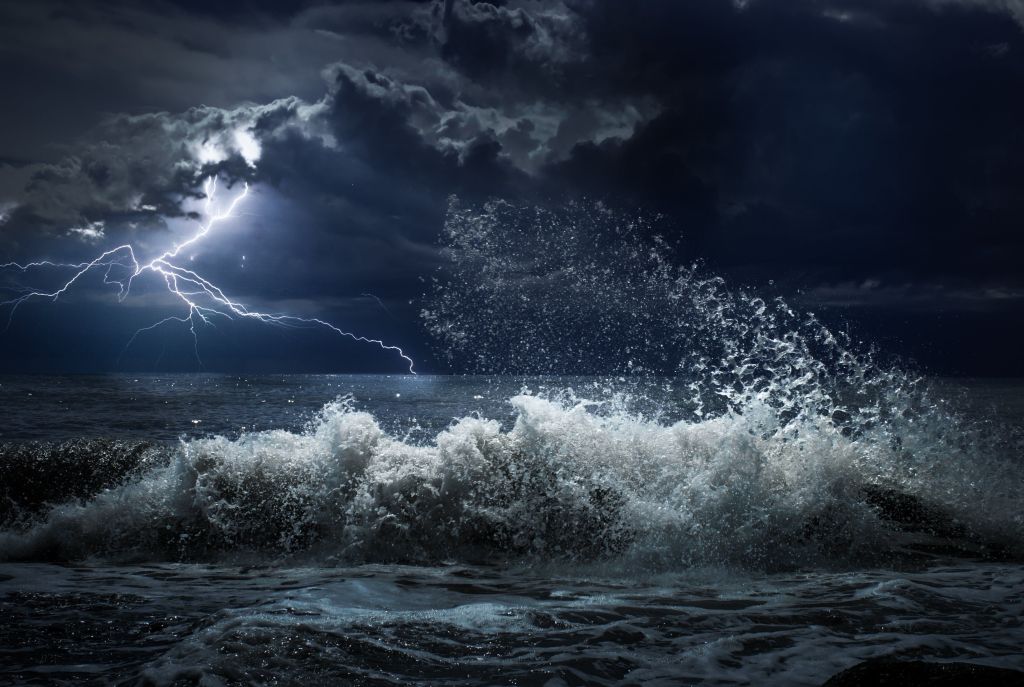
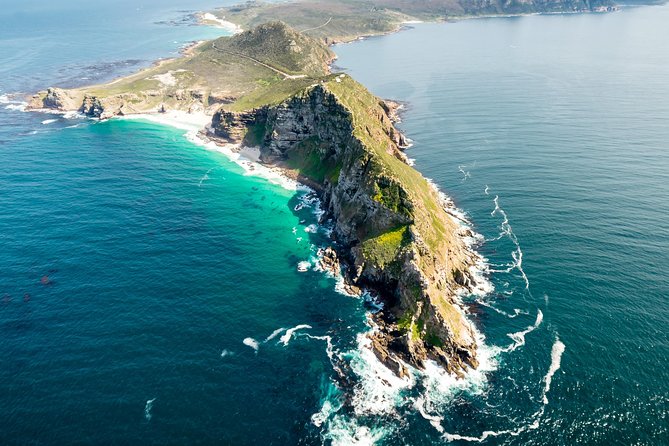
“It was originally named the Cape of Storms by Portuguese explorer Bartholomew Dias in 1488. It was later renamed, by King John II of Portugal, the Cape of Good Hope because of the great optimism engendered by the opening of a sea route to India and the East.”

4.

Complete the table on p.34 to show who the Explorers were, where they went and why they were important…
5.
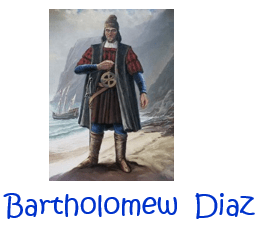
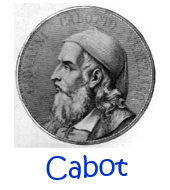
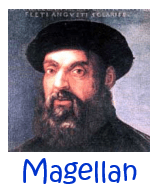
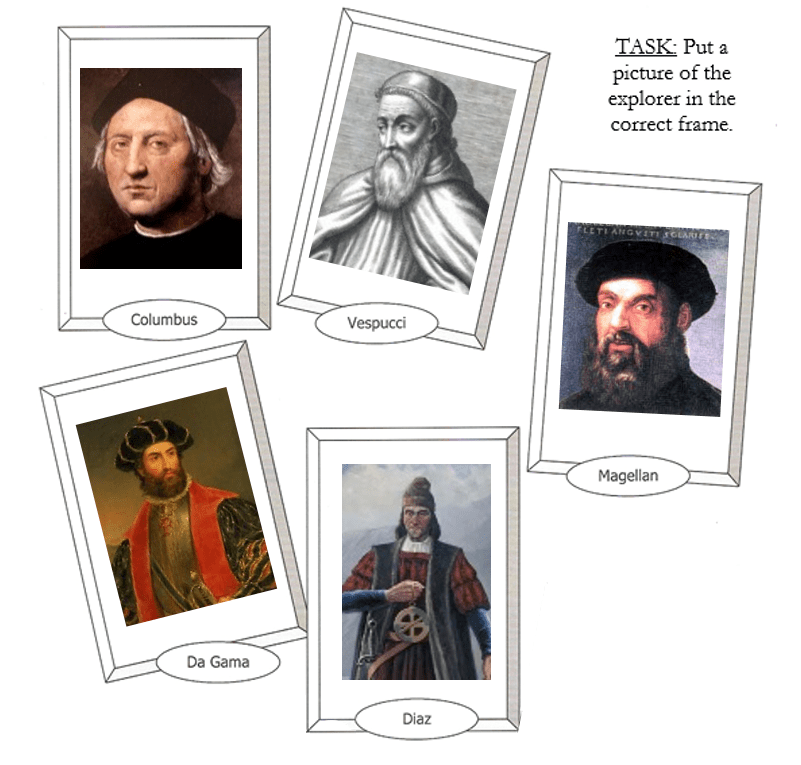
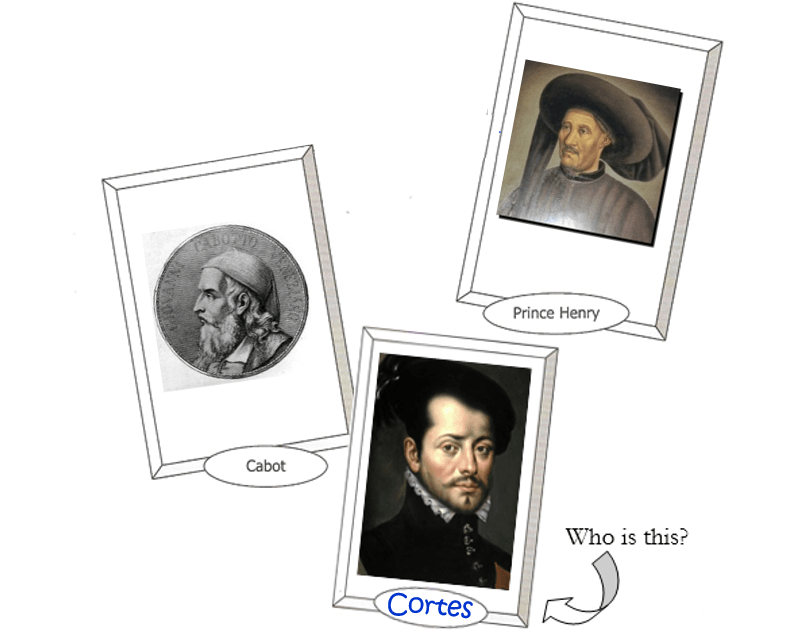
Complete the cut-and-paste task (p.33).
(You must put the picture of the explorer in the correct frame.)
cut-and-paste sheet
SOLUTION:
(WordPress advertisements may appear below.)
Y10: 2-12. Lenin’s Russia Questions
Today you are going to look at 4-mark exam questions!
4-mark Questions
1.
Here is a list of typical 4-mark exam questions. These questions were taken from previous exam papers. It is very important that you are able to answer all of them.
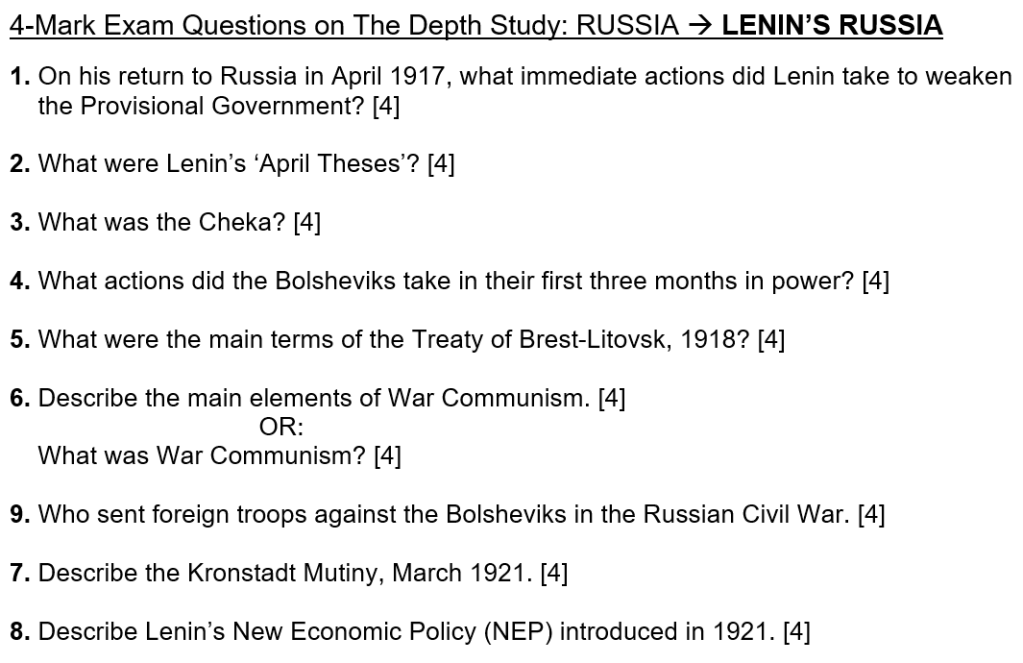
If you know your work perfectly well, it should take you 5-7 minutes to do one of these questions. So, doing all of them, without taking any breaks, should take you no more than one hour…
Don’t worry! You are not going to do all of them now! We will only do a selected few for now. It is, however, important to go through the entire list and make sure that you are indeed able to answer any of these questions should you get them in an exam.
2.
So, complete the following questions now in class:
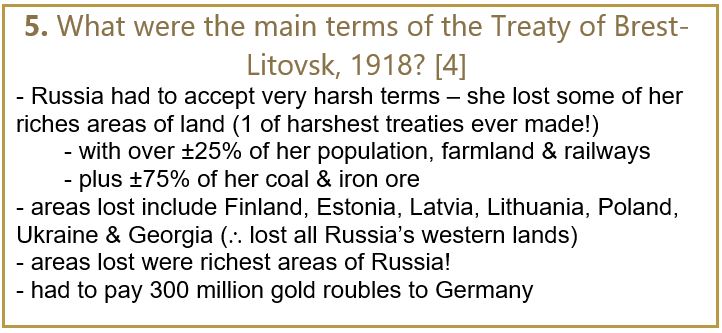
5. What were the main terms of the Treaty of Brest Litovsk, 1918? [4]
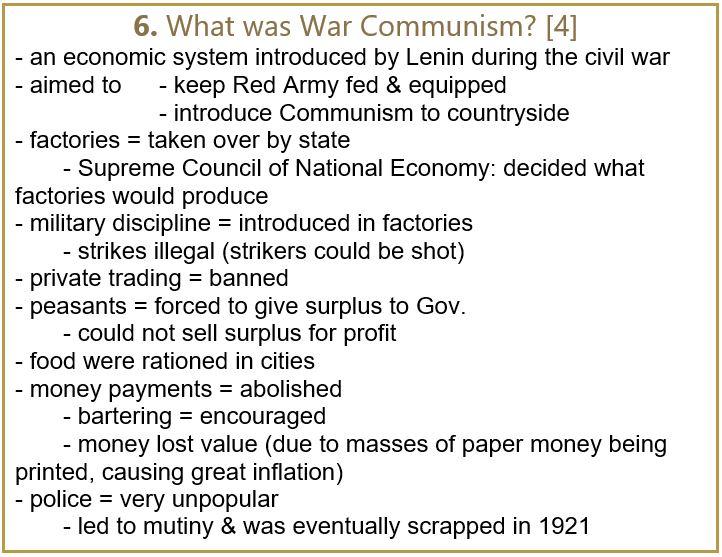
6. What was War Communism? [4]
7. Describe the Kronstadt Mutiny, March 1921. [4]
8. Describe Lenin’s New Economic Policy (NEP) introduced in 1921. [4]
3.
SOLUTIONS:

(Alternatively, you may be asked to hand in your answers for assessment.)


4.

How did the Bolsheviks Take Russia? (10:21 minutes long)
(WordPress advertisements may appear below.)
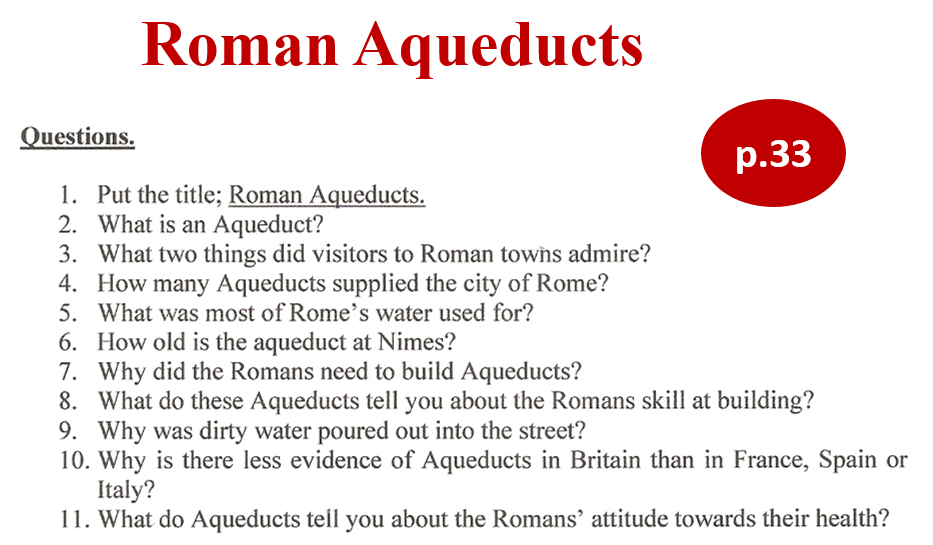
Y7: 2-7. Roman Aqueducts
Year 7A & Year 7B
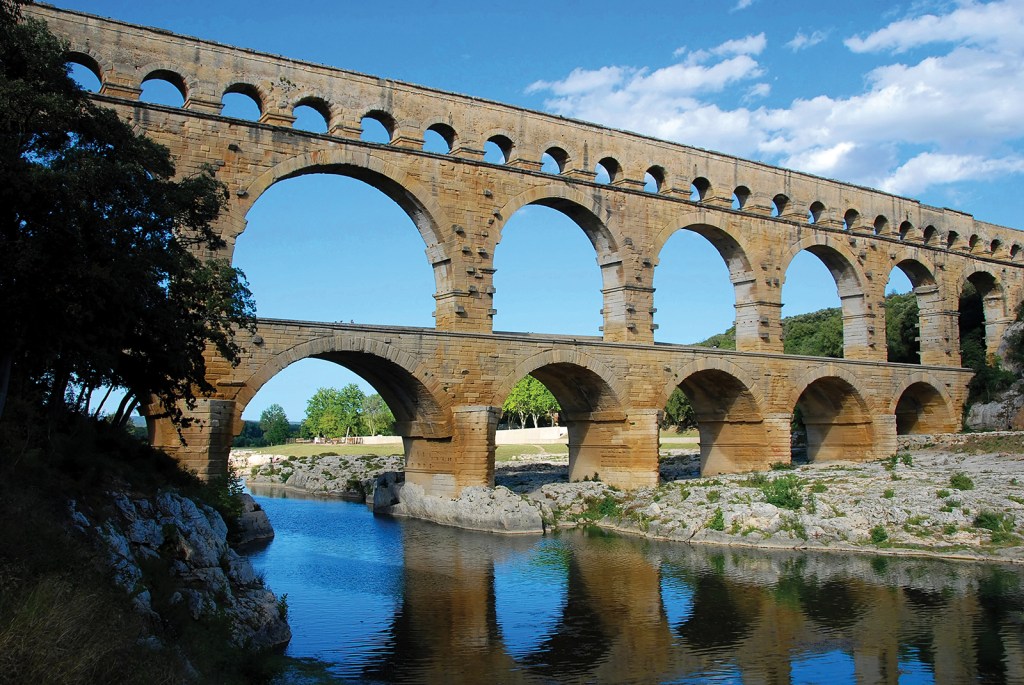
Today you are going to investigate Roman Aqueducts…
Follow the instructions step by step:
1.
Homework Task 4 (p.28-29) will be teacher assessed. Make sure that you are satisfied that you have given good responses to the questions in this task, so that you are ready to hand in this homework when asked for it!
2.
The Romans needed water for their baths! Where did the water come from? Watch the following videos that tells us more about Roman water supplies…
Aqueducts: Technology and Uses – Ancient Rome Live. (4:04 minutes long)
Roman Water Supply | Strip the City. (1:33 minutes long)
Romans – Aqueducts. (3:14 minutes long)
3.
Roman Aqueducts, p.33.
4.
“Roman Aqueducts, p.33”
5.
If there is time in class…
Your answers on “Roman Aqueducts, p.33”.
ANSWERS:
8.

Make on infographic on aquaducts.
(Use the information on page 33 and a blank A4 page for this task.)
What is an infographic?
It is a visual representation of information or data, using:
- charts
- diagrams
- pictures
- interesting facts
- short paragraphs
- short sentences
Examples of infographics:


(WordPress advertisements may appear below.)
Y9: 2-5. Marking – pre-2024
Year 9A & Year 9B
Today you are going to mark some tasks completed recently and also complete questions on “Consequences of WW1“.
Follow the instructions step by step:
1.
Task 2 on p.29-31.
ANSWERS:
2.
“The Horrors of War, p.38”
ANSWERS:
3.
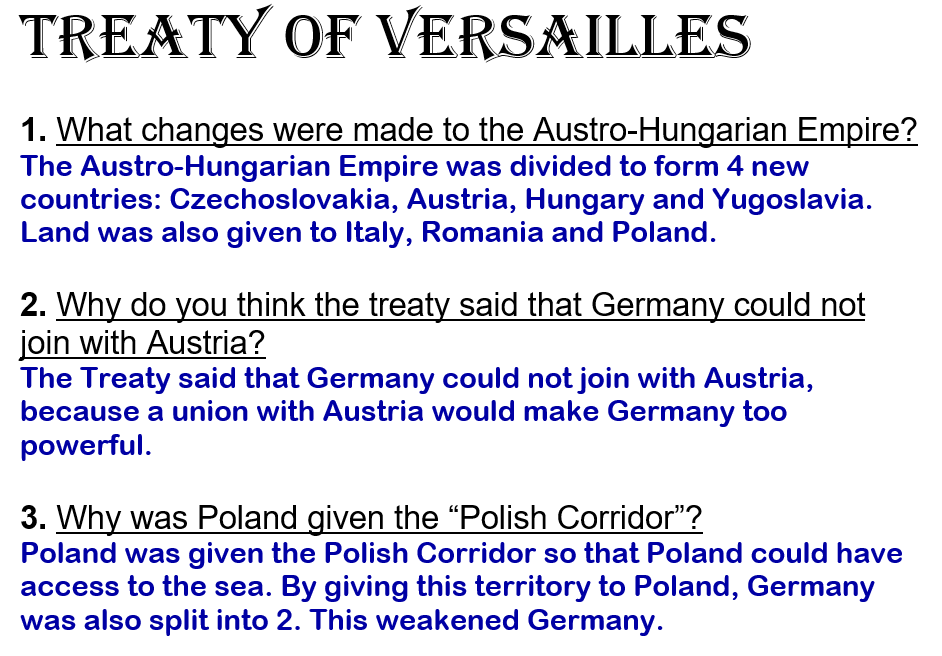
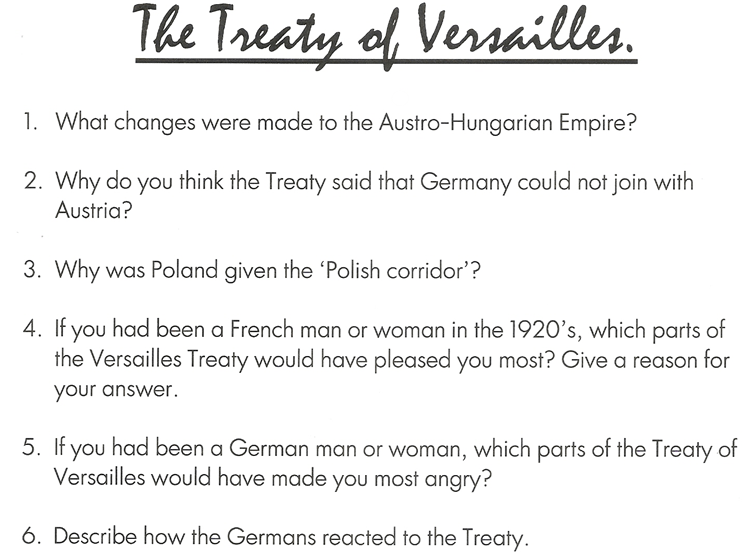
“The Treaty of Versailles, p.48”
ANSWERS:
4.
Finally, it is time to answer a few questions in order to test your knowledge and understanding of the consequences of WW1…
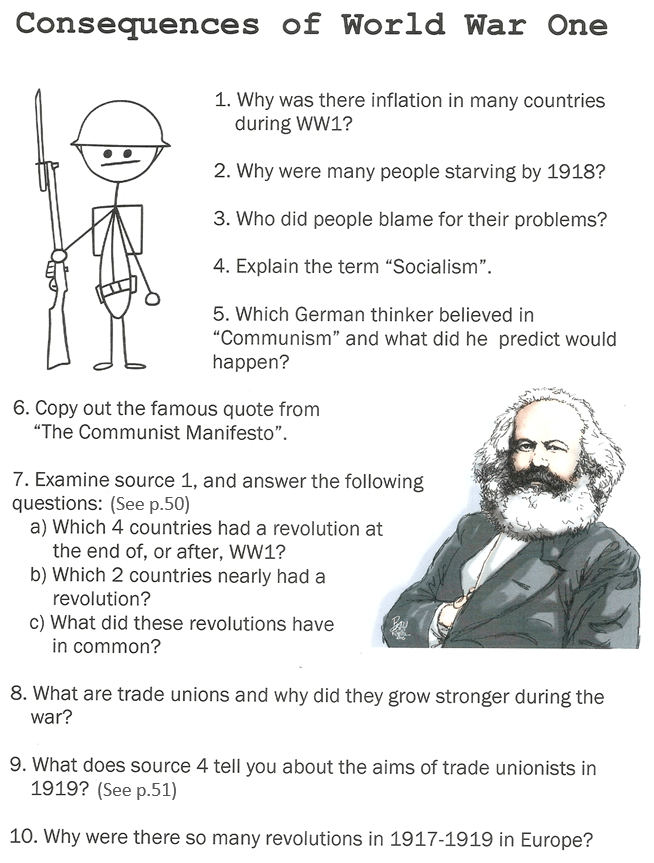
“Consequences of World War One, p.53”
Please take note:
You may choose to complete EITHER numbers 1 to 6,
OR: numbers 7 to 10.
Read the questions carefully before you decide which ones to do.
5.
If there is time in this lesson, also mark your work…
“Consequences of WW1, p.53”
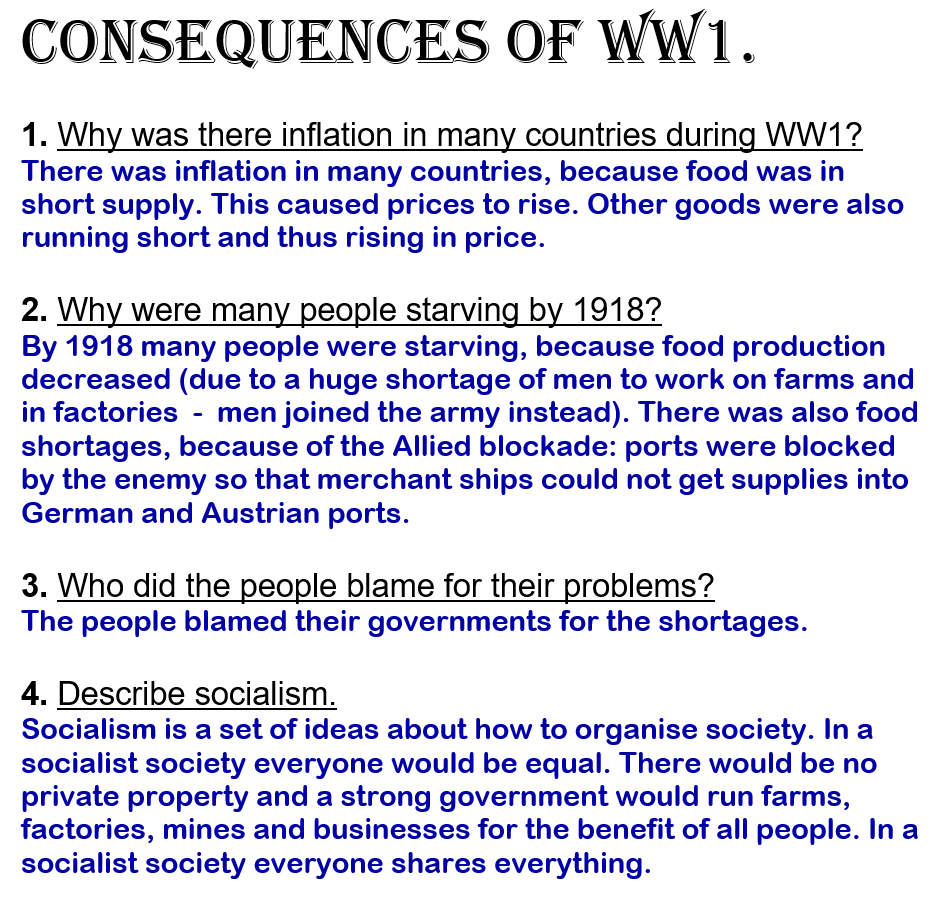
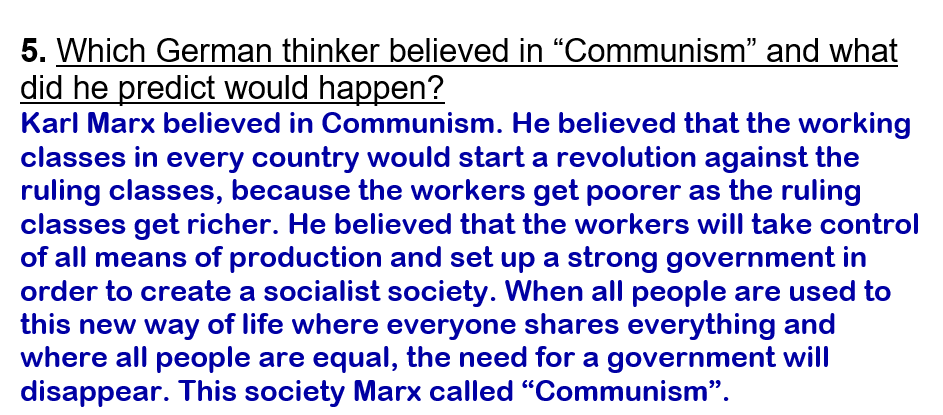
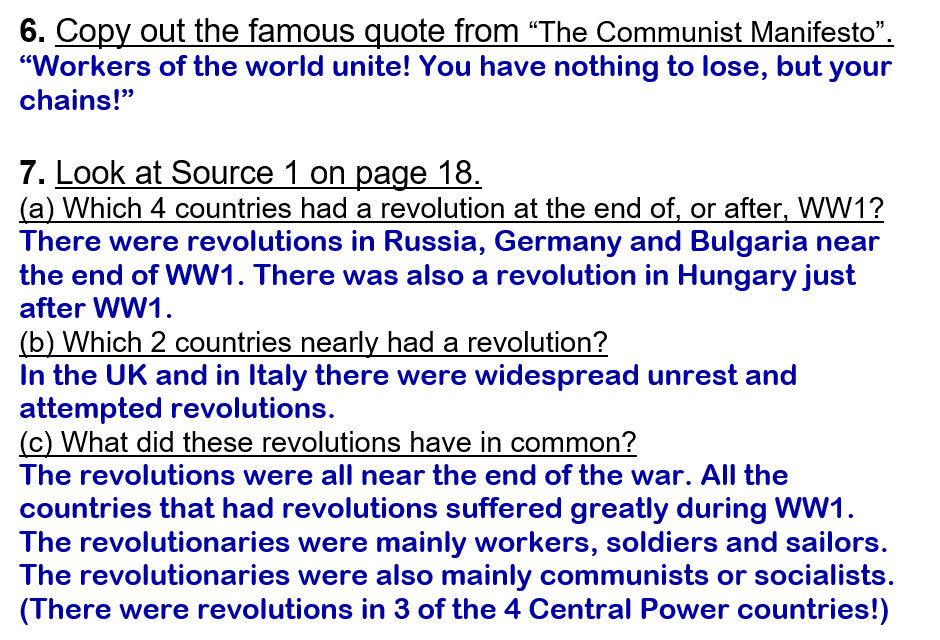
ANSWERS:

(WordPress advertisements may appear below.)
Consequences of WW 1: HW-4
Homework Task 4 (p.35-37) is due:
(See Schoology.)
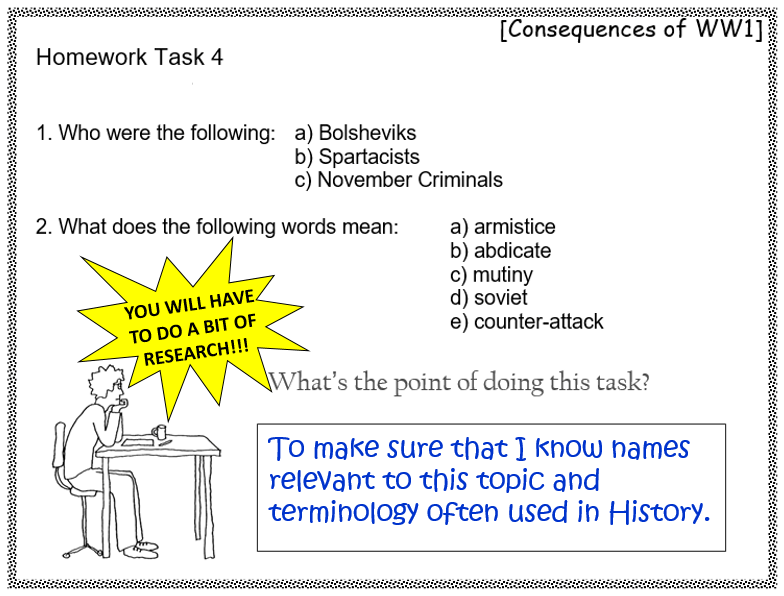
Some of these words were discussed in class and you might even have copied the definitions into your purple book… Others might only have been mentioned briefly. (Also look in your workbook… p.68-70 may be very useful!)
(WordPress advertisements may appear below.)
Y9: 2-3. Consequences of WW1
Year 9
Today you are going to look at the consequences of WW1 in a bit more detail.
Follow the instructions step by step:
1.
Watch Part 1 of “Consequences of WW1”. It discusses the increased power of Trade Unions as one consequence of WW1…
Consequences of WW1 – Part 1: Trade Unions. (4:05 minutes long)
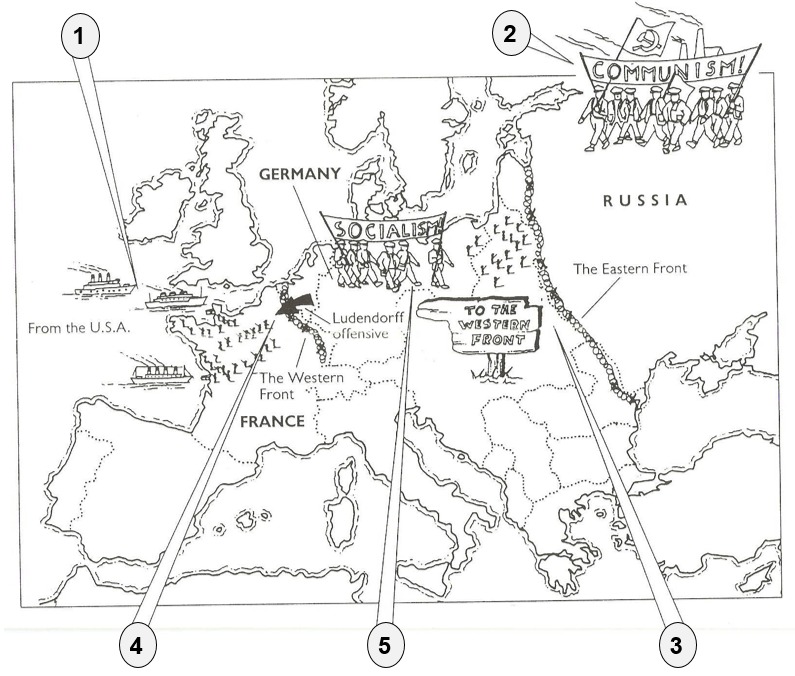
Here is the Socialist propaganda poster, as well as the revolutions-map (shown in the video) for you to examine more closely:
2.
Now, watch Part 2 of “Consequences of WW1”. It briefly discusses the Treaty of Versailles as a consequence of WW1.
Consequences of WW1 – Part 2: Treaty of Versailles. (0:48 minutes long)
3.
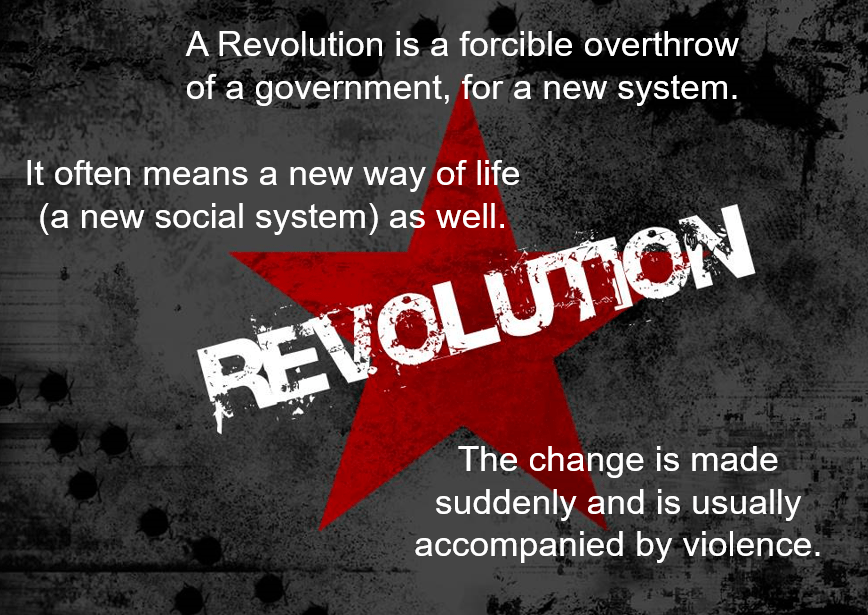
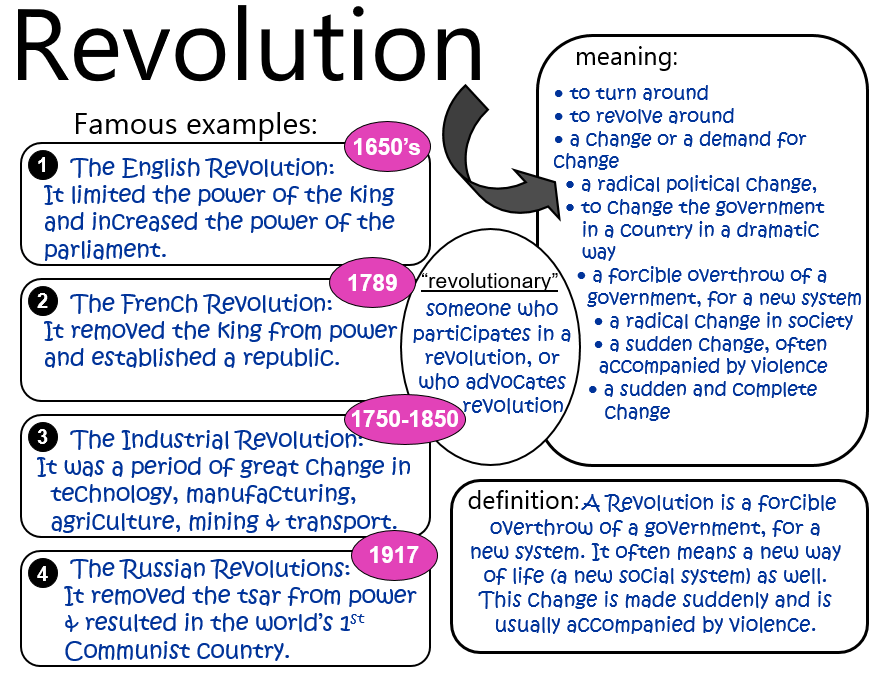
Part 3 of “Consequences of WW1” discusses the outbreak of revolutions as a consequence of WW1. Before we watch Part 3, let’s see what is meant by “revolution”.
Revolution. (2:29 minutes long)
Here is a quick summary of what a revolution is:
4.
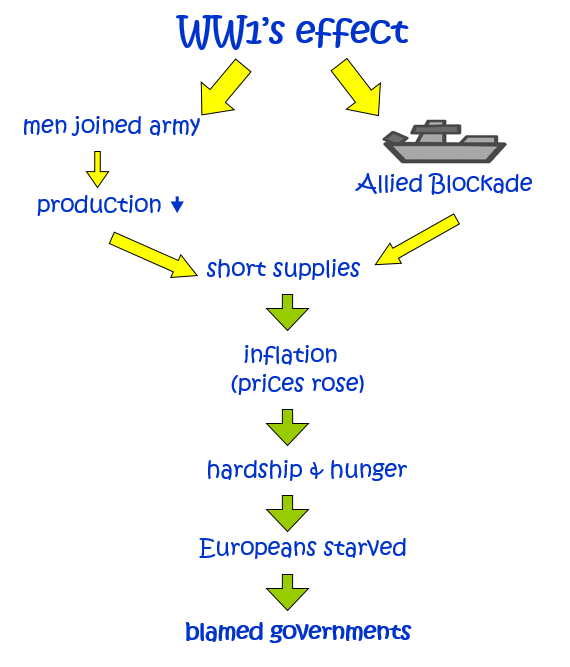
Finally, watch Part 3 of “Consequences of WW1”. It discusses the outbreak of revolutions as a consequence of WW1.
Consequences of WW1 – Part 3: Revolutions. (3:31 minutes long)
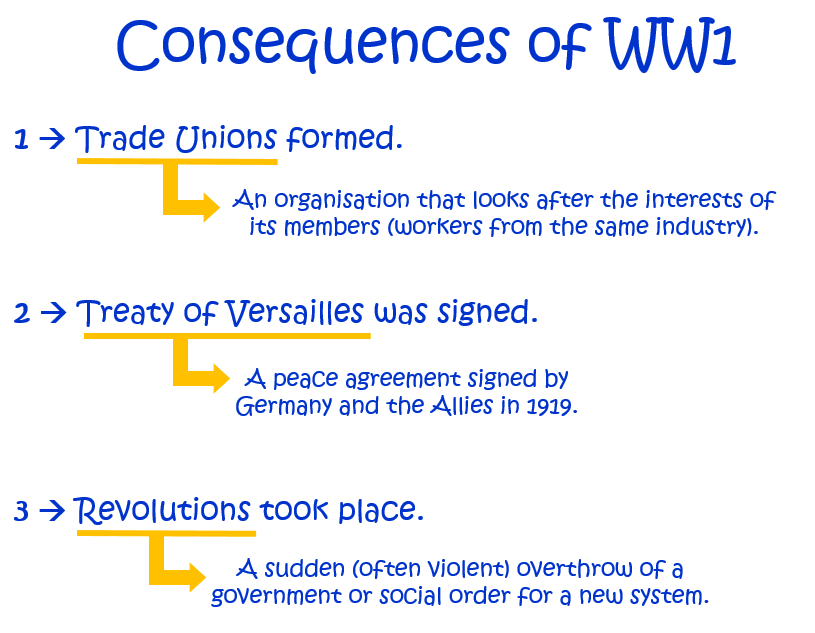
Here is the effects-of-WW1 diagram (shown in the video) for you to examine more closely:
5.
Fill in the missing notes about “revolution”, on p.49.
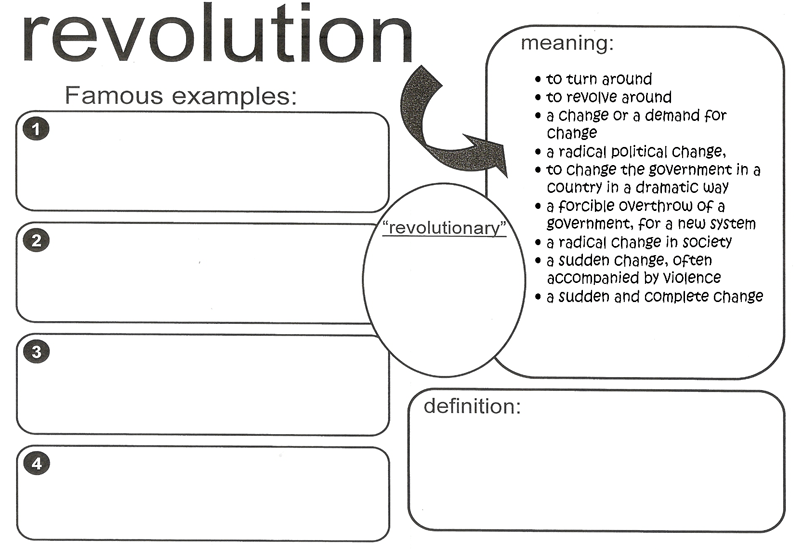
SOLUTION:
6.

7.
p.50-51
8.
If there is time…
Finally, it is time to answer a few questions in order to test your knowledge and understanding of the consequences of WW1…
“Consequences of World War One, p.53”
Please take note:
You may choose to complete EITHER numbers 1 to 6,
OR: numbers 7 to 10.
Read the questions carefully before you decide which ones to do.
9.
Below is the entire video on “Consequences of WW1” (i.e. all three parts), for revision purposes:
Consequences of WW1. (7:58 minutes long)
(WordPress advertisements may appear below.)
Exploration: HW-4
Homework Task 4 (p.20-21) is due:
(See Schoology.)
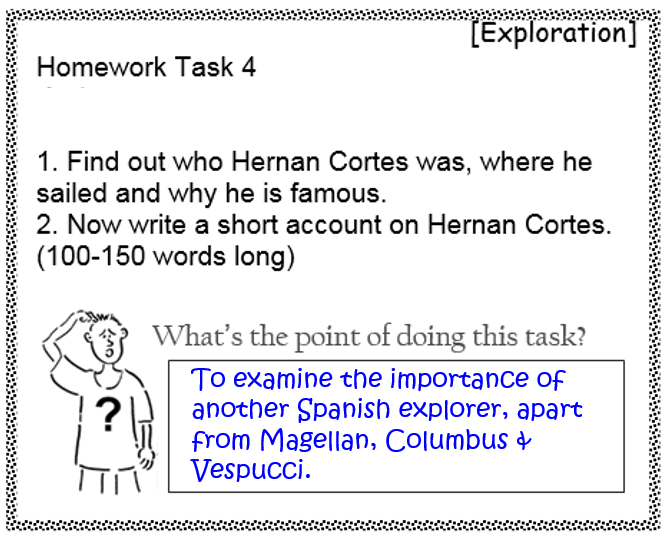
Do thorough research on Google. Then write a short but detailed account on who Cortes was and why he is important. (Imagine that you write this for a website – make a good job of it! Express yourself clearly and correctly!)
(WordPress advertisements may appear below.)
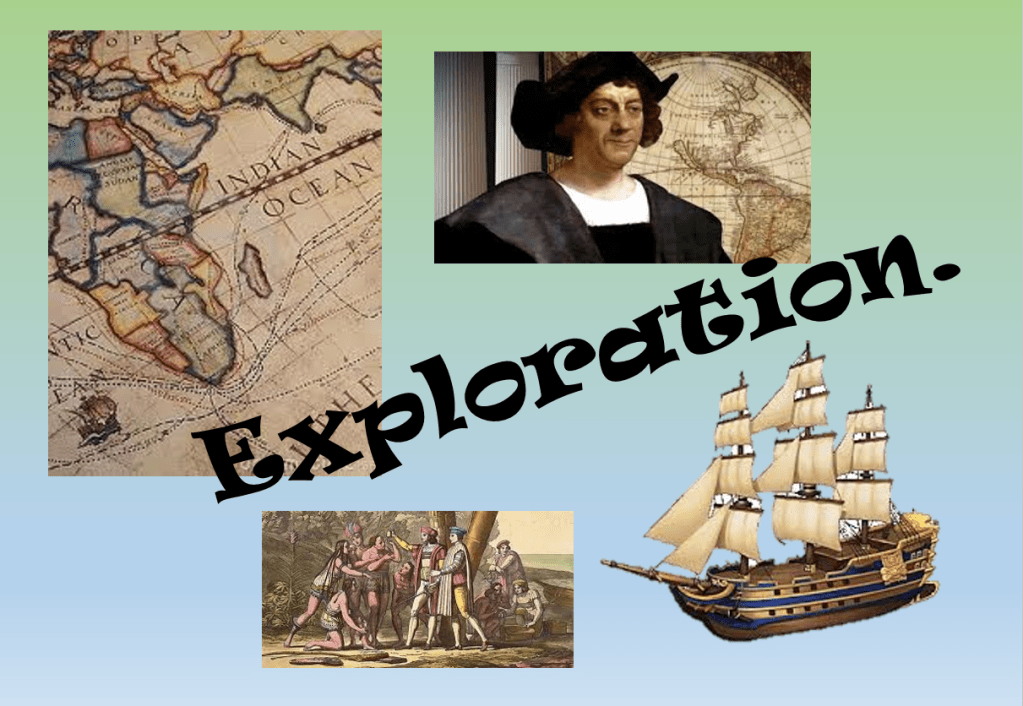
Y8: 2-1. Exploration – Introduction
Year 8A & Year 8B
Today we are going to start with a new topic – on “Exploration”.
We are going to look how technical advances during the Renaissance made exploration possible.
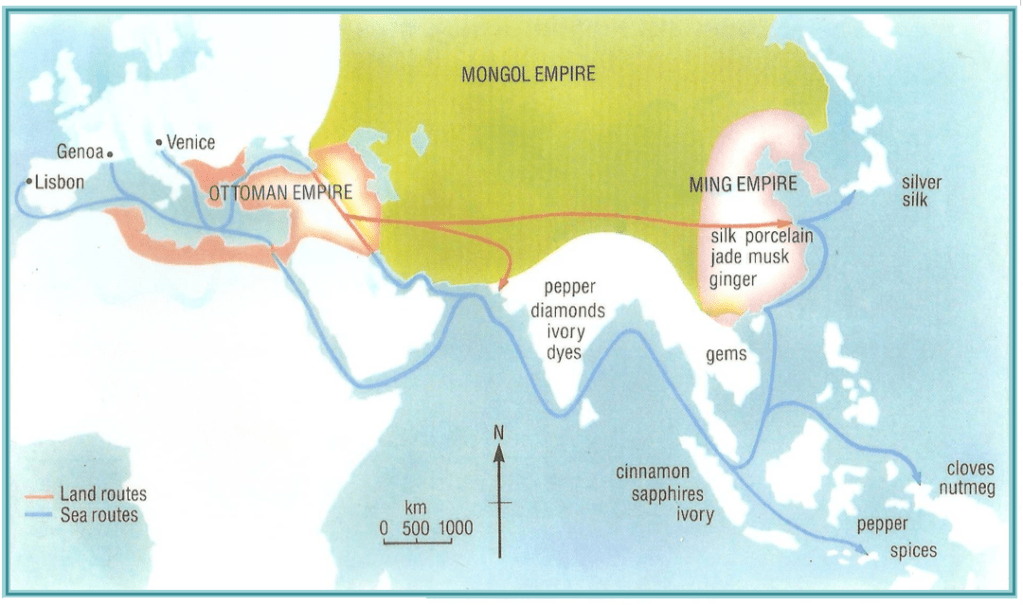
We are also going to consider the importance of trade with the far east during the Renaissance, by looking at:
- trading goods
- trade routes
Follow the instructions step by step:
1.
Renaissance gave humanity a lot… look at the diagram and see if you can tell how this period benefited society…
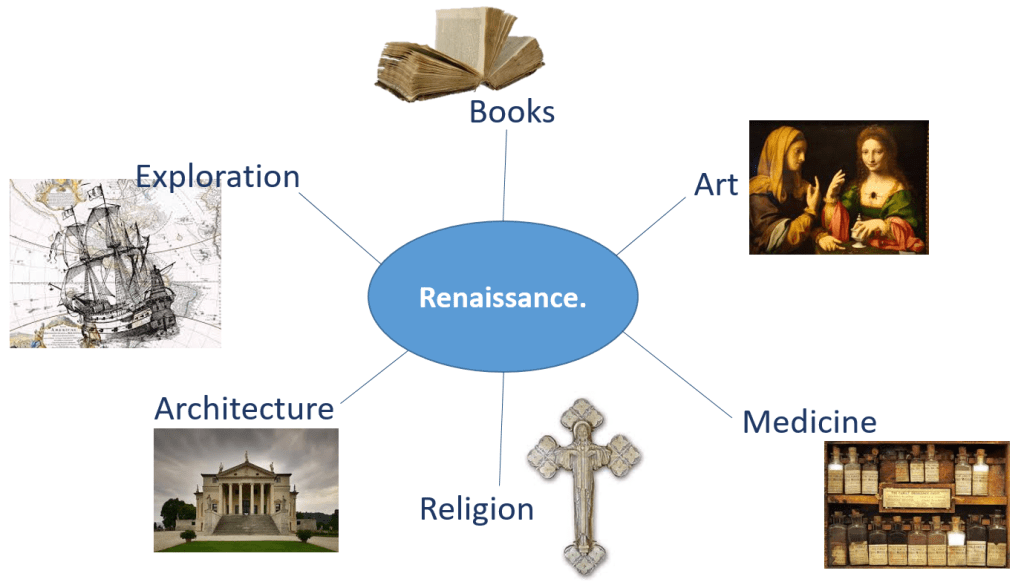
IDEAS:
You may have come up with the following ideas:
- books were mass produced and more accessible
- art improved and became more realistic
- medicine improved dramatically
- religion was no longer just accepted but critically questioned
- architecture improved as Classical styled became popular
- exploration was made possible thanks to improved knowledge
2.
Exploration was possible thanks to technical advances during the Renaissance. Let’s see how technical advances in ship building helped exploration…
Technical Advances. (1:35 minutes long)
3.
Before we continue with any other work, stick your title page for our new topic on “Exploration” into your purple exercise book…
4.
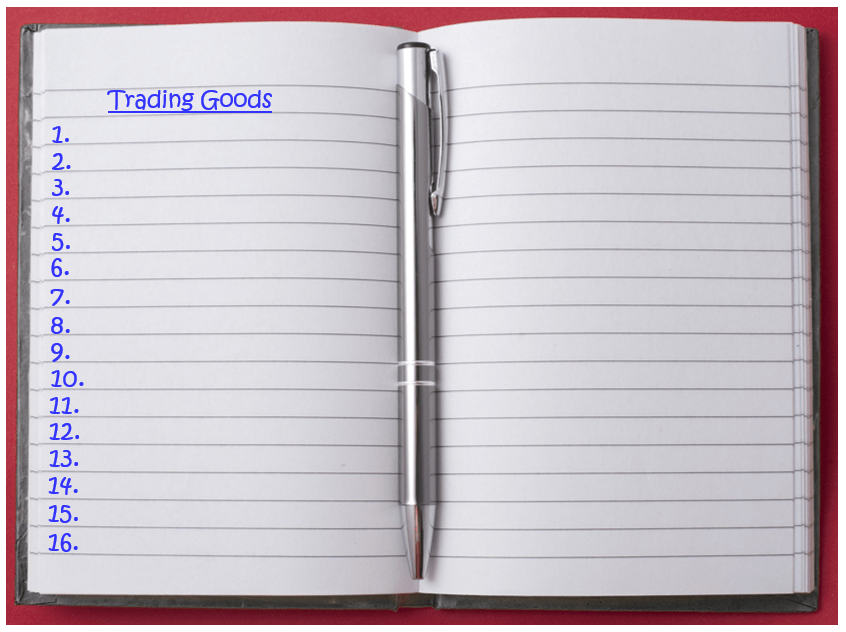
Europeans had an interest in Exploration because it provide great opportunities for trade. Let’s see which goods were popular trading goods during the Renaissance.
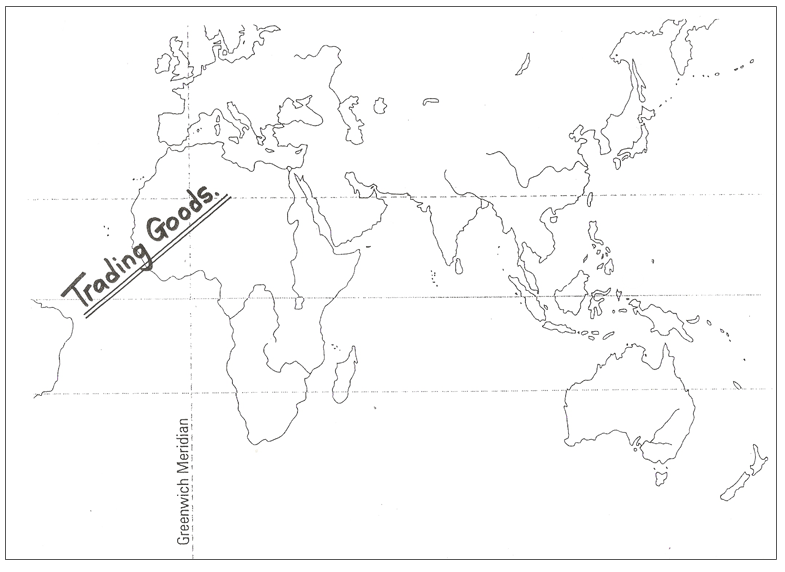
Trading Goods
Now, write down the numbers 1 to 20 on the margin – so that you can be ready for the next task…
5.
Watch the following slides and write down the names of the goods that Europeans traded with. If you do not know, guess… You do not have time to discuss this – you need to work quite fast…
Trading Goods “test”. (5:16 minutes long)
6.
Let’s see how well you know these trading goods! Quickly mark this task on trading goods…

Trading Goods “test” – answers. (1:40 minutes long)
These trading goods were all very expensive and Europeans made good profits on them. Trade with the Far East was, therefore, very important to Europeans.
7.
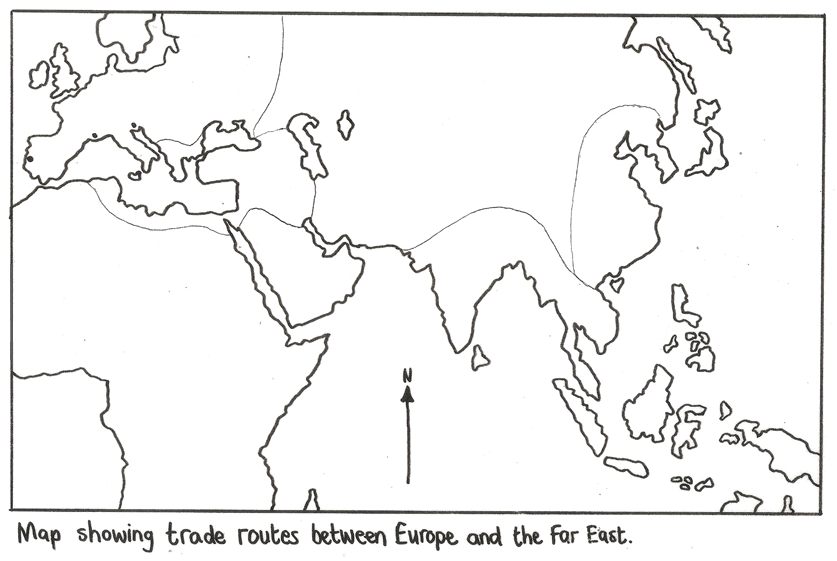
Now, carefully examine the map below. It shows trading goods and trading routes to the Far East… There are some sea routes (indicated in blue) and some land routes (indicated in red). There came a time that Europeans could no longer safely make use of these trading routes… (You will learn about his in a subsequent lesson.)
8.
On the map (on p.31 in your workbook), write down the trading goods that Europeans traded with during the Middle Ages.
9.
Now, on the map (on p.30 in your workbook), draw in the trading routes that Europeans used to reach the Far East during the Middle Ages.
10.

(It tells you a bit more about musk… and other interesting things…)
About that musk… (4:55 minutes long)
11.

(WordPress advertisements may appear below.)
Exploration: HW-3
Homework Task 3 (p.18-19) is due:
(See Schoology.)
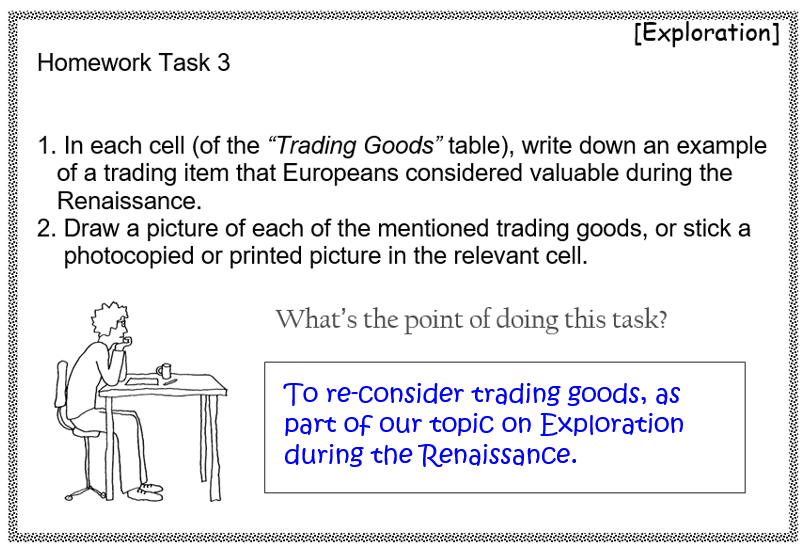
Search with Google Images for relevant pictures for this task!
(WordPress advertisements may appear below.)
Consequences of WW 1: HW-3
Homework Task 3 (p.32-34) is due:
(See Schoology.)
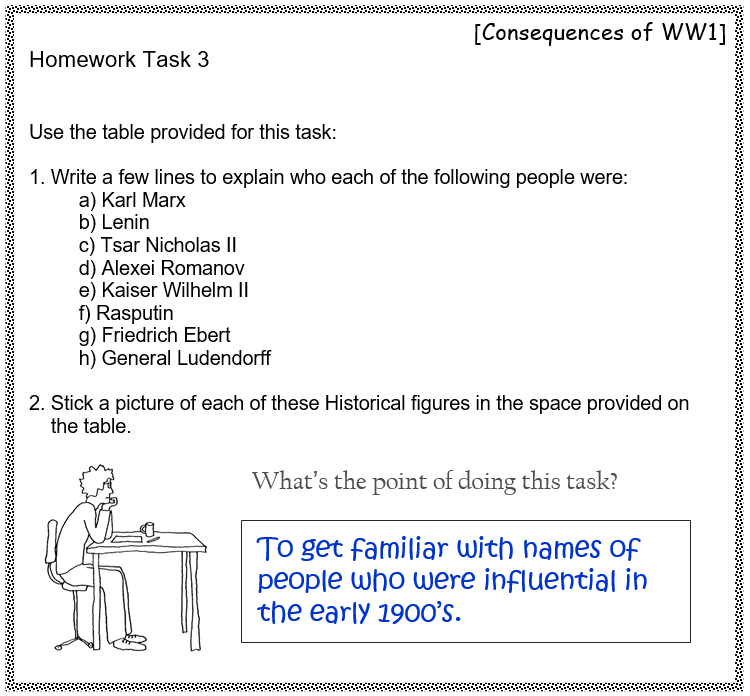
This task requires research… Make sure that you understand who each of the individuals were. Keep the information brief and relevant.
(WordPress advertisements may appear below.)
Y9: 2-2. Treaty of Versailles
Year 9A & Year 9B
Today you are going to examine the peace agreement that was made with Germany after WW1…
Follow the instructions step by step:
1.
As you have heard in the previous lesson, after WW1 representatives of the victorious countries met in France to draw up peace treaties that the defeated countries had to sign. The treaty that Germany had to sign is known as the Treaty of Versailles. The video below explains briefly what this treaty was all about.
World War 1 – Treaty of Versailles. (3:06 minutes long)
2.
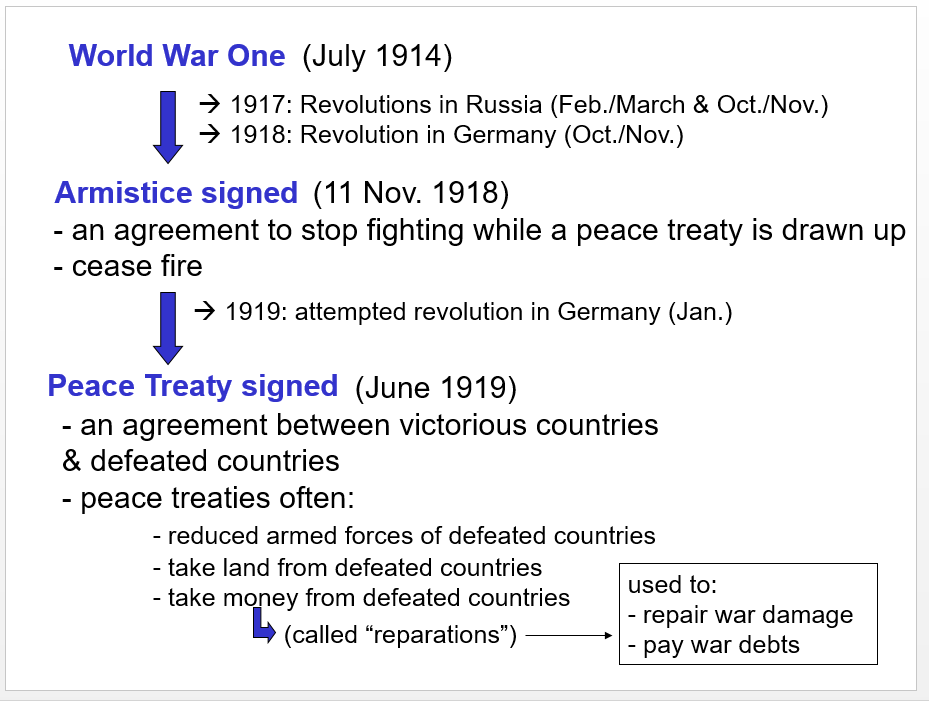
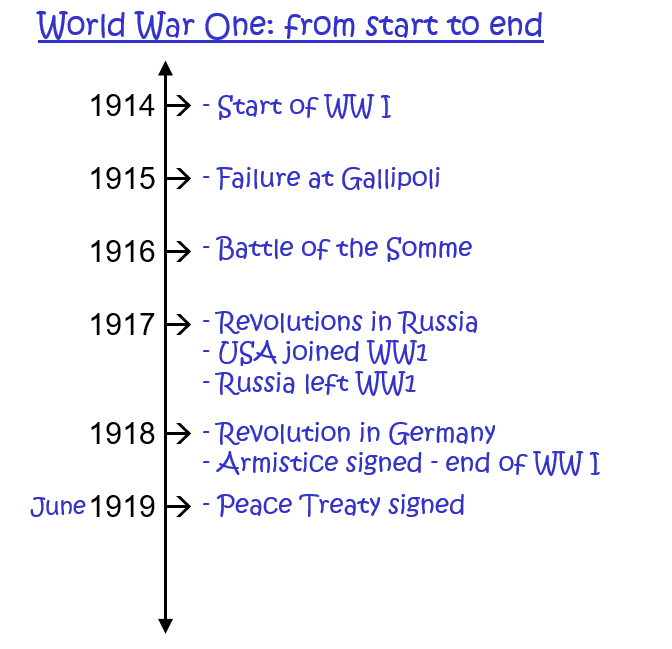
So, in January 1919 representatives from the Allies met in Paris, at Palace of Versailles, to draw up the peace treaty with Germany. The conference was dominated by Britain, France and the USA. The treaty was only finalized and signed in June 1919. The flow-chart below clarifies dates that you need to be familiar with:
3.
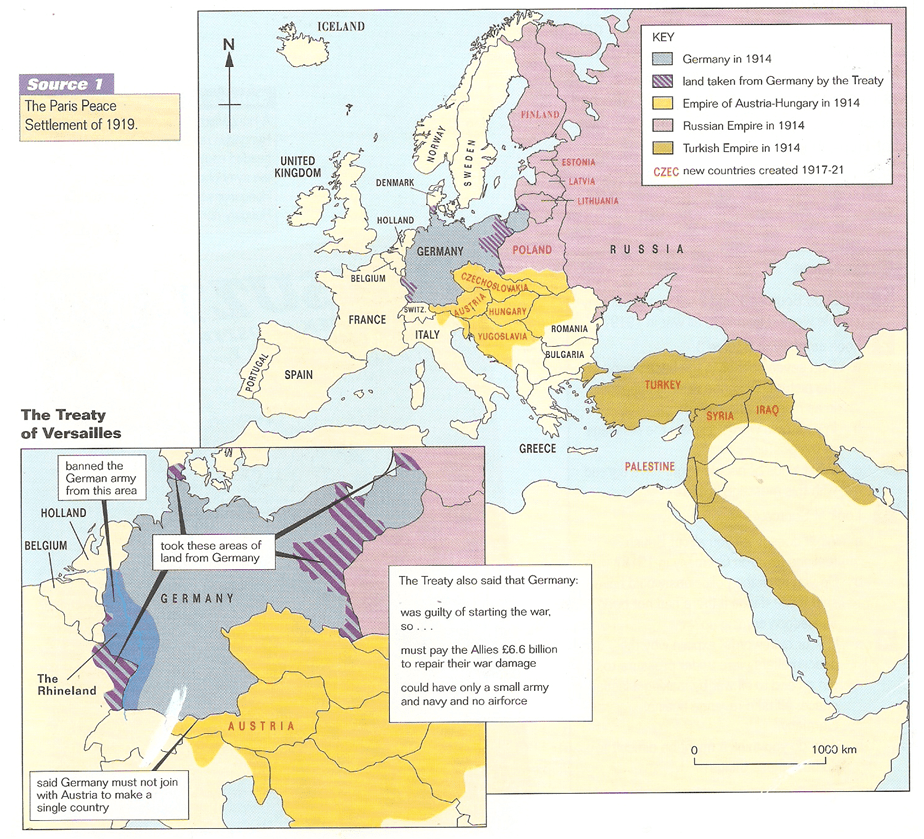
Germany had to pay £6.6 billion in reparations. Her armed forces were also dramatically reduced. And, Germany lost a lot of land. The map shows all the European territories taken away from Germany.
4.
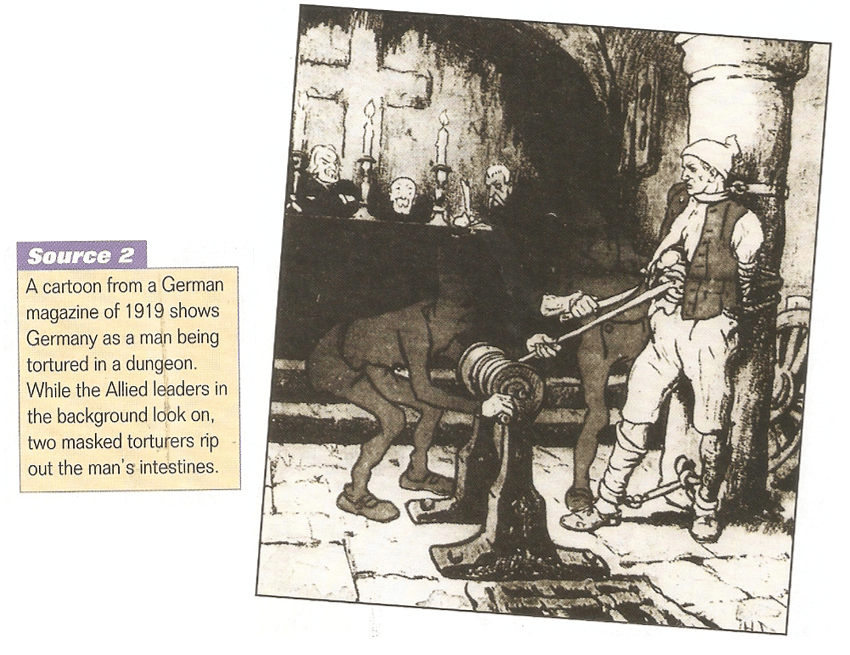
Germany had to sign the Treaty, or face an Allied invasion of Germany! This cartoon gives us an idea of how the Germans felt about the treaty!
5.
Your workbook has all the details that you need to know about the Treaty of Versailles.
p.46-47
6.
So, the dates that you need to know, so far, are:
7.
Below are a few more useful notes that you need to know.

8.
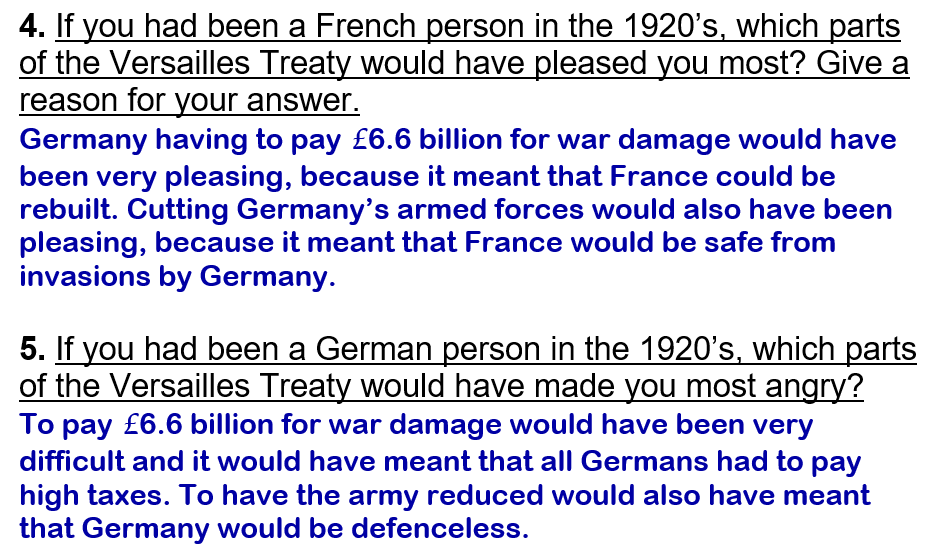
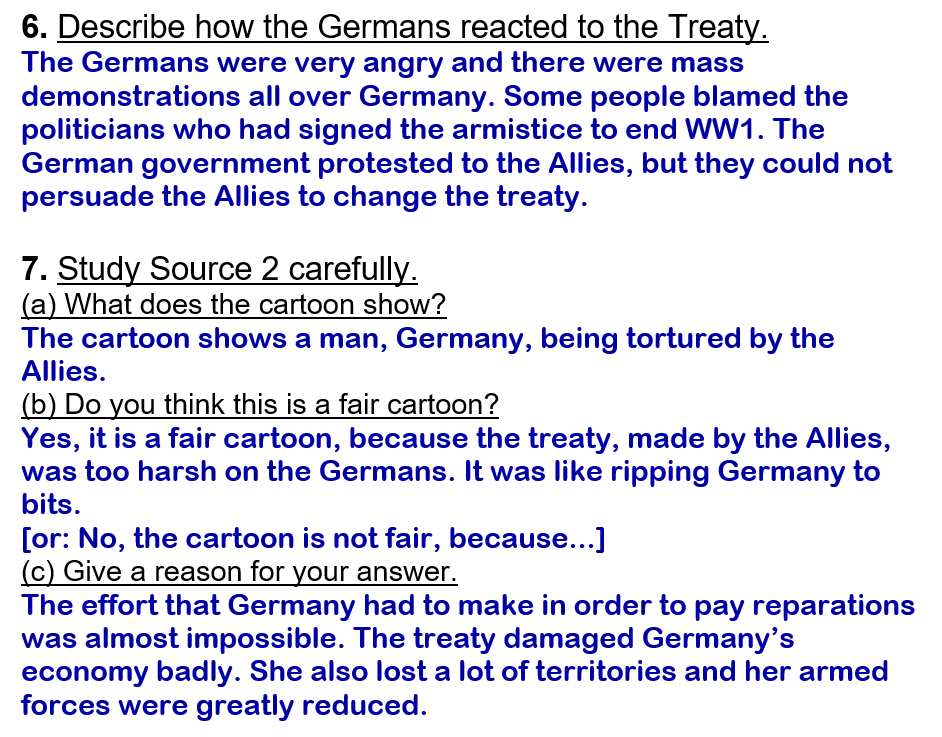
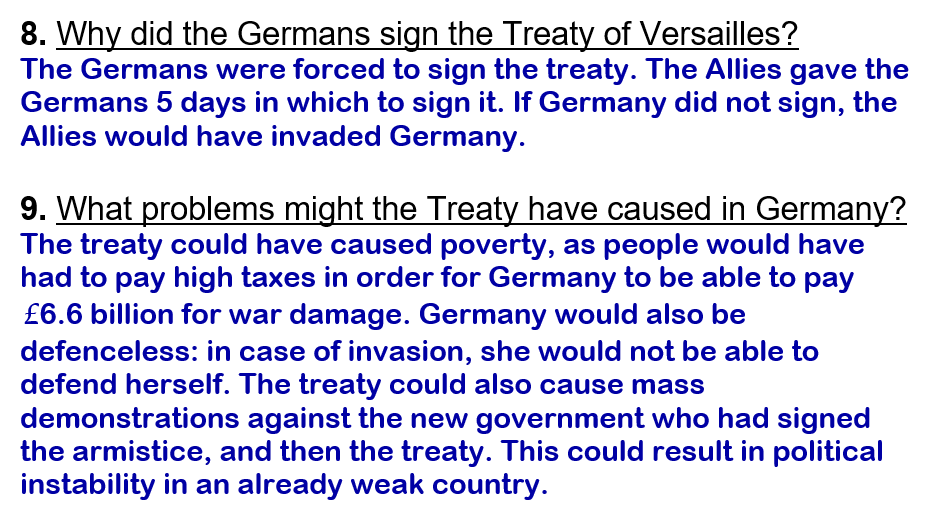
And now for a few questions to test your knowledge and understanding.
“The Treaty of Versailles, p.48”
Please take note:
You may choose to complete EITHER numbers 1 to 5,
OR: numbers 6 to 9.
Read the questions carefully before you decide which ones to do.

(WordPress advertisements may appear below.)
Y9: 2-1. Official end of WW1
Year 9A & Year 9B
Today we are going to start our topic on The Consequences of WW1. We are going to look at an overview of 1918 (the last year of the war) and also look at how WW1 was officially brought to an end in 1919 when a peace treaty was signed…
Follow the instructions step by step:
1.
Let’s first mark some homework…
Task 1 on p.27-28.
2.
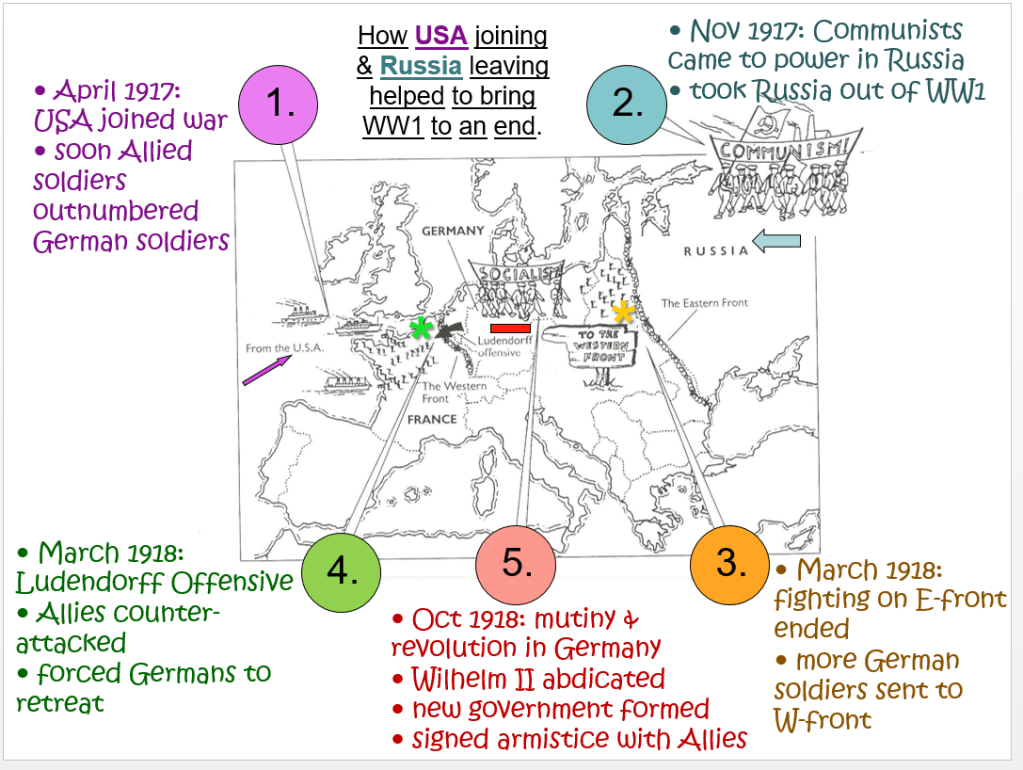
Here is a reminder of how WW1 came to an end:
How WW1 ended… (1:45 minutes long)
3.

Stick the diagram into your purple book and then copy the annotations onto your diagram…
ANNOTATIONS:
4.
This is what the last year of the war looked like…
(1:44 minutes long)
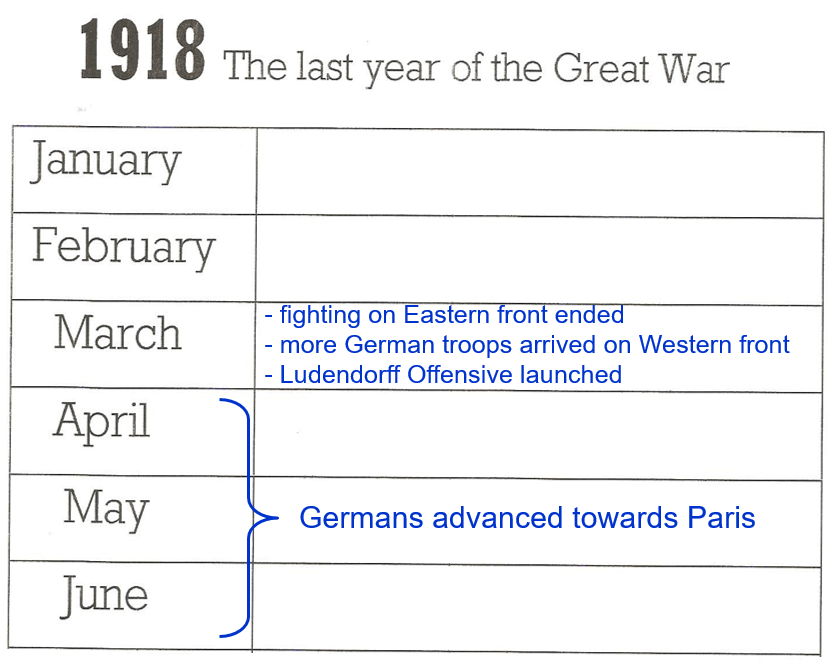
5.
Complete the calendar entries for 1918, on p.43.
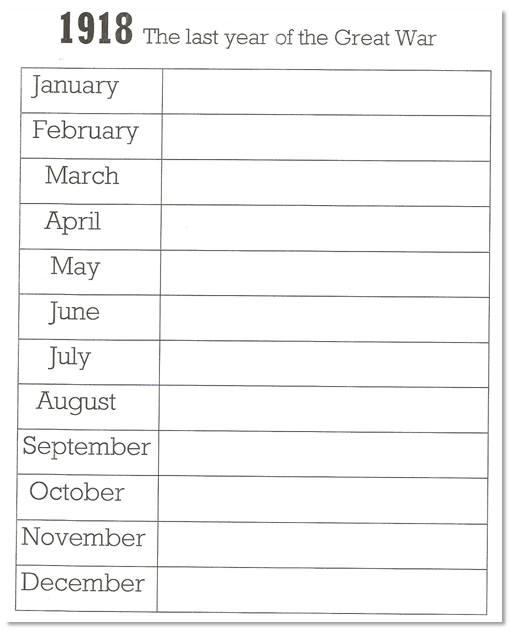
SOLUTION:

6.
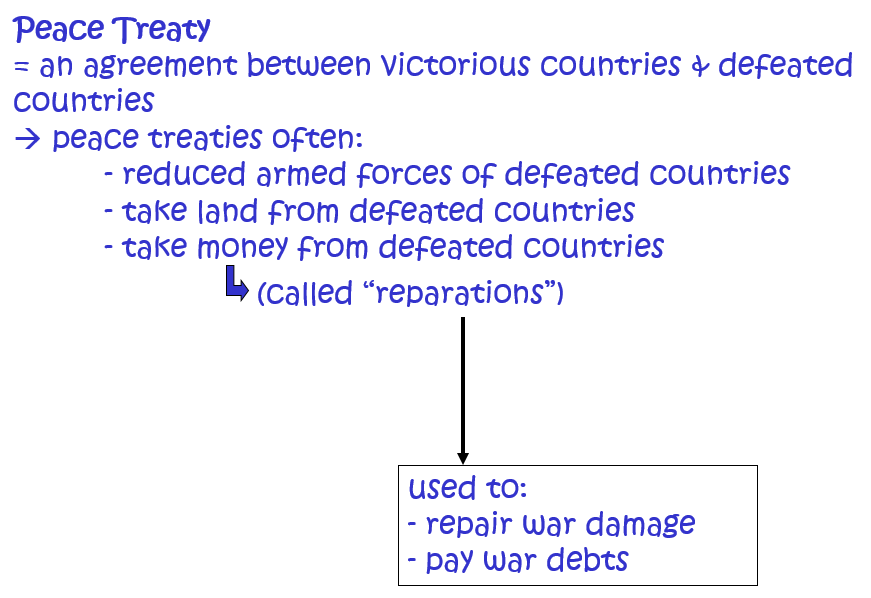
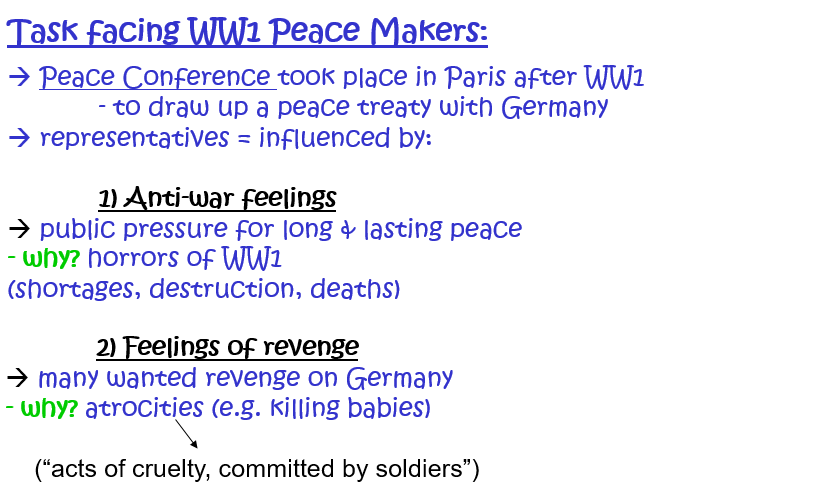
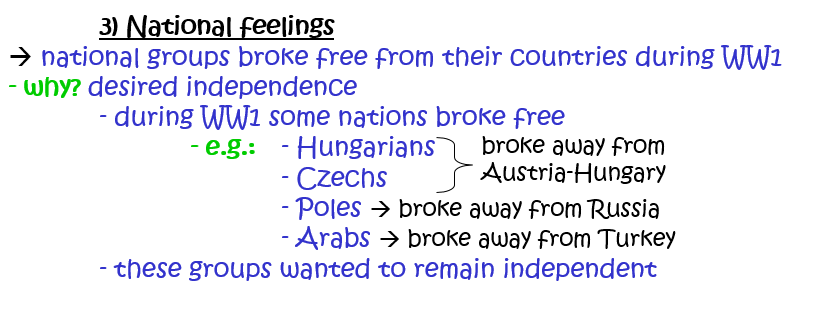
So what happened after the armistice was signed in Nov.1918 and all the fighting stopped?
The armistice was simply an agreement to stop fighting. A formal peace agreement (or “Peace Treaty”) had to be drawn up and signed. This took a few months as it required considerable planning! Let’s see what was involved in this process!
Task facing the Peace Makers. (2:03 minutes long)
7.
Your workbook explains the task facing the peace makers in detail!
p.44-45
8.
The notes below contain the essential information that you need to know from these pages.
Copy the notes into your purple book. Use a new page for this!
9.

(WordPress advertisements may appear below.)
Y7: 2-6. Roman Baths
Year 7A & Year 7B

Today you are going to mark some work and also look at the Roman Baths in more detail…
Follow the instructions step by step:
1.
Task 3 on p.26-27.
2.
Mark the following task with a pencil, even though I have marked some of the answers for grading: “Roman Living, p.31”.
3.
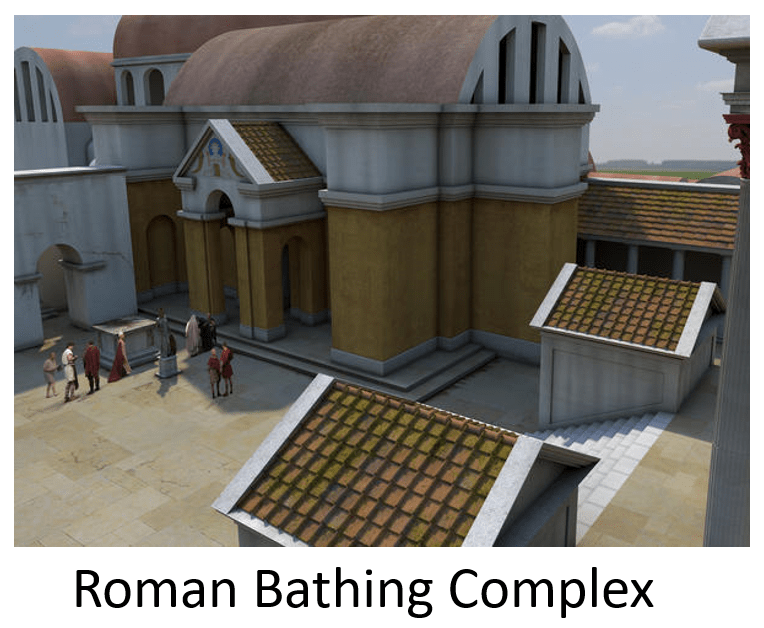
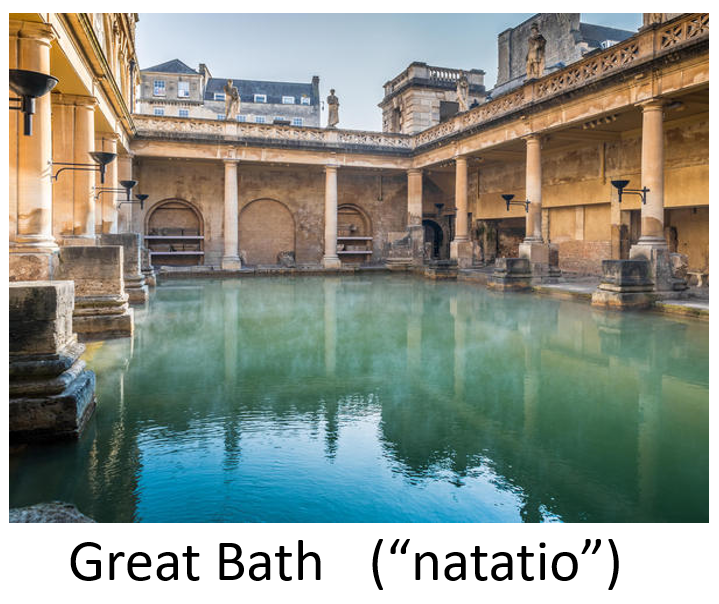
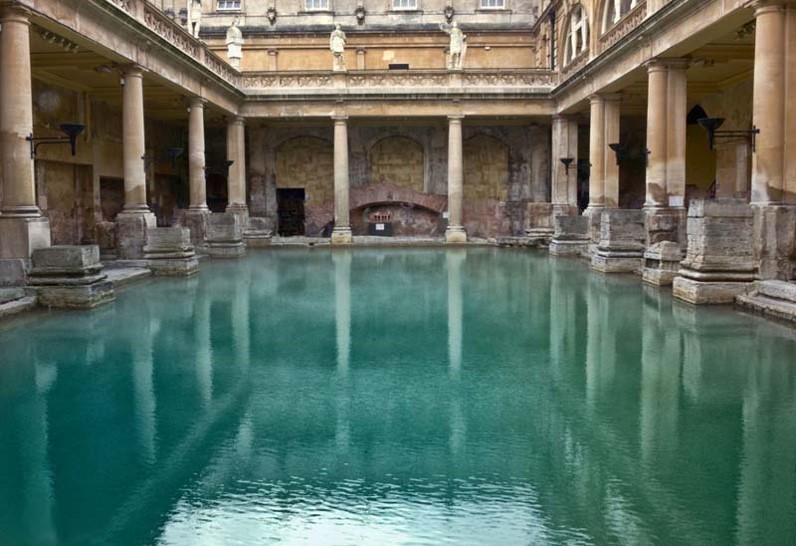
Most towns had a bath complex that looked more or less like the ones below:

5.
Watch the video below. It shows you how Romans used a bathing complex.
Roman Baths. (1:21 minutes long)
4.
p.24-25
It tells you about Roman Towns, Amphitheaters, Roman Writing, and Roman Baths.
5.

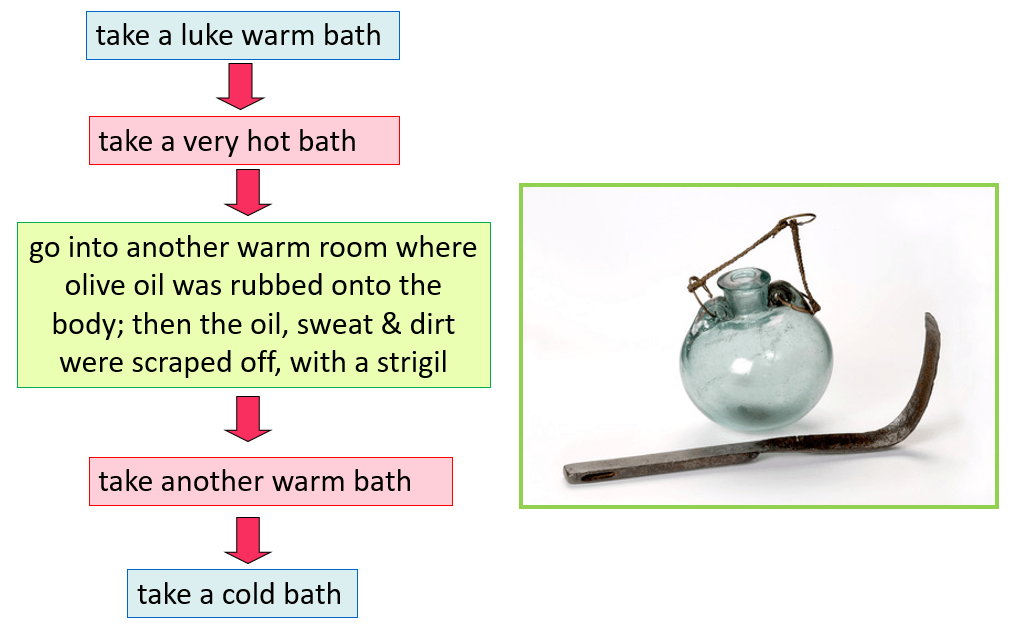
(You need to complete the missing information on the flow-chart, on p.25, to show how Romans used the Roman Baths.)
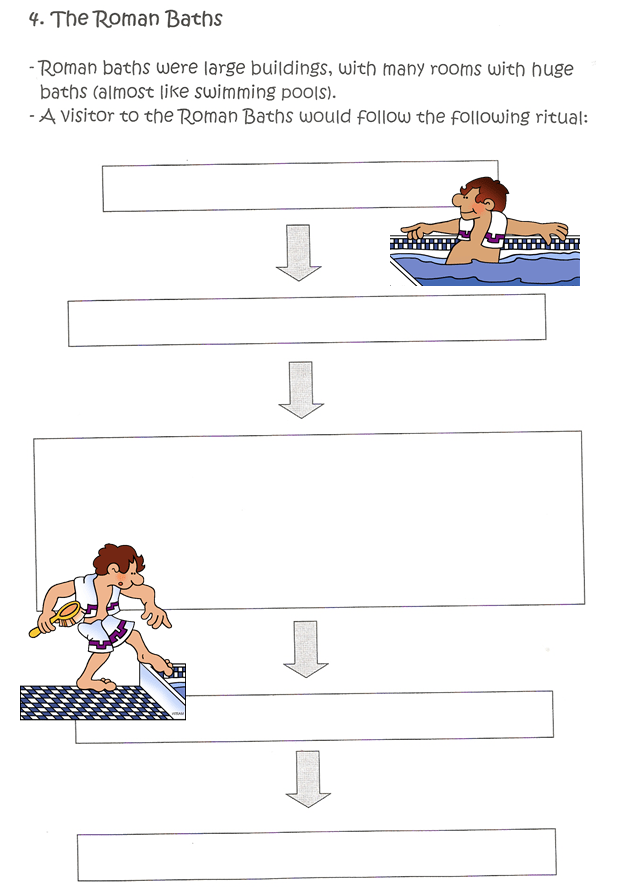
SOLUTION:

6.
Let’s see what else we can learn from the following videos about the Roman Baths…
Roman Baths – Hypocaust System. (3:49 minutes long)
Roman Baths. (3:16 minutes long)
7.
a) Read the article below about the “Roman Bathing Complex”. (Scroll down to find the article…)
OR:
b) Pretend you are a Roman visiting the baths. When you returned home you wrote about your day in your diary… Make the diary inscription that Historians (learning about Roman Baths) will discover hundreds of years later! (200 words long)

Roman Bathing Complex
In ancient Rome, the apodyterium was the primary entry in the public baths, comprising of a large changing room with cubicles or shelves where citizens could store clothing and other belongings while bathing.
The tepidarium was the warm (tepidus) bathroom of the Roman baths heated by a hypocaust or underfloor heating system. The specialty of a tepidarium is the pleasant feeling of constant radiant heat which directly affects the human body from the walls and floor.
A caldarium was a room with a hot plunge bath, used in a Roman bath complex. This was a very hot and steamy room, heated by a hypocaust, an underfloor heating system. This was the hottest room in the regular sequence of bathing rooms; after the caldarium, bathers would progress back through the tepidarium to the frigidarium. In the caldarium, there would be a bath (alveus) of hot water sunk into the floor and there was sometimes even a laconicum (calveus) — a hot, dry area for inducing sweating. The Romans would use olive oil to cleanse themselves, by applying it to their bodies and using a strigil to remove the excess. This was sometimes left on the floor for the slaves to pick up or put back in the pot for the women to use for their hair.

The sudatorium was a vaulted sweating-room (sudor, sweat) of the large Roman bathing complexes, or thermae. In order to obtain the great heat required, the whole wall was lined with vertical terra-cotta flue pipes of rectangular section, placed side by side, through which hot air and smoke from the suspensura passed to an exit in the roof.
A frigidarium was a large cold pool at the Roman baths. It would be entered after the caldarium and the tepidarium, which were used to open the pores of the skin. The cold water would close the pores. There would be a small pool of cold water or sometimes a large swimming pool (though this, differently from the piscina natatoria, was usually covered). The water could also be kept cold by using snow.
(WordPress advertisements may appear below.)
Y7: 2-5. Roman Writing
Year 7A & Year 7B
Today you are going to…
- Look at Roman Writing
- Complete questions on Roman Living
Follow the instructions step by step:
1.
Task 2 on p.24-25.
2.
Read, p.24
3.
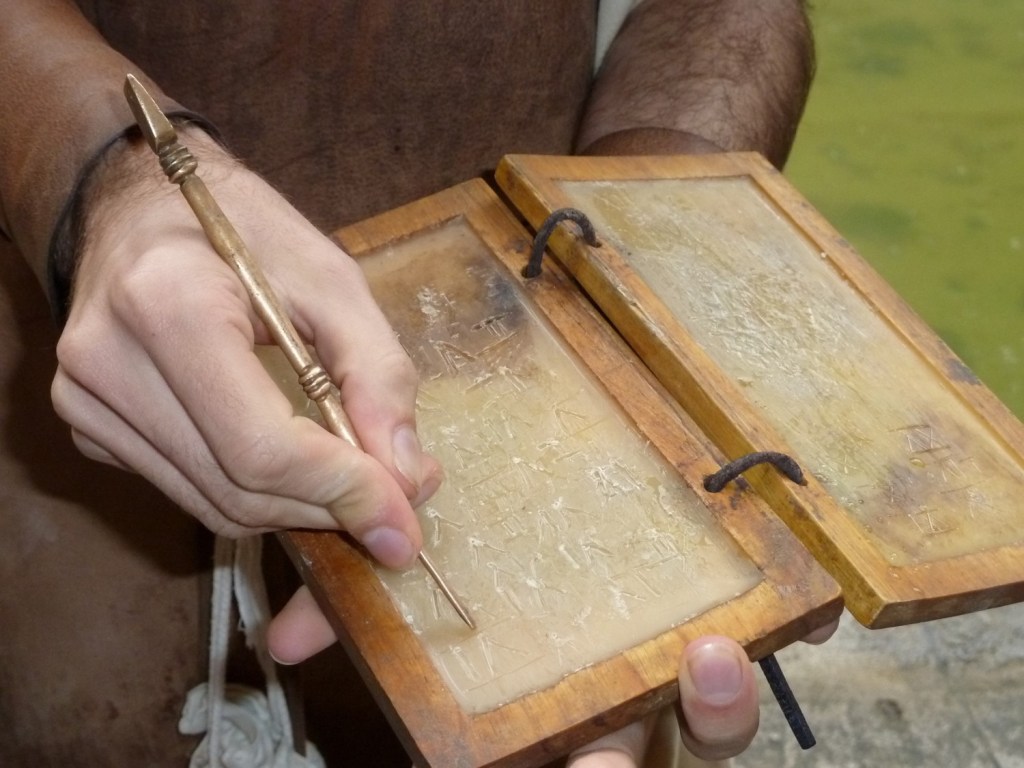
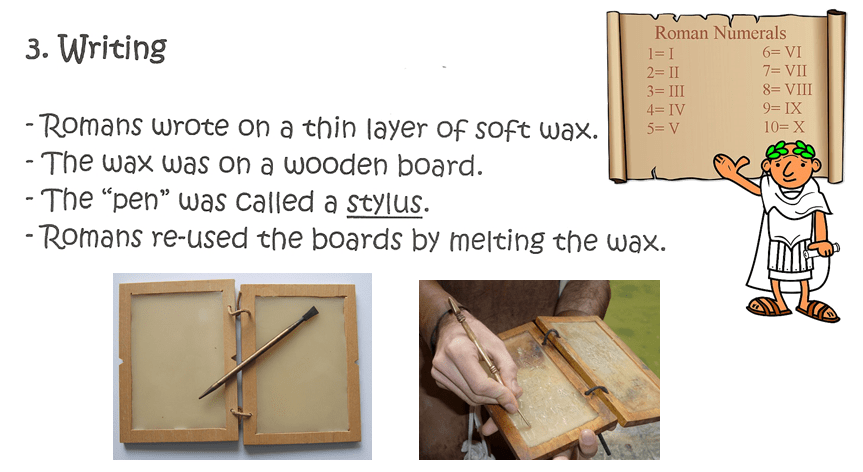
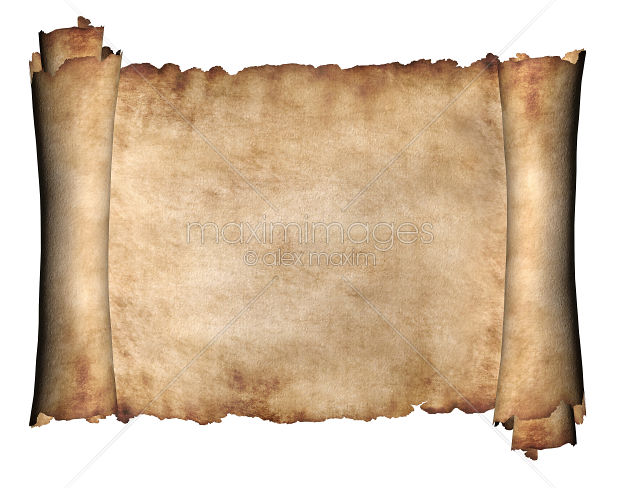
But this is not all… The Romans used a variety of tools for writing. Everyday writing could be done on wax tablets or thin leaves of wood. Documents, like legal contracts, were usually written in pen and ink on papyrus. Books were also written in pen and ink on papyrus or sometimes on parchment.
Papyrus
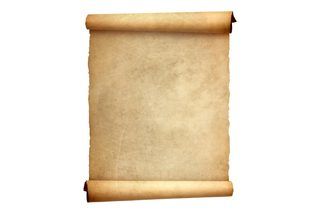
Papyrus, from which we get the modern word paper, is a writing material made from the papyrus plant, a reed which grows in the marshy areas around the Nile river.
Parchment
Parchment is a stiff, flat, thin material made from the prepared skin of an animal, usually a sheep or goat. It was used as a durable writing surface in ancient and medieval times.
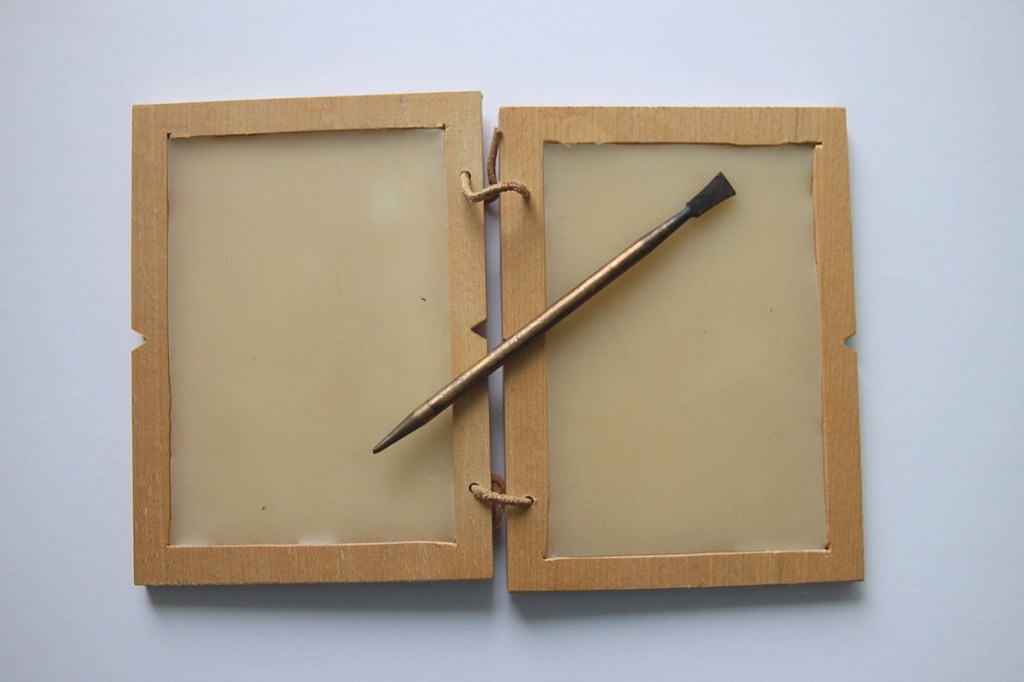
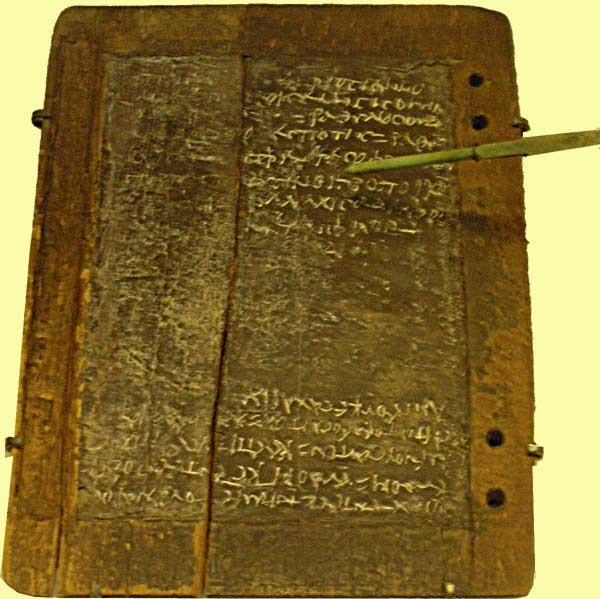
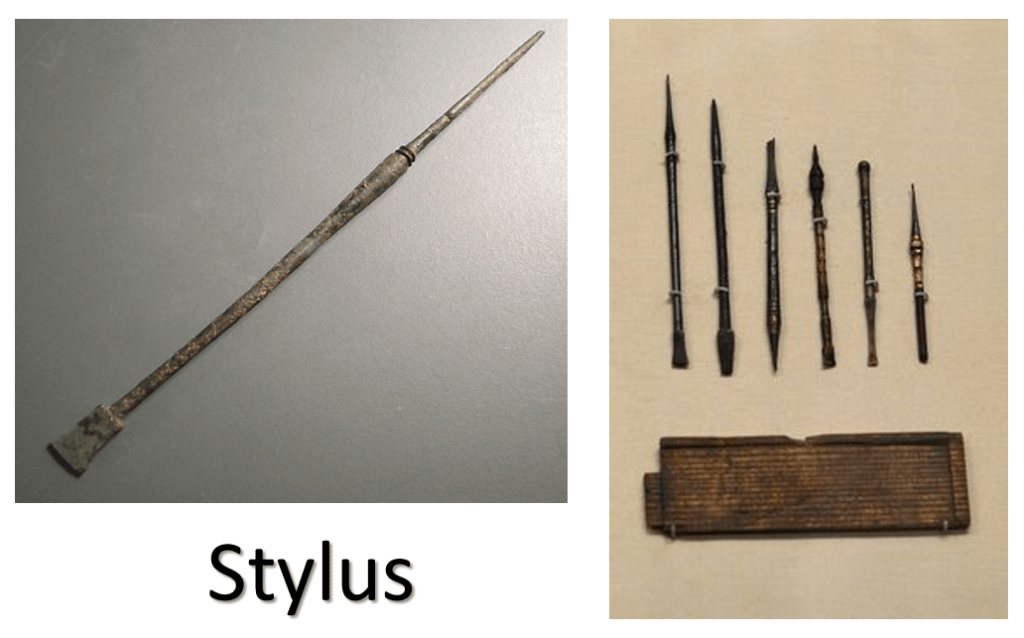
Below you can also see what the wax table and stylus looked like that Romans used to write with.
4.
Use the rest of the lesson to complete the questions on Roman Living (p.31), from the previous lesson.
Remember to use the check-list!!

(WordPress advertisements may appear below.)
